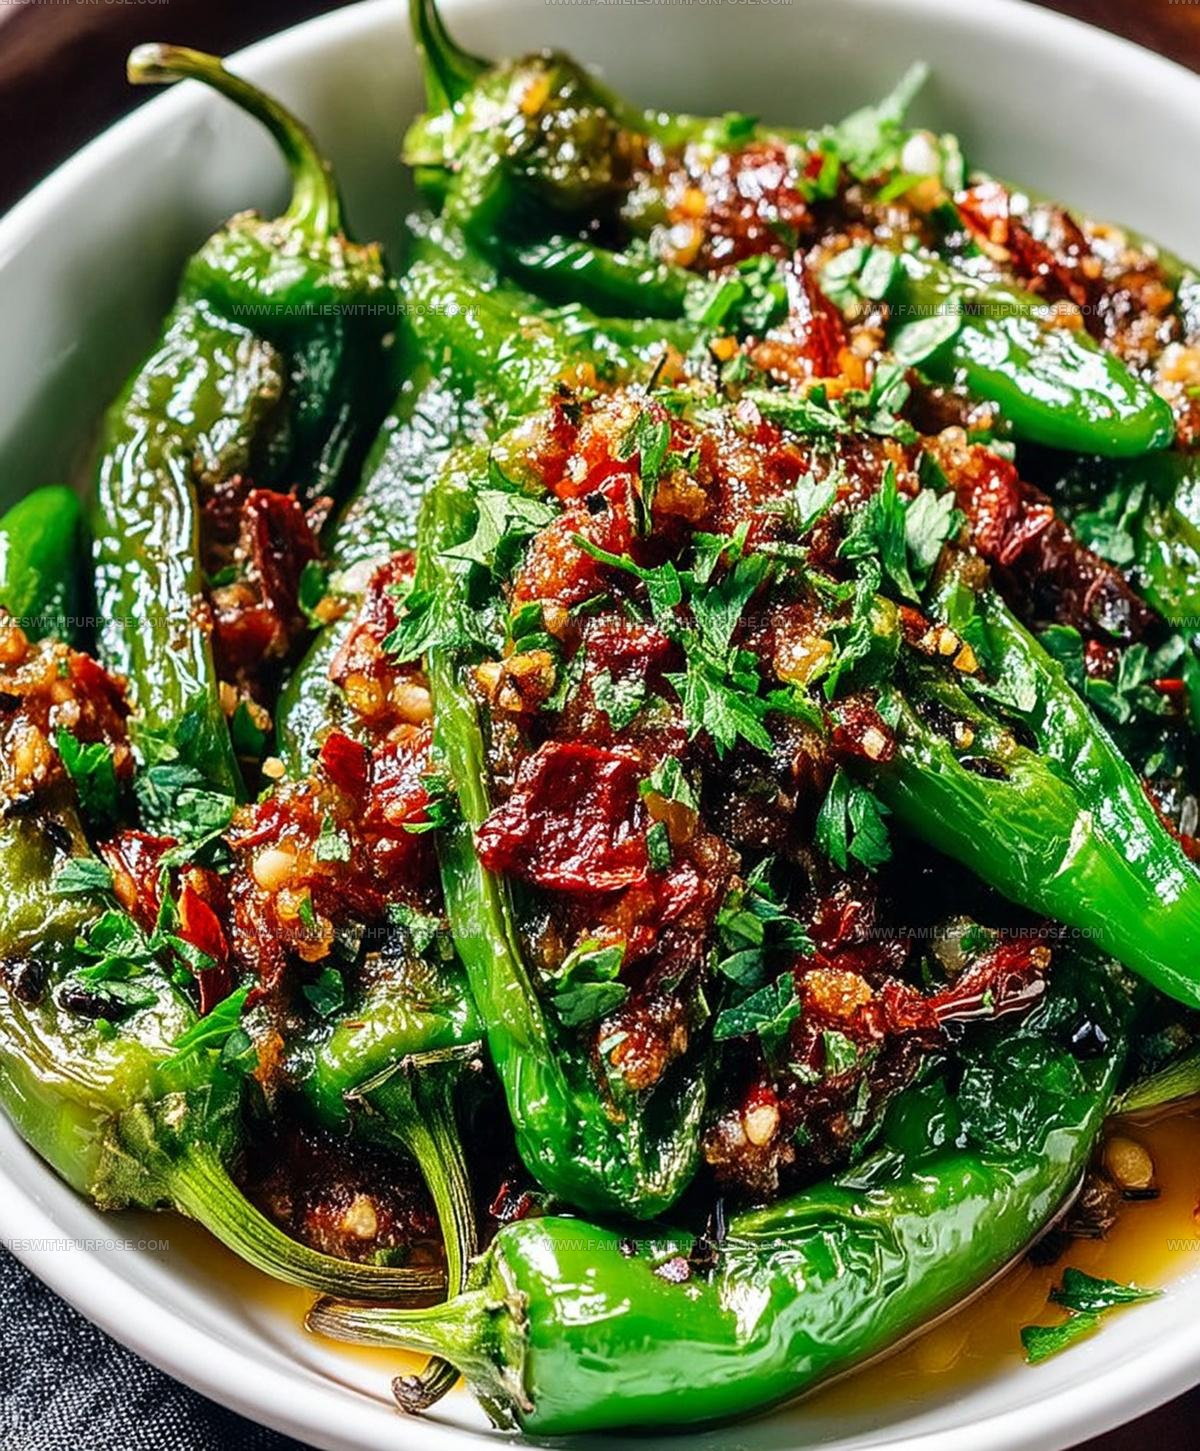
Charred Shishito Peppers Recipe for Summer Grilling Sessions
Blistered shishito peppers have become a favorite appetizer at restaurants and home gatherings because they're fun to eat and incredibly satisfying.
The mild heat combined with occasional spicy surprises makes every bite an adventure that keeps people coming back for more.
When cooked properly, the charred exterior develops a smoky depth while maintaining a tender bite inside.
They work beautifully as a snack before dinner, a side dish that complements grilled proteins, or party food that disappears within minutes.
The rustic presentation feels both casual and elegant enough for any occasion.
Simple preparation means less time in the kitchen and more time enjoying good company.
One taste explains why restaurants charge premium prices for something so easy to recreate at home, and once you know how straightforward preparation can be, they'll become part of regular meal rotation.
Top Highlights of Blistered Shishito Peppers
What Makes Blistered Shishito Peppers
What Tools Blister Shishito Peppers
Pan-Searing Guide for Blistered Shishito Peppers
Prep the Peppers
Grab your pound of shishito peppers and give them a quick rinse under cold water. Pat them completely dry with a clean kitchen towel – water will make them splatter in the hot pan. Trim off just the tippy top of the stems if you want, but no need to be super precise.
Heat the Pan
Place a cast-iron skillet on the stove and crank the heat to medium-high. Let the pan get seriously hot – about 3-4 minutes should do the trick. Your pan needs to be sizzling before adding the oil.
Add the Oil
Pour 2 tablespoons of olive oil into the hot pan and swirl it around so the entire bottom gets coated. The oil should shimmer but not smoke.
Arrange the Peppers
Carefully drop the peppers into the pan in a single layer. Don’t crowd them – if your skillet isn’t big enough, cook them in batches. Each pepper needs some personal space to get those beautiful charred spots.
First Side Charring
Let the peppers sit undisturbed for 2-3 minutes. Watch for those gorgeous blistered spots developing on the bottom. No need to touch them yet.
Keep Turning
Toss the peppers around and continue cooking for another 2-3 minutes. Keep turning them so each side gets that perfect charred look.
Season Immediately
Once the peppers are beautifully blistered, transfer them to a bowl. Right away, sprinkle on your seasonings:
Toss everything together so the peppers get evenly coated.
Final Touches
Squeeze some fresh lemon juice over the peppers and sprinkle with flaky sea salt if you’re feeling fancy. Serve them hot and crispy straight from the pan.
Best Tips for Blistered Shishito Peppers
Blistered Shishito Pepper Variations to Make
Simple Serving Styles for Blistered Shishito Peppers
How to Store Blistered Shishito Peppers
Blistered Shishito Peppers Common Questions
Are shishito peppers spicy?
Most are mild, but about one in ten is surprisingly hot. You never know which one will have a spicy kick!
Can people with food allergies eat these peppers?
Shishito peppers are naturally gluten-free and typically allergen-friendly. Check your personal sensitivities first.
What makes the peppers get those awesome blisters?
High heat and a dry pan create those perfect charred spots. Direct contact with hot metal creates the signature blistered texture.
Do shishito peppers need to be seeded before cooking?
No seeding required! Simply wash and dry the peppers, then cook them whole.
What if my peppers aren’t perfectly uniform in size?
No problem. Different sizes just mean some might cook slightly faster. Watch them carefully and remove peppers as they reach perfect char.
Can shishito peppers be eaten whole?
Absolutely! The entire pepper – stem, skin, and all – is edible and delicious when cooked this way.
Blistered Shishito Peppers Recipe
- Total Time: 10-11 minutes
- Yield: 2 1x
Description
Shishito peppers deliver a quick, smoky flavor blast that zings right into your dinner routine. Sizzling these peppers takes just minutes and turns an ordinary side dish into something seriously delicious.
Ingredients
Main Ingredients:
- 1 pound shishito peppers
Seasonings:
- 1 teaspoon sea salt
- ½ teaspoon garlic powder
- ¼ teaspoon black pepper
Cooking Ingredients:
- 2 tablespoons olive oil
- Lemon wedges
- Flaky sea salt
Instructions
- Thoroughly rinse your shishito peppers under cold water, then pat them completely dry using a kitchen towel or paper towels.
- Trim just the very top of the stems, keeping most of the stem attached.
- Place a cast-iron skillet over medium-high heat for 3 minutes until the surface is extremely hot.
- Pour 2 tablespoons olive oil into the skillet, swirling to create an even coating across the bottom.
- Arrange peppers carefully in a single layer, ensuring they are not overcrowded. Work in batches if your pan is small.
- Allow peppers to sear undisturbed for exactly 2-3 minutes, creating a deep char on the bottom surface.
- Gently toss the peppers and continue cooking for another 2-3 minutes, rotating them to achieve an even, blistered exterior.
- Transfer the roasted peppers to a serving bowl, immediately sprinkling with 1 teaspoon sea salt, ½ teaspoon garlic powder, and ¼ teaspoon black pepper.
- Squeeze fresh lemon juice over the peppers and add a light zest for extra brightness.
- Finish with a final sprinkle of flaky sea salt just before serving.
Notes
- Pat the peppers completely dry to ensure they blister and char perfectly without steaming.
- Cast-iron or heavy stainless steel pans provide the best high-heat surface for creating those delicious crispy edges.
- Work in small batches to maintain high pan temperature and prevent the peppers from becoming soggy or steamed.
- Experiment with seasoning variations like smoked paprika, za’atar, or Japanese togarashi for different flavor profiles that complement the peppers’ natural taste.
- Prep Time: 5 minutes
- Cook Time: 5-6 minutes
- Category: Sautéed
- Method: Sautéing
- Cuisine: Japanese
Nutrition
- Serving Size: 2
- Calories: 123 kcal
- Sugar: 2 g
- Sodium: 1173 mg
- Fat: 14 g
- Saturated Fat: 2 g
- Unsaturated Fat: 12 g
- Trans Fat: 0 g
- Carbohydrates: 6 g
- Fiber: 3 g
- Protein: 1 g
- Cholesterol: 0 mg
Mason Carter
Founder
Expertise
Family Meal Routines, Simple One-pot Meals, Budget-friendly Cooking, Quick Dinner Planning, Batch Cooking Systems
Education
- Certificate: Culinary Arts
- Focus: Training in core cooking techniques, kitchen operations, and real food preparation through hands-on experience in professional-style kitchens.
Penn Foster Career School (Online)Mason is the founder of Families With Purpose and the heart behind its simple, family-focused recipes. Based in Greenville, South Carolina, he creates meals that fit into busy routines and bring people back to the table. He focuses on easy dinners, one-pot meals, budget-friendly cooking, and practical weekly meal planning. Mason has built a recipe collection shaped by real family life, with clear methods and repeatable meals that work on everyday schedules.