
Cheesy Beefy Roll-Ups Recipe for Hungry Families
Cheesy Beefy Rolls Up deliver all the satisfaction of comfort food wrapped into convenient, handheld portions perfect for any occasion.
Whether serving them at game day gatherings, packing them for lunch boxes, or simply enjoying a cozy dinner at home, they hit the spot every time.
The combination of savory flavors wrapped in a tender exterior creates a meal that feels both familiar and exciting.
Busy weeknights become so much easier when dinner comes together quickly without sacrificing flavor or heartiness.
Everyone at the table will appreciate how filling and flavorful each bite turns out to be.
There's something universally appealing about food that's easy to hold and even easier to love.
The best part is how well they work for feeding a crowd or prepping meals ahead of time for the week.
When you need reliable comfort that always provides smiles, scroll down for the full recipe that makes mealtime a guaranteed success.
Why You’ll Love Cheesy Beefy Roll Ups
Cheesy Beefy Roll Ups Ingredient Breakdown
Main Ingredients:Vegetable Additions:Seasoning Blend:What Tools Are Needed for Cheesy Beef Roll Ups?
Preparation Guide for Cheesy Beef Roll-Ups
Prepare the Beef
Heat a large skillet over medium heat at 350°F. Crumble 1 lb ground beef into the pan and cook until it’s no longer pink, breaking it apart with a spatula as it cooks.
Add Veggie Flavor
Toss in your fresh vegetables to give the beef some extra zing:
Stir and cook until the veggies become soft and slightly translucent, about 3-4 minutes.
Season the Mixture
Sprinkle in your seasonings to amp up the flavor:
Mix everything together so the spices coat the beef and vegetables evenly.
Cheese It Up
Remove the skillet from heat and stir in 1 cup shredded cheddar cheese. Watch how the cheese starts to melt and create a creamy texture with the beef.
Roll and Wrap
Grab your 4 large flour tortillas and spread an equal portion of the beef mixture across each one. Make sure to leave a small border around the edges to keep everything tucked in tight.
Create Your Rolls
Roll each tortilla carefully, tucking in the sides as you go. Press gently to seal the edges and keep the filling inside.
Slice and Serve
Cut each rolled tortilla into bite-sized pieces about 1-2 inches thick. Arrange on a plate and serve immediately while they’re warm and the cheese is still soft.
Helpful Notes for Cheesy Beef Roll-Ups
Easy Cheesy Beefy Rolls Up Alternative Versions
Cheesy Beefy Roll Ups Game Day Serving Suggestions
Cheesy Beef Roll-Ups Storage Notes
Cheesy Beefy Roll Ups Q&A
Can I use a different type of meat?
Ground turkey or chicken work perfectly as substitutes and keep the recipe lean and tasty.
What cheese melts best in these rolls?
Cheddar, monterey jack, or a blend of both create fantastic melty texture and rich flavor.
Are these rolls good for meal prep?
Absolutely! Prepare them ahead and store in the refrigerator for quick snacks or lunches during the week.
Can these be made vegetarian?
Replace beef with black beans, chopped mushrooms, or lentils for a protein-packed vegetarian version.
Do these need to be cooked after rolling?
No cooking required after rolling – they’re ready to enjoy right after assembly.
How small should I slice the rolls?
Cut each roll into bite-sized pieces about 1-2 inches long for easy eating and sharing.

Cheesy Beefy Rolls Up Recipe
- Total Time: 25 minutes
- Yield: 4 1x
Description
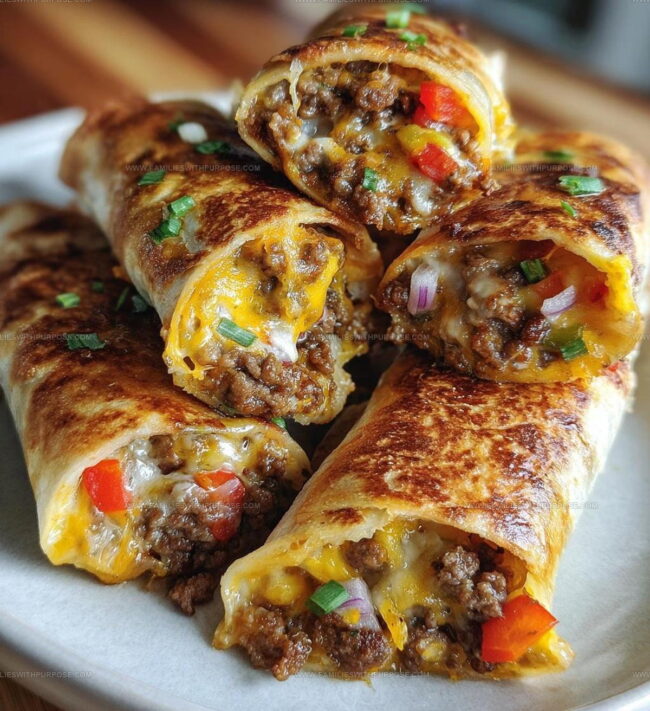
Rolled beef and melted cheese come together in these delectable cheesy beefy rolls up that will make your dinner table sing with excitement. Tender meat wrapped around gooey cheese creates a simple yet satisfying meal your family craves.
Ingredients
Protein:
- 1 lb ground beef
Dairy:
- 1 cup shredded cheddar cheese
Vegetables and Seasonings:
- 4 large flour tortillas
- ½ cup diced onions
- ½ cup diced bell peppers
- 1 teaspoon garlic powder
- 1 teaspoon onion powder
- Salt
- Pepper
Instructions
- Grab a large skillet and heat it to medium temperature for 3-4 minutes. Crumble 1 lb ground beef into the pan, breaking it into small pieces while cooking.
- Add ½ cup diced onions and ½ cup diced bell peppers to the beef. Cook for 5-6 minutes until vegetables soften and become translucent.
- Sprinkle 1 tsp garlic powder, 1 tsp onion powder, salt, and pepper over the meat mixture. Stir thoroughly to distribute seasonings evenly.
- Remove the skillet from heat. Pour 1 cup shredded cheddar cheese into the meat mixture, stirring quickly to help cheese melt slightly.
- Lay one 10-inch flour tortilla flat on your cutting board. Spread ¼ of the warm beef mixture across the center of the tortilla.
- Fold the bottom edge of the tortilla over the filling, then roll tightly from one side to create a compact cylindrical shape.
- Using a sharp knife, cut each rolled tortilla into 3-4 bite-sized pieces, approximately 1-2 inches long.
- Arrange the roll-ups on a serving plate. Let them rest for 2-3 minutes before serving to allow filling to set.
Notes
- Use lean ground beef to reduce excess grease and keep the rolls crisp.
- Warm tortillas slightly before filling to prevent cracking when rolling.
- Experiment with different cheese blends like cheddar and pepper jack for varied flavor profiles.
- Prepare filling ahead of time and refrigerate to enhance seasoning depth, making weeknight cooking faster.
- Prep Time: 10 minutes
- Cook Time: 15 minutes
- Category: Sautéed
- Method: Sautéing
- Cuisine: American
Nutrition
- Serving Size: 4
- Calories: 470 kcal
- Sugar: 2 g
- Sodium: 520 mg
- Fat: 28 g
- Saturated Fat: 12 g
- Unsaturated Fat: 14 g
- Trans Fat: 1 g
- Carbohydrates: 27 g
- Fiber: 3 g
- Protein: 30 g
- Cholesterol: 85 mg
Mason Carter
Founder
Expertise
Family Meal Routines, Simple One-pot Meals, Budget-friendly Cooking, Quick Dinner Planning, Batch Cooking Systems
Education
- Certificate: Culinary Arts
- Focus: Training in core cooking techniques, kitchen operations, and real food preparation through hands-on experience in professional-style kitchens.
Penn Foster Career School (Online)Mason is the founder of Families With Purpose and the heart behind its simple, family-focused recipes. Based in Greenville, South Carolina, he creates meals that fit into busy routines and bring people back to the table. He focuses on easy dinners, one-pot meals, budget-friendly cooking, and practical weekly meal planning. Mason has built a recipe collection shaped by real family life, with clear methods and repeatable meals that work on everyday schedules.