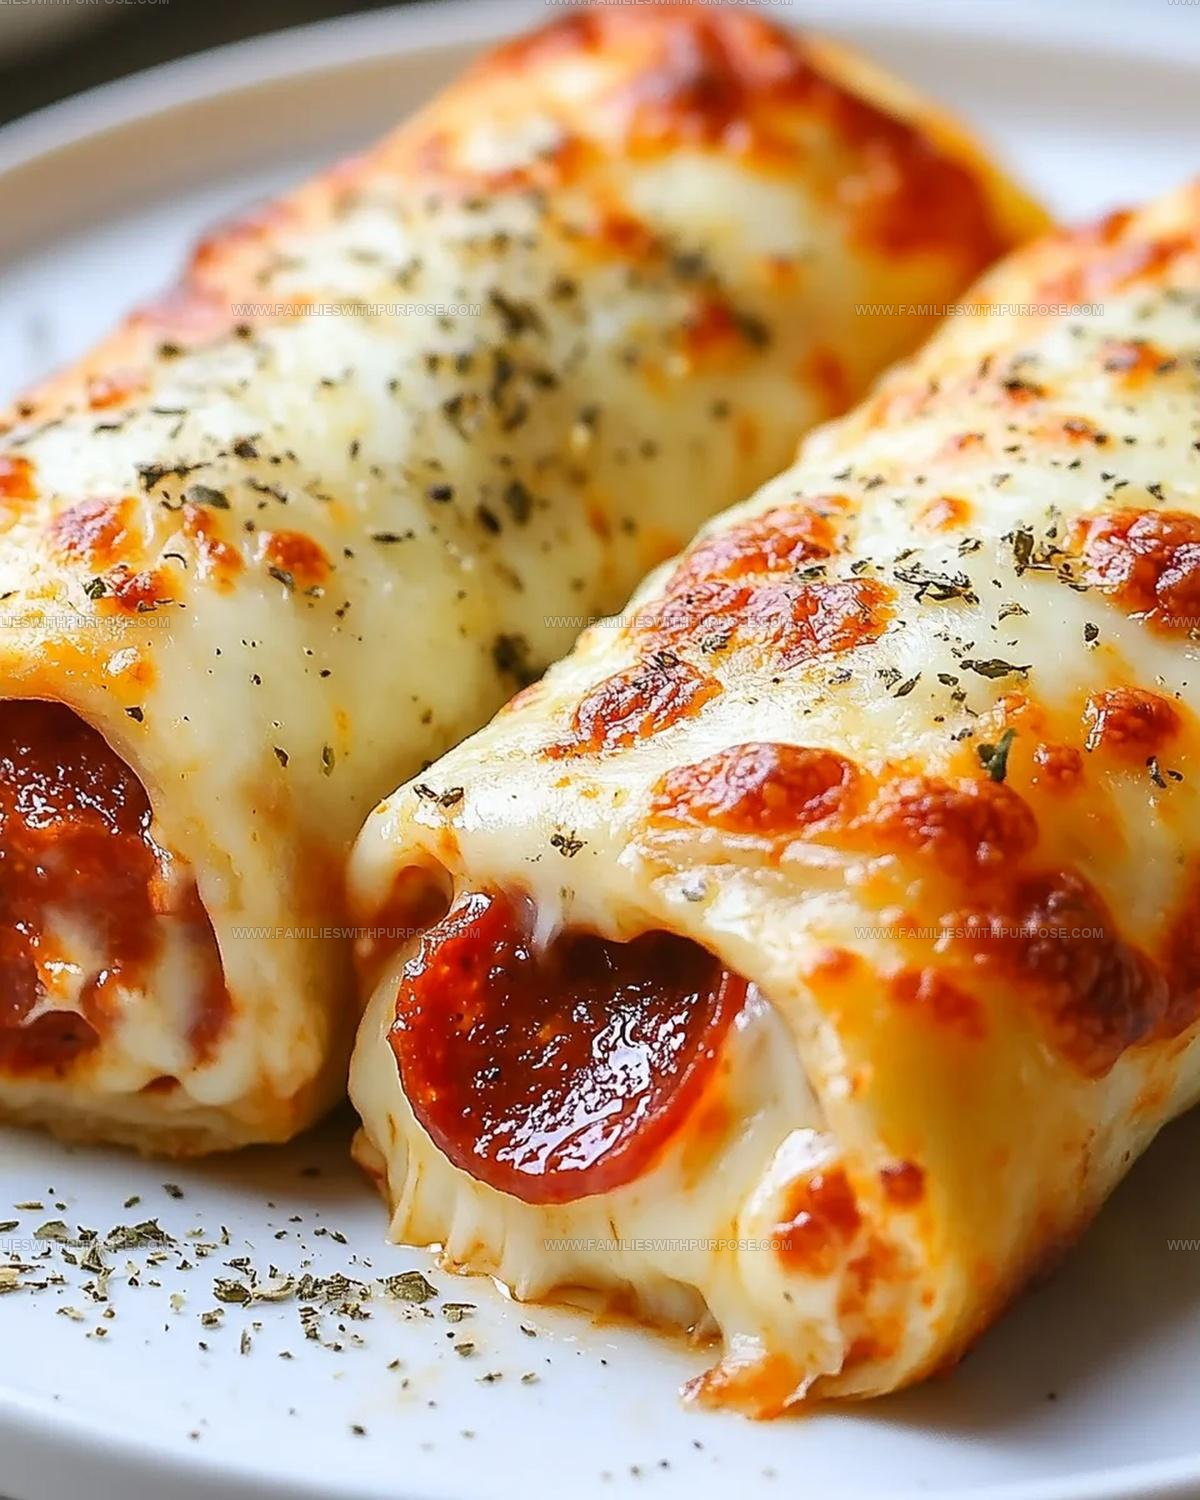
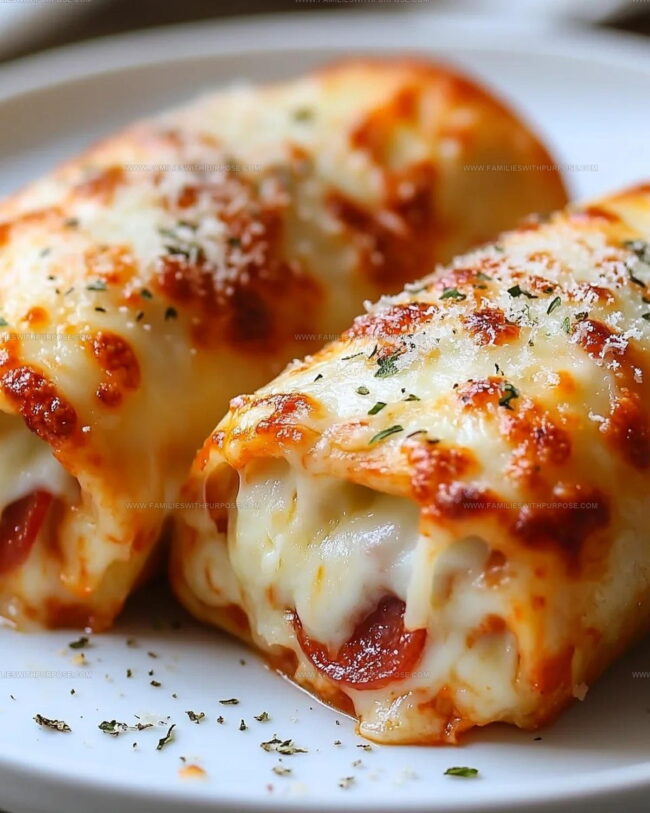
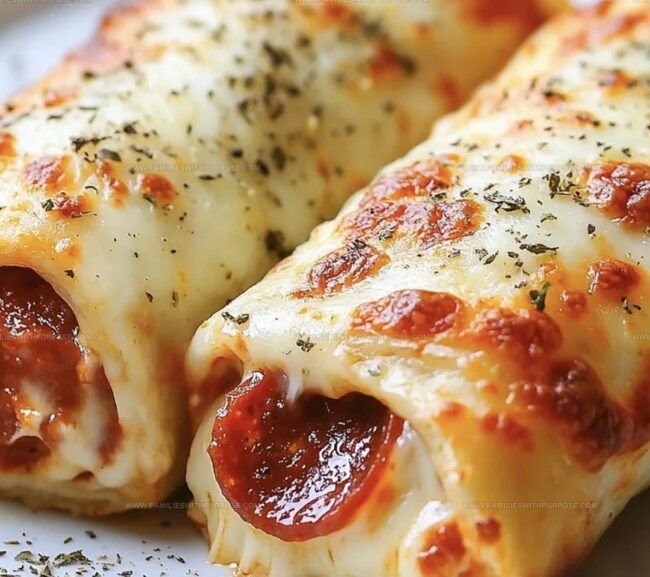
Cheesy Pepperoni Pizza Roll Ups Recipe to Devour
Cheesy pepperoni pizza roll ups deliver all the satisfaction of your favorite pizza in a fun, handheld form that feels like a celebration on every plate.
There's something wonderfully comforting about food that combines familiar flavors in an unexpected way, and this recipe does exactly that with minimal fuss.
Perfect for game day gatherings, afternoon snacks, or casual dinners when you want something different, these roll ups have earned their spot as a reliable crowd-pleaser.
You can serve them as an appetizer, pack them for lunch boxes, or enjoy them as a satisfying meal any time hunger strikes.
Kids go wild for them, and adults find themselves reaching for seconds without hesitation.
Best Reasons To Try Cheesy Pepperoni Pizza Roll Ups

What Are the Ingredients for Pepperoni Pizza Roll Ups
Cheese:Wrap Ingredients:Topping:Practical Tools for Pepperoni Pizza Roll Ups
Easy Instructions for Pepperoni Pizza Roll Ups
Prep the Skillet
Heat a large nonstick skillet over medium-high heat at 375°F. This high temperature helps create a crispy cheese base.
Create Cheese Base
Sprinkle exactly 1/2 cup of shredded mozzarella cheese directly into the center of the hot skillet. Let the cheese melt completely without touching it.
Add Tortilla Layer
When the cheese becomes bubbly and starts melting, carefully place one low-carb tortilla directly on top of the melted cheese. Press the tortilla gently to help it stick to the cheese.
Brown the Cheese Side
Watch for the cheese to turn golden brown and crisp around the edges. This takes about 2-3 minutes. Carefully flip the tortilla so the cheesy side is facing up.
Add Pizza Sauce
Spread exactly 1 tablespoon of pizza sauce in the center of the tortilla. Make sure to leave some space around the edges.
Layer Pepperoni
Top the sauce with exactly 6 slices of pepperoni, arranging them neatly across the center of the tortilla.
Roll and Seal
Start from one side, carefully roll the tortilla into a tight cylinder. The melted cheese helps seal the roll and keep the pepperoni inside.
Repeat and Serve
Repeat the entire process with the remaining 7 tortillas, 3 1/2 cups of mozzarella, pizza sauce, and 42 remaining pepperoni slices. Slice the rolls diagonally and serve warm.
Smart Tips For Cheesy Pepperoni Pizza Roll Ups
What Are the Best Flavor Options for Pepperoni Pizza Roll Ups
Best Ways to Serve Cheesy Pepperoni Pizza Roll Ups
Cheesy Pepperoni Pizza Roll Ups Storage Tips
Cheesy Pepperoni Pizza Roll Ups Common Queries
Can I use different cheese?
Absolutely! Cheddar or provolone work great as alternatives to mozzarella. Your pizza roll-ups will still taste delicious with other cheese types.
Do these need sauce for dipping?
While the roll-ups have pizza sauce inside, marinara or ranch dressing make excellent additional dipping sauces that enhance the flavor.
How crispy does the cheese get?
The cheese creates a golden, lacy crust that adds incredible crunch when melted directly in the skillet before adding the tortilla.
Are these best served immediately?
Fresh from the skillet is definitely best. The cheese stays melty and crisp, and the tortilla maintains its perfect texture right after cooking.
Can kids help make these?
Absolutely! Kids can help place pepperoni and roll tortillas, but adults should handle the hot skillet and flipping steps for safety.
What tortillas work best?
Medium-sized flour tortillas are ideal. Corn tortillas might break when rolling, so stick with soft flour varieties for perfect roll-ups.

Cheesy Pepperoni Pizza Roll Ups Recipe
- Total Time: 15 minutes
- Yield: 8 1x
Description
Cheesy pepperoni pizza roll ups deliver pure comfort right from your kitchen, wrapping up classic pizza flavors in a quick, handheld snack your family will devour. Crispy tortillas packed with melted cheese and spicy pepperoni make these rolls a perfect game day treat that disappears faster than you can serve them.
Ingredients
Main Ingredients:
- 8 low-carb tortillas
- 4 cups shredded mozzarella cheese
- 48 slices pepperoni
Sauce:
- ½ cup pizza sauce
Seasonings and Optional Additions:
(none in this recipe)
Instructions
- Heat a large nonstick skillet over medium-high heat at 375°F, preparing your cooking surface carefully.
- Sprinkle ½ cup mozzarella cheese directly in the skillet’s center, allowing it to melt without disturbing its natural spread.
- Watch the cheese bubble and transform, creating a golden melted base that will become your crispy foundation.
- Gently place a low-carb tortilla atop the melted cheese, pressing softly to ensure complete attachment.
- Allow the cheese to turn golden brown and crisp, which takes approximately 2-3 minutes.
- Cautiously flip the tortilla, ensuring the cheese remains connected to its surface.
- Spread 1 tablespoon pizza sauce directly down the tortilla’s center with smooth, even movements.
- Arrange 6 pepperoni slices precisely over the sauce, creating a uniform layer.
- Roll the tortilla tightly from one edge to the other, tucking ingredients inside as you progress.
- Compress the roll gently to seal its edges and maintain structural integrity.
- Repeat the entire process with remaining tortillas, cheese, sauce, and pepperoni until all ingredients are utilized.
Notes
- Cheese choice matters, so select a high-quality mozzarella that melts smoothly and creates a crispy exterior when cooked.
- Work quickly when flipping the tortilla to ensure the cheese adheres perfectly without burning.
- For a gluten-free version, swap regular tortillas with cauliflower or almond flour tortillas to maintain the same delicious flavor profile.
- Control your heat carefully to prevent burning and achieve that perfect golden-brown cheese crust on the outside of your roll-ups.
- Prep Time: 5 minutes
- Cook Time: 10 minutes
- Category: Sautéed
- Method: Sautéing
- Cuisine: Italian-American
Nutrition
- Serving Size: 8
- Calories: 384
- Sugar: 1 g
- Sodium: 890 mg
- Fat: 29 g
- Saturated Fat: 14 g
- Unsaturated Fat: 13 g
- Trans Fat: 0.5 g
- Carbohydrates: 8 g
- Fiber: 2 g
- Protein: 22 g
- Cholesterol: 55 mg
Sophie Lane
Recipe Developer
Expertise
Family-friendly Meals, Simple Healthy Cooking, Ingredient Substitutions, Beginner-friendly Recipes, Flexible Meal Prep
Education
- Program: Professional Cook Certificate
- Focus: Online culinary training covering knife skills, cooking techniques, and plant-based and modern cooking approaches.
Schoolcraft CollegeSophie brings a calm and flexible approach to Families With Purpose. Based in Fort Collins, Colorado, she creates recipes that feel simple, clear, and easy to make at home. She focuses on family-friendly meals, healthy everyday cooking, ingredient swaps, and beginner-friendly ideas. Sophie helps make each recipe approachable and easy to follow, especially for busy families who need meals that can bend with the day.