Authentic Sicilian Arancini Recipe for Golden Rice Balls
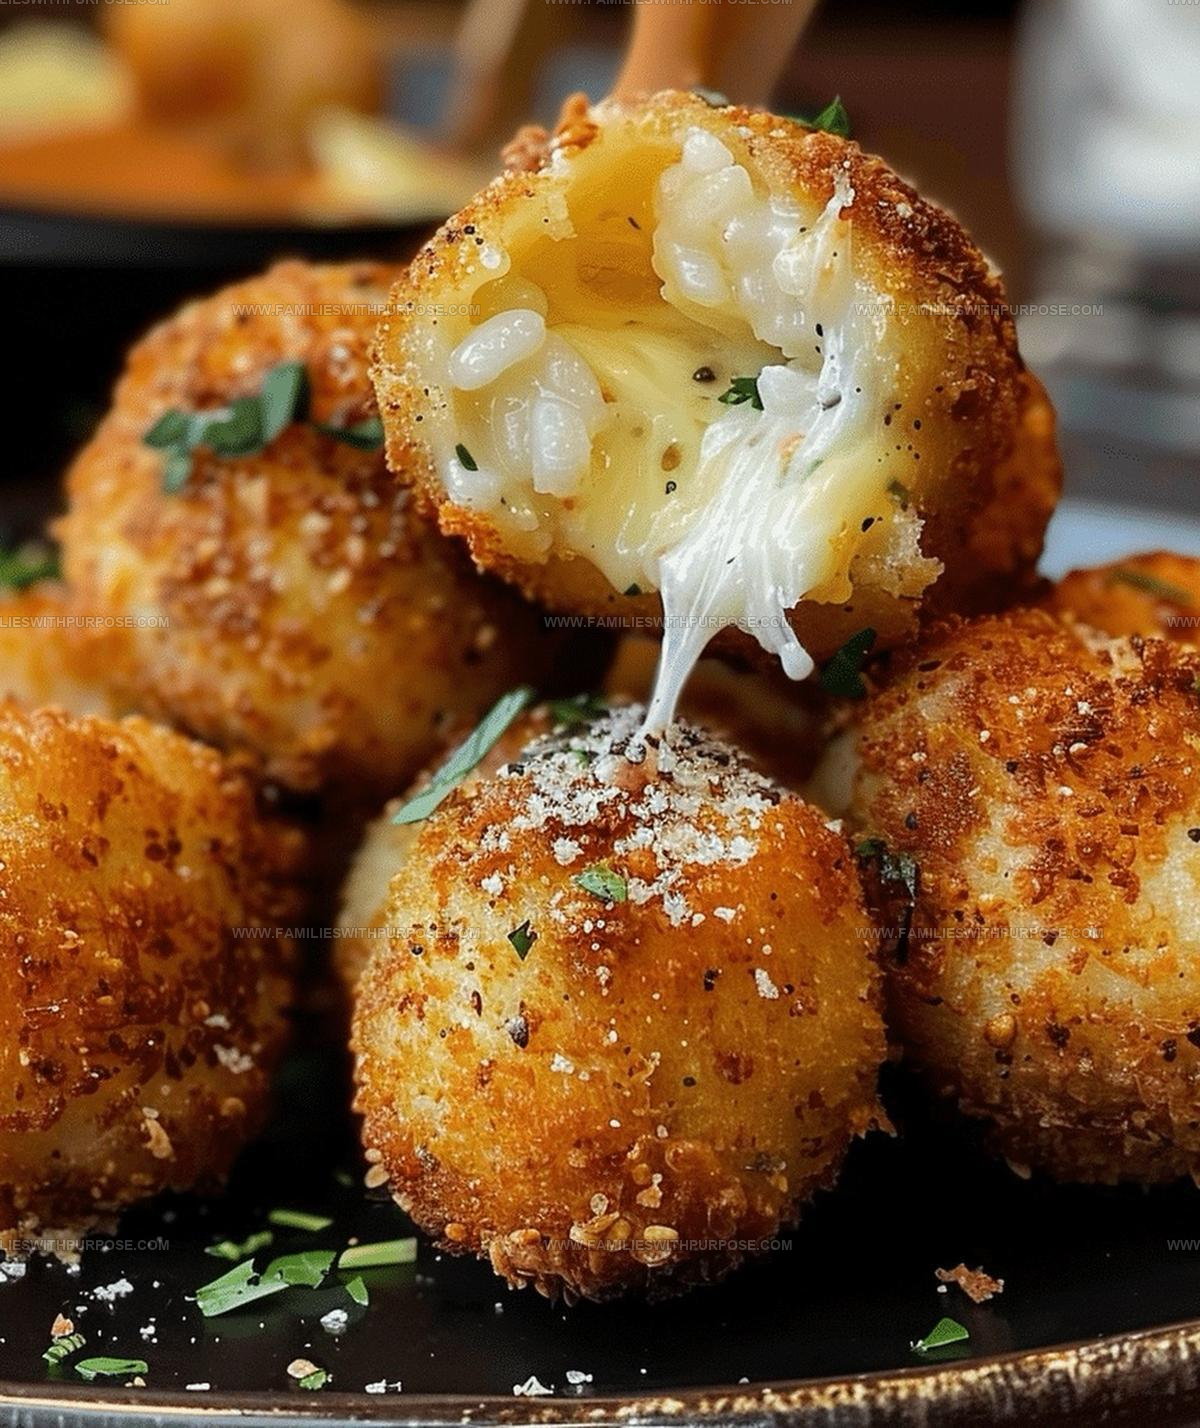
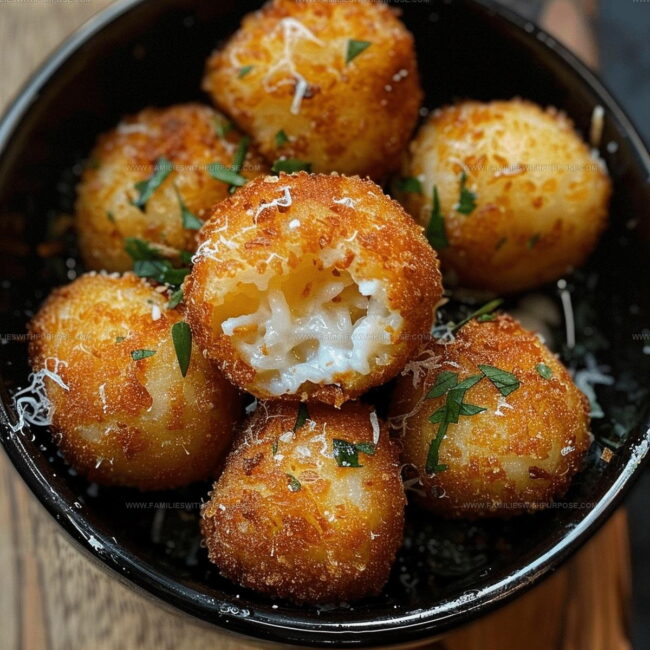
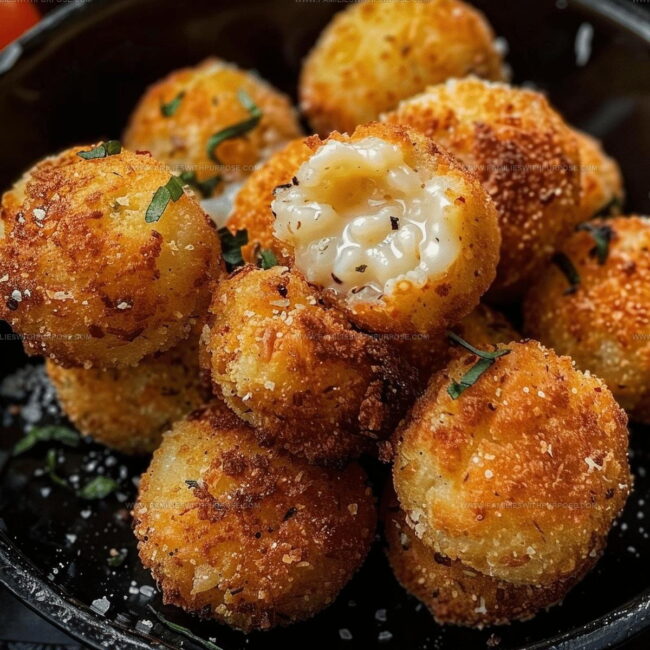
Crispy arancini recipe lovers know that few dishes deliver such satisfying contrast between golden, crunchy exteriors and creamy centers.
Originating from Sicily, balls of comfort have won hearts across the globe as a beloved street food and party favorite.
Whether served as an appetizer, snack, or main course, they fit effortlessly into any occasion.
The beauty lies in how portable and crowd-pleasing they are, making them ideal for gatherings where finger foods reign supreme.
You can serve them hot from the fryer or at room temperature, and they maintain their appeal either way.
Pairing them with a simple dipping sauce amplifies the experience without overwhelming the star of the show.
Every bite offers a delightful crunch followed by a burst of savory goodness that keeps everyone coming back for more.
Perfect for feeding a crowd or treating yourself to something special, this recipe will become a staple in no time.
Why Arancini Always Feels Special
Arancini Ingredients Overview
Rice Base:Flavor Enhancers:Binding and Coating:Frying:Tools Used Along the Way for Arancini
Arancini Italian Rice Balls Cooking Method
Prepare the Base
Warm 1 tablespoon olive oil in a large saucepan over medium heat. Drop in the finely chopped small onion and crushed garlic. Sauté until they’re soft and fragrant, but not turning brown.
Toast the Rice
Add 1 cup Arborio rice to the pan. Stir and cook for about 2 minutes until the rice looks slightly golden and smells nutty.
Add White Wine
Pour in ½ cup dry white wine. Keep stirring until the liquid completely disappears into the rice.
Build the Risotto
Slowly add 2 ½ cups boiling chicken stock, about 1/3 cup at a time. Stir constantly and wait for each addition to soak into the rice before adding more.
Finish the Base Risotto
When all the stock is absorbed, mix in these ingredients:
Cool the Risotto
Remove the pan from heat. Transfer the risotto to a bowl and let it cool down for about 15 minutes.
Bind the Mixture
Beat 1 large egg and stir it into the cooled risotto to help everything stick together.
Prepare Coating Stations
Set up three separate bowls:
Form Rice Balls
Grab 2 tablespoons of risotto and roll it into a ball. Make a small indent in the center.
Add Cheese Center
Tuck a ¾-inch cube of mozzarella into the center of each rice ball. Roll again to completely cover the cheese.
Coat the Balls
Roll each ball first in flour, then dip in egg mixture, and finally coat completely with bread crumbs.
Heat the Oil
Pour 1 quart vegetable oil into a deep fryer or large saucepan. Heat to exactly 350°F.
Fry the Arancini
Carefully drop rice balls into hot oil. Fry in batches, turning them so they become evenly golden brown.
Drain and Serve
Place fried arancini on a paper towel-lined plate to drain excess oil. Keep warm in an oven set to 200°F while finishing the remaining batches.
Cooking Tips for Arancini

Arancini with Cheesy and Savory Filling Variations
Best Ways to Serve Arancini for Entertaining
How to Store Arancini Without Sogginess
Arancini Common Questions Answered
What are the origins of Arancini?
These golden rice balls come from Sicily, where street vendors and home cooks have been making them for generations as a delicious way to use leftover risotto.
Can I make the risotto ahead of time?
Absolutely! Preparing the risotto a day before helps it cool and firm up, making it easier to form perfect rice balls.
How do I know the oil is hot enough for frying?
Use a kitchen thermometer to check the temperature reaches 350°F. If you don’t have one, drop a bread crumb into the oil – it should sizzle and turn golden quickly.
What cheese works best inside Arancini?
Mozzarella is classic, but you can experiment with other melting cheeses like provolone or fontina that create a gooey center.
Are Arancini difficult to make?
They take some practice, but follow the steps carefully and your technique will improve with each batch you create.
Can Arancini be frozen?
Freeze uncooked rice balls on a baking sheet, then transfer to a freezer bag. Thaw in the refrigerator before frying to maintain their crispy texture.

Crispy Arancini Recipe
- Total Time: 50 minutes
- Yield: 4 1x
Description
Arancini brings Italian street food magic straight to your kitchen, turning leftover risotto into crispy golden rice balls packed with cheesy goodness. Stuffed with gooey mozzarella and coated in seasoned breadcrumbs, these little treasures make snack time feel like a mini celebration from Sicily.
Ingredients
Primary Ingredients:
- 1 cup Arborio rice
- 2 ½ cups chicken stock
- 4 ounces mozzarella cheese
- 2 ounces ham
- 2 large eggs
Supporting Ingredients:
- 1 tablespoon olive oil
- 1 small onion
- 1 clove garlic
- ½ cup dry white wine
- ½ cup frozen green peas
- Salt and pepper
Coating Ingredients:
- ½ cup all-purpose flour
- 1 cup dry bread crumbs
- 1 tablespoon milk
- ½ cup Parmesan cheese
- 1 quart vegetable oil
Instructions
- Heat 1 tablespoon olive oil in a large saucepan over medium heat. Sauté 1 finely chopped small onion and 1 crushed garlic clove until softened, about 3 minutes.
- Add 1 cup Arborio rice and toast for 2 minutes, stirring constantly to prevent burning.
- Pour ½ cup dry white wine into the rice and stir until the liquid completely evaporates.
- Gradually add 2 ½ cups boiling chicken stock, ⅓ cup at a time. Stir constantly and wait for each addition to absorb before adding more liquid.
- Mix in ½ cup frozen green peas, 2 ounces chopped ham, salt, and pepper after all stock is absorbed.
- Remove risotto from heat and fold in ½ cup Parmesan cheese. Transfer to a bowl and let cool for 15 minutes.
- Beat 1 large egg and gently stir into the cooled risotto mixture.
- Prepare three shallow dishes: one with ½ cup flour, another with 1 beaten egg mixed with 1 tablespoon milk, and the third with 1 cup bread crumbs.
- Scoop 2 tablespoons of risotto and shape into a compact ball.
- Create a small indentation in each rice ball and insert a ¾-inch mozzarella cheese cube. Seal the cheese inside by reshaping the ball.
- Roll each ball first in flour, then dip in egg mixture, and finally coat completely with bread crumbs.
- Heat 1 quart vegetable oil in a deep fryer or large saucepan to exactly 350°F.
- Carefully lower 4-5 rice balls into hot oil. Fry for 3-4 minutes, turning occasionally until golden brown and crispy.
- Transfer fried arancini to a paper towel-lined plate to drain excess oil. Keep warm in a 200°F oven while frying remaining batches.
Notes
- Risotto texture matters most, so stir constantly and add stock gradually to create creamy, tender rice that holds together perfectly.
- Chilling the risotto before forming balls helps them maintain shape and prevents falling apart during frying.
- Ensure oil temperature stays consistent at 350°F for crispy, golden exterior without greasy or undercooked centers.
- For gluten-free version, swap regular flour and breadcrumbs with gluten-free alternatives like almond flour and gluten-free panko.
- Prep Time: 20 minutes
- Cook Time: 30 minutes
- Category: Sautéed
- Method: Sautéing
- Cuisine: Italian
Nutrition
- Serving Size: 4
- Calories: 423 kcal
- Sugar: 2 g
- Sodium: 670 mg
- Fat: 18 g
- Saturated Fat: 7 g
- Unsaturated Fat: 10 g
- Trans Fat: 0.1 g
- Carbohydrates: 44 g
- Fiber: 2 g
- Protein: 19 g
- Cholesterol: 125 mg
Mason Carter
Founder
Expertise
Family Meal Routines, Simple One-pot Meals, Budget-friendly Cooking, Quick Dinner Planning, Batch Cooking Systems
Education
- Certificate: Culinary Arts
- Focus: Training in core cooking techniques, kitchen operations, and real food preparation through hands-on experience in professional-style kitchens.
Penn Foster Career School (Online)Mason is the founder of Families With Purpose and the heart behind its simple, family-focused recipes. Based in Greenville, South Carolina, he creates meals that fit into busy routines and bring people back to the table. He focuses on easy dinners, one-pot meals, budget-friendly cooking, and practical weekly meal planning. Mason has built a recipe collection shaped by real family life, with clear methods and repeatable meals that work on everyday schedules.