
Crispy Fried Chicken Tenders Recipe to Dip and Devour
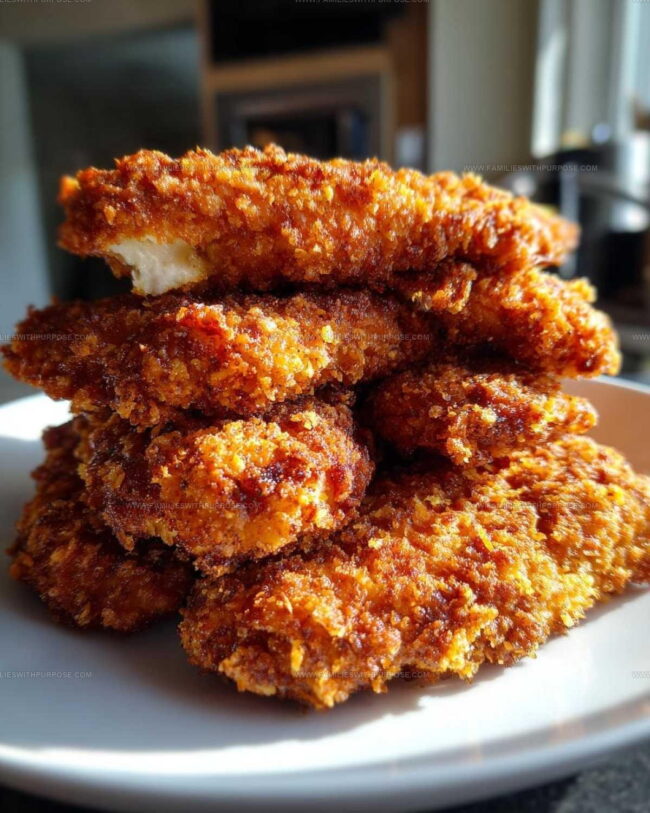
A crispy fried chicken tenders recipe delivers that satisfying crunch everyone craves at dinnertime.
There's something special about biting into golden, perfectly cooked chicken that makes any meal feel like a celebration.
Whether you need a quick weeknight dinner or want to serve something that appeals to all ages, this dish never disappoints.
The beauty here is how simple home cooking can create such joy around the table.
You can count on this recipe to become a regular request in no time.
Everyone loves food that's both comforting and exciting, and these tenders check both boxes beautifully.
They're perfect for casual gatherings, game days, or those evenings when you want something reliably delicious.
Secrets Behind These Amazing Crispy Fried Chicken Tenders
Crispy Elements Behind These Amazing Chicken Tenders
Main Protein:Flour Coating:Wet Binding Layer:Crispy Outer Layer:Frying Medium:Frying Equipment for Amazing Crispy Chicken Tenders
How To Fry Crispy Chicken Tenders
Prepare Flour Mixture
Grab a shallow dish and whisk together 2 cups of all-purpose flour with your spices. Add:
This seasoned flour will be your first coating for creating crispy chicken tenders.
Create Egg Wash
In another shallow dish, whisk 2 large eggs with ¼ cup milk until they’re thoroughly combined. This liquid mixture will help your breading stick perfectly to each chicken strip and create a delicious golden exterior.
Set Up Breadcrumb Station
Pour 2 cups of panko breadcrumbs into a third shallow dish. These crispy crumbs will give your chicken tenders that amazing crunchy texture that makes everyone’s mouth water when they take a bite.
Coat First Layer
Take each chicken tender and roll it completely in the seasoned flour mixture. Shake off any extra flour so you get a thin, even coating that will help the next layer stick beautifully.
Apply Egg Coating
Dunk your flour-covered chicken tender into the egg wash. Let any excess liquid drip back into the dish. This egg layer acts like glue for your final crispy coating.
Add Breadcrumb Layer
Roll the egg-coated chicken tender in panko breadcrumbs. Press gently so the crumbs stick well to every surface. Your chicken should be completely covered with a beautiful, even layer of breadcrumbs.
Prepare Oil
Heat 2 inches of vegetable oil in a large skillet or Dutch oven. Bring the temperature to 350°F (175°C) using a kitchen thermometer. The right oil temperature ensures crispy, not greasy, chicken tenders.
Fry First Batch
Carefully place 3-4 chicken tenders into the hot oil. Don’t crowd the pan, as this can lower the oil temperature and make your tenders soggy instead of crisp.
Cook Until Golden
Fry each batch of tenders for 3-4 minutes per side. They should turn a beautiful golden brown color and reach an internal temperature of 165°F (74°C). Watch them closely to prevent burning.
Drain Excess Oil
Transfer the cooked tenders to a wire rack set over a baking sheet. This helps excess oil drip away, keeping your chicken crispy instead of greasy. Let them rest for a few minutes before serving.
Ways to Enhance Amazing Crispy Chicken Tenders
Crispy Substitutions for Amazing Chicken Tenders
Serving Crispy Tenders With Sauces Or Sides
Keeping Fried Chicken Tenders Crisp For Hours
Chicken Tender Questions New Fryers Always Ask
How do I know the oil is hot enough for frying?
Use a digital thermometer to check that the oil reaches 350°F. If you don’t have one, drop a small piece of breadcrumb into the oil – it should sizzle immediately and float to the top.
Can I bake these chicken tenders instead of frying?
Baking won’t give the same crispy texture. If you want a healthier version, try coating the tenders with cooking spray and baking at 425°F for about 15-20 minutes, flipping halfway through.
Why do I need three separate dishes for coating?
Each dish serves a specific purpose: flour helps the egg stick, eggs help the breadcrumbs adhere, and panko creates that perfect crispy exterior. Skipping a step means less crunch.
What’s the best way to keep the breading from falling off?
Press the panko gently but firmly onto the chicken. Let each tender rest for a few minutes after breading to help the coating set before frying.
How can I tell if the chicken is fully cooked?
The internal temperature should reach 165°F when checked with a meat thermometer. The exterior will be golden brown, and the meat should look opaque, not pink.
Can I reuse the oil after frying?
Strain the cooled oil through a fine mesh sieve and reuse it once or twice for frying future batches of chicken tenders.
Crispy Fried Chicken Tenders Recipe
- Total Time: 25 minutes
- Yield: 4 1x
Description
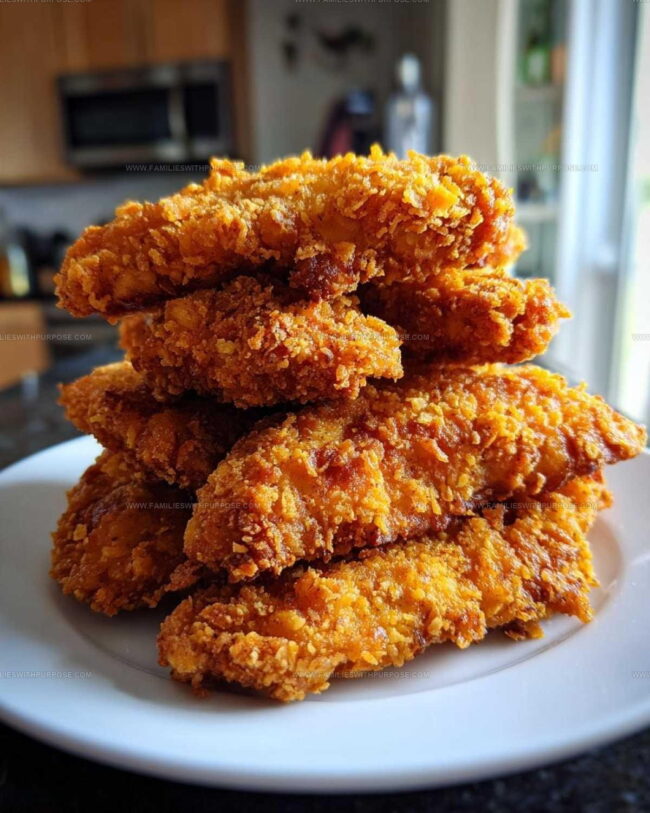
Crunchy Fried Chicken Tenders deliver pure comfort straight from Southern kitchens, where golden breading and perfect seasoning create serious snacking magic. Crispy exterior and juicy meat make these tender chicken strips an absolute crowd-pleaser that your family will devour in minutes.
Ingredients
Main Ingredients:
- 2 pounds boneless, skinless chicken breasts
Coating Ingredients:
- 2 cups all-purpose flour
- 2 cups panko breadcrumbs
- 2 large eggs
Seasoning Ingredients:
- 1 tablespoon paprika
- 1 teaspoon garlic powder
- 1 teaspoon onion powder
- 1 teaspoon salt
- ½ teaspoon black pepper
- ¼ cup milk
- Vegetable oil, for frying
Instructions
- Prepare three separate shallow dishes: mix 2 cups flour with paprika, garlic powder, onion powder, salt, and pepper in the first dish.
- Whisk 2 large eggs with ¼ cup milk in the second dish until thoroughly combined.
- Pour 2 cups panko breadcrumbs into the third dish, spreading them evenly.
- Take each chicken strip and thoroughly coat it in the seasoned flour mixture, shaking off any excess powder.
- Dunk the floured chicken directly into the egg wash, ensuring complete coverage while allowing extra liquid to drip back into the dish.
- Roll the egg-coated chicken in panko breadcrumbs, pressing gently to create a thick, even coating that adheres completely.
- Pour vegetable oil into a large skillet, filling it about 2 inches deep, and heat to 350°F (175°C).
- Gently lower 3-4 breaded chicken tenders into the hot oil, maintaining enough space between them to prevent overcrowding.
- Fry each batch for 3-4 minutes per side, rotating when the bottom turns a deep golden brown color.
- Transfer the crispy tenders to a wire rack positioned over a baking sheet, allowing excess oil to drain and maintaining their crunch.
- Continue frying remaining chicken tenders in batches, ensuring consistent temperature and color.
- Let the tenders rest for 2-3 minutes before serving to allow the coating to set and cool slightly.
Notes
- Seasoning the flour mix deeply helps create layers of flavor in your chicken tenders.
- Using a thermometer ensures perfect oil temperature, which guarantees crispy exterior and juicy interior.
- Pat chicken tenders completely dry before coating to help breading stick better and create crunchier results.
- For gluten-free options, swap wheat flour with rice flour and use gluten-free panko breadcrumbs or crushed cornflakes.
- Prep Time: 15 minutes
- Cook Time: 10 minutes
- Category: Fried
- Method: Frying
- Cuisine: American
Nutrition
- Serving Size: 4
- Calories: 610 kcal
- Sugar: 1 g
- Sodium: 520 mg
- Fat: 25 g
- Saturated Fat: 4 g
- Unsaturated Fat: 20 g
- Trans Fat: 0 g
- Carbohydrates: 54 g
- Fiber: 2 g
- Protein: 43 g
- Cholesterol: 125 mg
Sophie Lane
Recipe Developer
Expertise
Family-friendly Meals, Simple Healthy Cooking, Ingredient Substitutions, Beginner-friendly Recipes, Flexible Meal Prep
Education
- Program: Professional Cook Certificate
- Focus: Online culinary training covering knife skills, cooking techniques, and plant-based and modern cooking approaches.
Schoolcraft CollegeSophie brings a calm and flexible approach to Families With Purpose. Based in Fort Collins, Colorado, she creates recipes that feel simple, clear, and easy to make at home. She focuses on family-friendly meals, healthy everyday cooking, ingredient swaps, and beginner-friendly ideas. Sophie helps make each recipe approachable and easy to follow, especially for busy families who need meals that can bend with the day.