
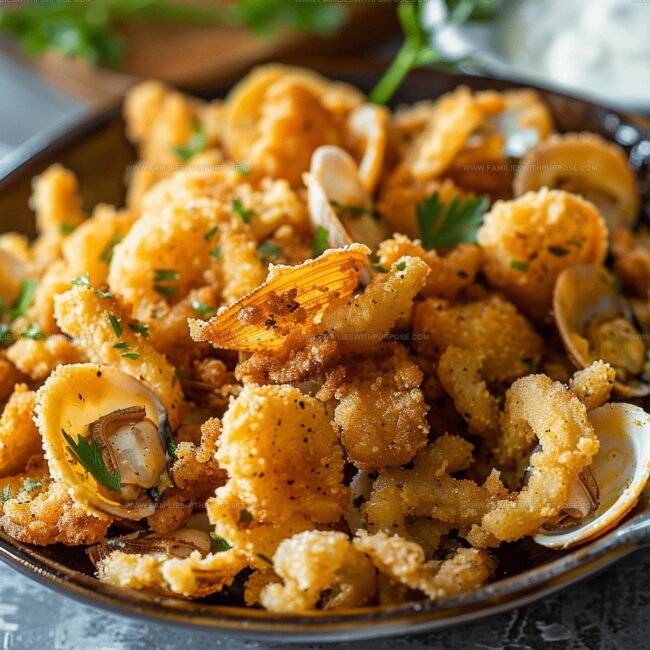
Recipe for Golden Fried Clams with a Perfect Crunch
Nothing beats the satisfaction of crispy fried clams when you want coastal comfort food that feels like a special treat.
Seafood lovers and casual diners alike find themselves drawn to the golden, crunchy exterior that makes every bite memorable.
Coastal restaurants have long featured this dish as a summertime favorite, but it belongs on tables year-round.
The appeal spans generations, from grandparents who remember boardwalk vendors to kids experiencing ocean flavors for the first time.
What makes this dish so universally loved is the way it balances richness with a light, satisfying crunch that never feels heavy.
Whether served at backyard gatherings or quiet weeknight dinners, it brings that seaside feeling home.
Preparing this beloved seafood classic means you can enjoy restaurant-worthy results without leaving the house.
Check out the full recipe below and see just how simple coastal cooking can be.
What Makes Fried Clams So Appealing
Fried Clams Ingredients Overview
Main Ingredients:Serving Accompaniments:What Tools Help with Fried Clams?
Fried Clams Crispy Cooking Method
Prepare the Clams
Grab your fresh clams and rinse them thoroughly under cool water. Gently pat each clam dry using paper towels, making sure to remove any excess moisture that might cause splattering when frying.
Create Flour Coating
Take a shallow dish and mix together 1 cup all-purpose flour, 1 teaspoon salt, and 1/2 teaspoon black pepper. This seasoned flour will give your clams a delicious crispy exterior.
Heat Cooking Oil
Pour vegetable oil into a deep fryer or large pot. Heat the oil to exactly 375°F. This precise temperature ensures your clams will cook evenly and become perfectly crisp.
Coat the Clams
Dip each clam into the seasoned flour mixture. Make sure to:
Fry the Clams
Carefully lower the flour-coated clams into the hot oil. Fry them in small batches to keep the oil temperature stable. Cook for 2-3 minutes until they turn a beautiful golden brown.
Drain and Rest
Using a slotted spoon, transfer the fried clams onto paper towels. This helps absorb extra oil and keeps the clams crispy.
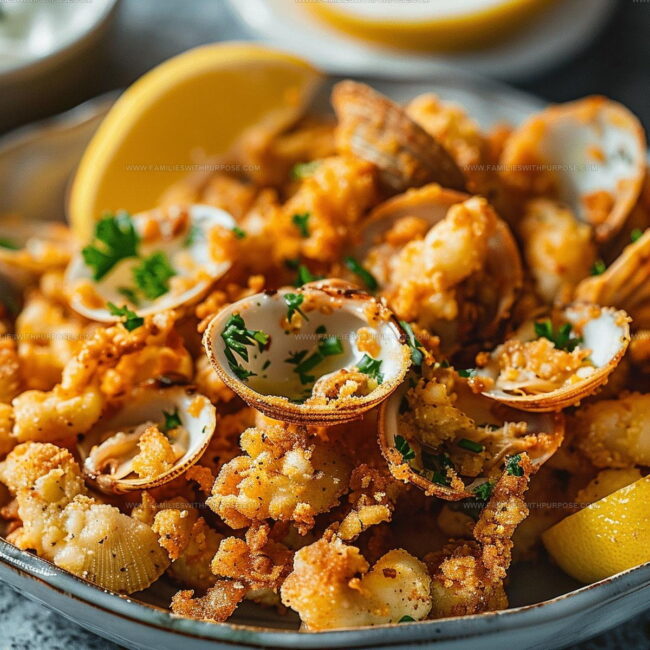
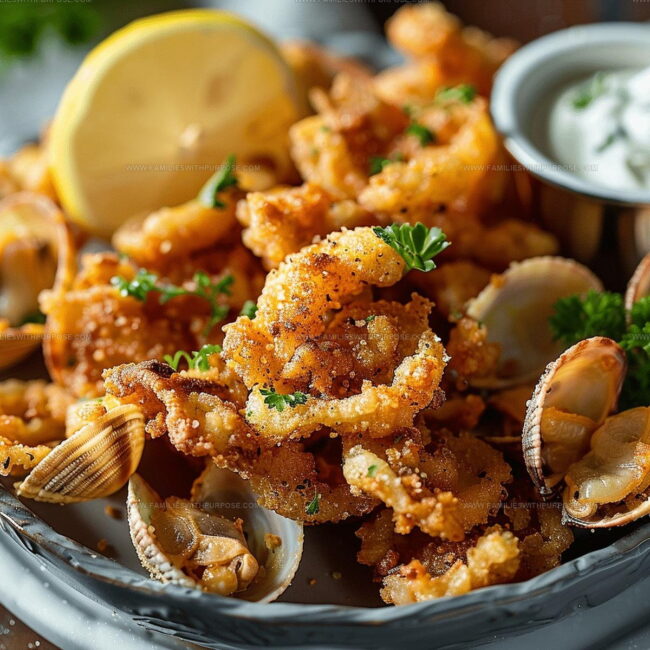
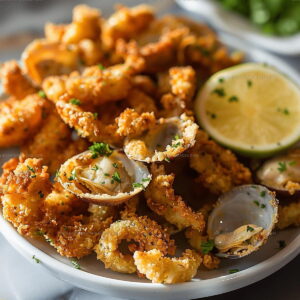
Serve and Enjoy
Place the hot clams on a serving plate. Arrange lemon wedges alongside and serve with tartar sauce if you like. Enjoy your crispy, delicious fried clams while they’re hot!
Cooking Tips for Fried Clams
Fried Clams with Crispy Coating Variations
How to Serve Fried Clams as a Crowd Favorite
Best Ways to Store Fried Clams
Fried Clams Recipe Reader FAQ
What kind of clams work best for frying?
Whole-belly soft-shell clams from the Northeast coast are perfect. They provide that classic, rich flavor and tender texture that makes fried clams delicious.
Can fresh clams be substituted with frozen?
Absolutely. Fresh is ideal, but high-quality frozen clams will work well if thawed completely and patted super dry before coating.
Why do clams need to be completely dry before frying?
Moisture prevents the flour from sticking and creates a soggy coating. Dry clams ensure a crisp, golden exterior that crackles when you bite into them.
What if the oil temperature isn’t exactly 375°F?
Close matters – between 365-385°F works fine. Use a kitchen thermometer for best results, and adjust heat to maintain consistent temperature.
How do fresh clams get cleaned before frying?
Rinse thoroughly under cold running water, checking for any sand or debris. Pat completely dry with paper towels to remove excess moisture.
Can the flour mixture be seasoned differently?
Definitely. Experiment with adding paprika, garlic powder, or cayenne for extra flavor. Keep salt and pepper as your base seasoning.
Crispy Fried Clams Recipe
- Total Time: 20 minutes
- Yield: 4 1x
Description
Crispy Fried Clams emerge from a sizzling bath of golden batter, delivering pure coastal comfort straight to your plate. Fresh clams coated in seasoned flour create a crunchy seafood treat that transports you to a New England shoreline.
Ingredients
Main Ingredients:
- 1 pound fresh clams
- 1 cup all-purpose flour
Seasonings:
- 1 teaspoon salt
- ½ teaspoon black pepper
Cooking and Serving:
- Vegetable oil
- Lemon wedges
- Tartar sauce
Instructions
- Carefully rinse your 1 pound of fresh shucked clams under cold running water. Pat them completely dry using paper towels.
- Create a seasoned coating by thoroughly combining 1 cup all-purpose flour, 1 teaspoon salt, and ½ teaspoon black pepper in a shallow dish.
- Pour vegetable oil into a deep fryer or large pot, heating it precisely to 375°F. Use a cooking thermometer to confirm accurate temperature.
- Dredge each clam through your seasoned flour mixture, gently shaking off excess coating to ensure a light, even layer.
- Lower clams carefully into the 375°F hot oil, working in small batches to prevent overcrowding and maintain consistent oil temperature.
- Fry each batch of clams for exactly 2-3 minutes, watching for a uniform golden brown color and crispy exterior.
- Extract fried clams using a slotted spoon, transferring them onto paper towels to absorb excess oil and maintain crispiness.
- Arrange hot clams on a serving plate, accompanied by fresh lemon wedges and optional tartar sauce for dipping.
Notes
- Fresh clams work best when they’re plump and have a clean, briny smell without any fishiness.
- Thoroughly pat clams dry before coating to help the flour adhere and create a crispier exterior.
- Use a deep-fry thermometer to maintain consistent oil temperature for even, golden-brown results.
- For a gluten-free version, swap wheat flour with cornmeal or rice flour to get an equally crunchy coating.
- Prep Time: 10 minutes
- Cook Time: 10 minutes
- Category: Fried
- Method: Frying
- Cuisine: American
Nutrition
- Serving Size: 4
- Calories: 420 kcal
- Sugar: 1 g
- Sodium: 600 mg
- Fat: 18 g
- Saturated Fat: 3 g
- Unsaturated Fat: 12 g
- Trans Fat: 0.2 g
- Carbohydrates: 40 g
- Fiber: 2 g
- Protein: 25 g
- Cholesterol: 75 mg
Sophie Lane
Recipe Developer
Expertise
Family-friendly Meals, Simple Healthy Cooking, Ingredient Substitutions, Beginner-friendly Recipes, Flexible Meal Prep
Education
- Program: Professional Cook Certificate
- Focus: Online culinary training covering knife skills, cooking techniques, and plant-based and modern cooking approaches.
Schoolcraft CollegeSophie brings a calm and flexible approach to Families With Purpose. Based in Fort Collins, Colorado, she creates recipes that feel simple, clear, and easy to make at home. She focuses on family-friendly meals, healthy everyday cooking, ingredient swaps, and beginner-friendly ideas. Sophie helps make each recipe approachable and easy to follow, especially for busy families who need meals that can bend with the day.