
Crunchy Japanese Fried Chicken Recipe That Beats Takeout
Crispy Japanese fried chicken has become a global sensation for good reason.
Light, crunchy coating meets incredibly juicy meat in what fans know as one of Asia's most addictive comfort foods.
Street vendors and high-end restaurants alike serve their own versions, proving its universal appeal across all dining settings.
The double-frying technique creates an unmatched texture that stays remarkably crunchy even after cooling down.
Bold, savory flavors mingle with subtle hints of garlic and ginger in every bite.
Whether you need a crowd-pleasing appetizer or a satisfying main dish, few options deliver such consistent satisfaction.
Perfect for game day gatherings, casual weeknight meals, or whenever a craving strikes, karaage never disappoints.
Standout Features of Japanese Fried Chicken
Ingredient Breakdown for Japanese Fried Chicken
Main Protein:Marinade Ingredients:Coating and Frying:What You’ll Need for Japanese Fried Chicken
How to Fry Japanese Chicken Ultra Crispy
Marinate the Chicken
Take those 4 thigh fillets and pop them into a ziplock bag. You’ll want to add these tasty ingredients:
Seal the bag and give it a gentle massage to make sure every inch of chicken gets coated. Tuck the bag in the refrigerator for 30 minutes while the flavors work their magic.
Prepare the Coating
Grab your 1 cup of corn flour and spread it out on a plate. Drain the chicken from the marinade and roll each piece through the flour until completely covered. Shake off any extra coating.
First Frying Round
Heat 4 cups of vegetable oil in a deep pot to 160°C (320°F). Carefully lower the chicken pieces into the oil, working in small batches. Let them fry for 3 minutes until they turn a light golden color.
First Rest
Remove the chicken and let it drain on paper towels for 4 minutes. This helps get rid of extra oil and lets the chicken settle.
Final Crispy Fry
Bump up the oil temperature to 190°C (374°F). Drop the chicken back into the hot oil for another quick fry, about 45 seconds. You’re looking for a deep golden brown that makes your mouth water.
Serve and Enjoy
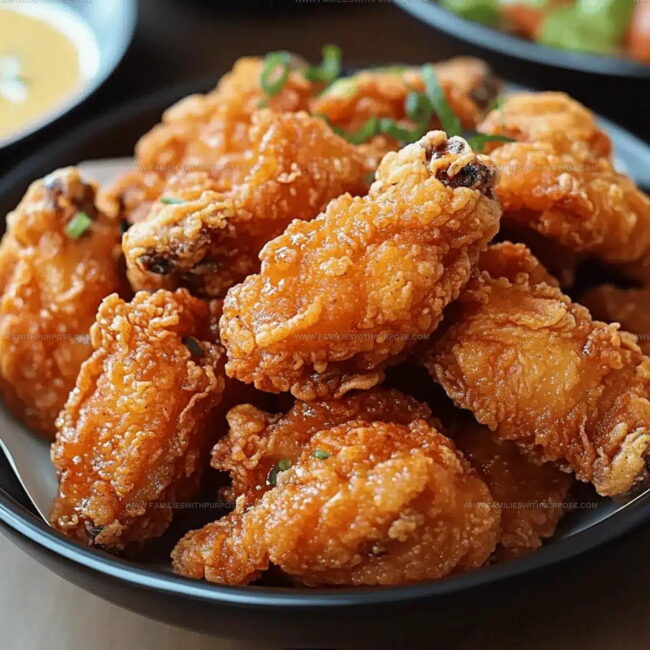
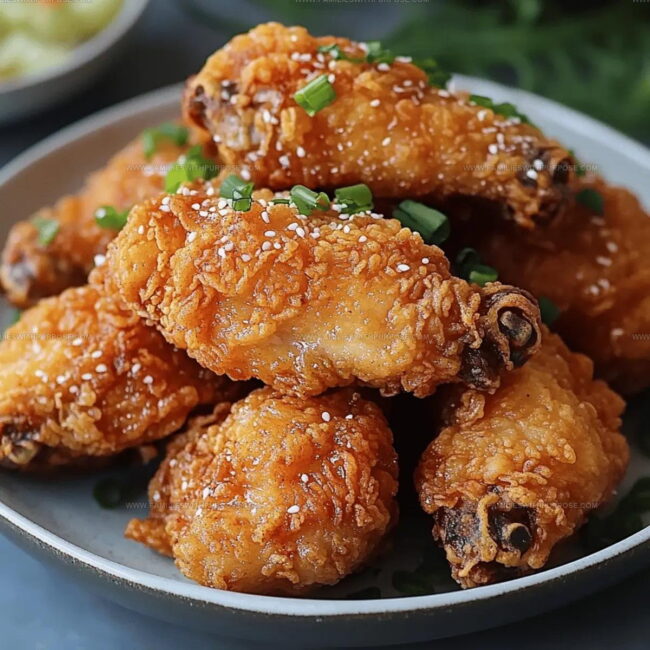
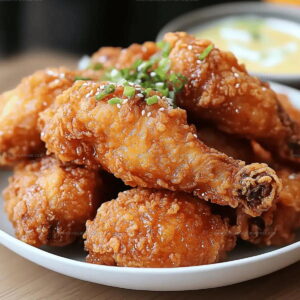
Transfer the crispy chicken to a serving plate. Sprinkle some chopped green onions on top if you’re feeling fancy. Grab some napkins – this gets deliciously messy!
Cooking Insights for Japanese Fried Chicken
What Variations Suit Japanese Fried Chicken
What Are Smart Ways to Serve Japanese Fried Chicken
Japanese Fried Chicken Storage After Frying
Japanese Fried Chicken Reader Q&A
What kind of chicken works best for Karaage?
Chicken thighs are perfect because they stay super tender and juicy, with more flavor compared to chicken breast.
Can corn flour be replaced with something else?
Potato starch or regular flour will work, but corn flour creates the crispiest exterior that makes Karaage special.
Why do we fry twice?
The double-frying technique helps create an incredibly crispy exterior while keeping the inside tender and moist – it’s the secret to authentic Japanese fried chicken.
Is sake necessary for the marinade?
While sake adds depth, you can substitute with rice wine or dry white wine if sake isn’t available in your pantry.
How do I know the oil is the right temperature?
Use a cooking thermometer for precise results, or drop a small piece of bread into the oil – if it sizzles and turns golden quickly, the temperature is perfect.
Can Karaage be made ahead of time?
Marinate the chicken up to 8 hours in advance, but fry just before serving to maintain maximum crispiness.
Crispy Japanese Fried Chicken Recipe
- Total Time: 37-69 minutes
- Yield: 4 1x
Description
Karaage brings crispy, juicy goodness straight from Japanese kitchens to your plate. Marinated in soy and ginger, these golden chicken bites deliver seriously addictive flavor that makes dinner feel like a fun celebration.
Ingredients
Main Protein:
- 4 thigh fillets
Marinade and Seasoning:
- ½ cup soy sauce
- ¼ cup cooking sake
- 2 tablespoons mirin
- 1 tablespoon fresh ginger
Coating and Cooking:
- 1 cup corn flour
- 4 cups vegetable oil
Instructions
- Submerge 4 skin-on thigh fillets into a ziplock bag containing ½ cup soy sauce, ¼ cup cooking sake, 2 tablespoons mirin, and 1 tablespoon grated ginger. Seal and gently massage the bag to distribute marinade evenly.
- Refrigerate the marinated chicken for 45 minutes, allowing flavors to penetrate the meat thoroughly.
- Pour 4 cups vegetable oil into a deep pot. Heat the oil to 160°C (320°F), monitoring temperature with a digital thermometer.
- Remove chicken from marinade and thoroughly pat each fillet dry with paper towels. Coat each piece completely with 1 cup corn flour, ensuring an even, light layer.
- Gently lower 2 chicken pieces into the hot oil. Fry for exactly 3 minutes until a pale golden color develops.
- Transfer fried chicken to a wire rack lined with paper towels. Allow excess oil to drain for 4 minutes.
- Increase oil temperature to 190°C (374°F). Carefully return chicken to the oil for a second fry lasting 45 seconds.
- Remove chicken when the exterior turns a deep, crispy golden brown. Let rest on paper towels for 2 minutes before serving.
Notes
- Choose chicken thighs with some fat for extra juiciness and flavor, as they’ll stay more tender during frying.
- Marinate the chicken for at least 30 minutes but no longer than 2 hours to prevent the meat from becoming too salty.
- Pat the chicken completely dry before coating with corn flour to ensure a crispy, light exterior that won’t become soggy.
- For gluten-free version, replace wheat-based soy sauce with tamari and use potato starch instead of corn flour for coating.
- Prep Time: 30-60 minutes
- Cook Time: 7-9 minutes
- Category: Fried
- Method: Frying
- Cuisine: Japanese
Nutrition
- Serving Size: 4
- Calories: 427
- Sugar: 5 g
- Sodium: 1200 mg
- Fat: 28 g
- Saturated Fat: 5 g
- Unsaturated Fat: 22 g
- Trans Fat: 0 g
- Carbohydrates: 18 g
- Fiber: 1 g
- Protein: 23 g
- Cholesterol: 90 mg
Mason Carter
Founder
Expertise
Family Meal Routines, Simple One-pot Meals, Budget-friendly Cooking, Quick Dinner Planning, Batch Cooking Systems
Education
- Certificate: Culinary Arts
- Focus: Training in core cooking techniques, kitchen operations, and real food preparation through hands-on experience in professional-style kitchens.
Penn Foster Career School (Online)Mason is the founder of Families With Purpose and the heart behind its simple, family-focused recipes. Based in Greenville, South Carolina, he creates meals that fit into busy routines and bring people back to the table. He focuses on easy dinners, one-pot meals, budget-friendly cooking, and practical weekly meal planning. Mason has built a recipe collection shaped by real family life, with clear methods and repeatable meals that work on everyday schedules.