Fried Cheese Curds Recipe That Stay Golden And Crunchy
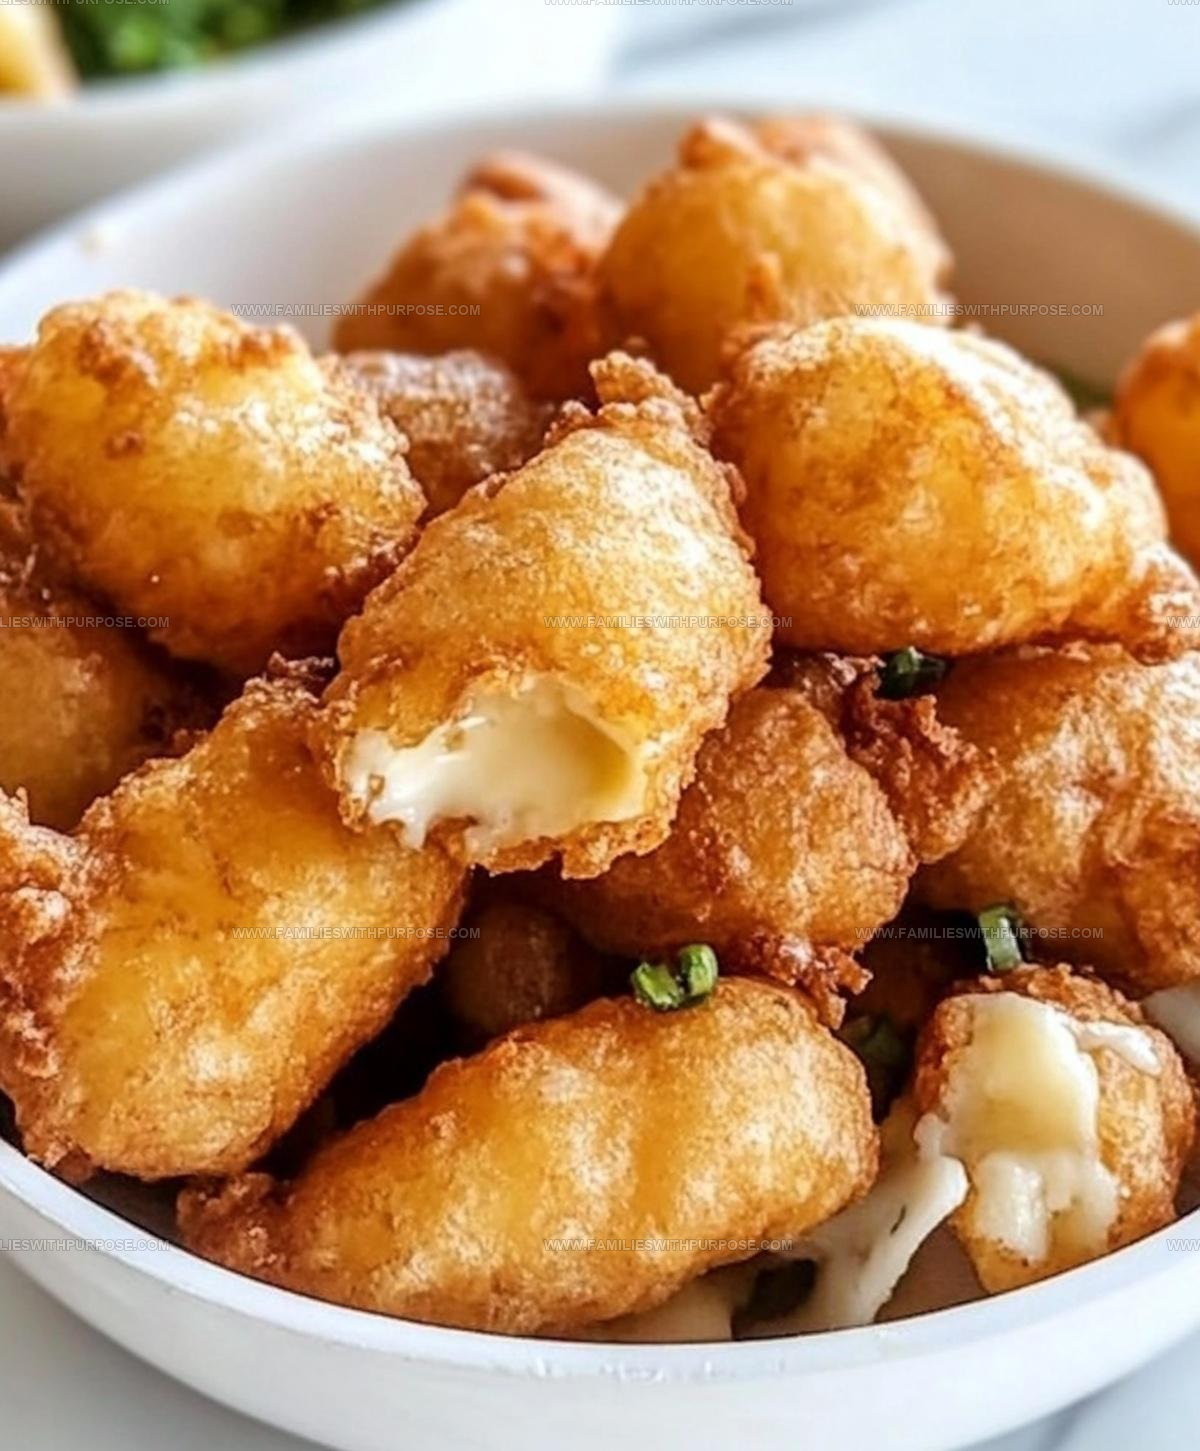
Deep fried cheese curds are the ultimate snack that proves comfort food doesn't need to be complicated.
Crispy on the outside and wonderfully gooey inside, they deliver that satisfying crunch followed by melted perfection in every bite.
Born in the heart of the Midwest, particularly Wisconsin, they've become a favorite at state fairs, sports bars, and backyard gatherings across the country.
What makes them so appealing is how they manage to feel both indulgent and fun at the same time.
They work beautifully as an appetizer for game day parties or as a casual treat when you want something special.
The combination of crispy coating and melty center creates a contrast that keeps people coming back for more.
What Makes Fresh Fried Cheese Curds So Addictive
Full Ingredient List for Fried Cheese Curds
Main Ingredients:Tool List for Fried Cheese Curds
How to Fry Fresh Cheese Curds Until Crisp
Prepare the Frying Oil
Get a large pan or deep fryer ready and heat the canola oil to exactly 375°F. Grab your kitchen thermometer to keep an eye on the temperature – this is super important for crispy, not greasy cheese curds.
Create the Batter
Grab a medium bowl and whisk together your ingredients for the perfect coating:
Blend everything until your batter looks smooth and creamy with no lumps.
Prep the Cheese Curds
Take your 2 pounds of cheese curds and get ready to transform them into crispy delights. Have a paper towel-lined plate nearby for draining.
First Batch of Frying
Dunk about 8-10 cheese curds into the batter, making sure each one gets a complete coating. Carefully lower them into the hot oil. Watch them turn golden brown – this takes just seconds, so stay alert!
Drain and Cool
Remove the golden curds with a slotted spoon and let them drain on the paper towels. The towels will catch any extra oil and help keep your snacks crisp.
Continuing the Frying
Keep working in small batches, always maintaining that 375°F oil temperature. Repeat the coating and frying process until all your cheese curds are transformed into crispy, cheesy bites of happiness.
Final Check
Do a quick temperature check between batches. If the oil drops, give it a moment to heat back up to ensure each batch comes out perfectly crisp and golden.
Extra Kitchen Insight for Fresh Fried Cheese Curds
Cheese Curd Coating and Seasoning Twists
Fun Ways to Enjoy Fried Cheese Curds
Best Storage Practices For Fresh Cheese Curds
Fried Cheese Curds FAQs
What makes cheese curds crispy?
Coating them in a thin, light batter and frying at exactly 375°F ensures a perfectly crisp exterior that shatters when you bite into it.
Can cheese curds be frozen before frying?
Fresh cheese curds work best. Frozen curds will release too much moisture and make your batter soggy.
How do I know when the cheese curds are done?
They should turn a beautiful golden brown and float to the top of the oil in just 15-20 seconds. Pull them out before the cheese starts to leak.
What type of cheese curds work best?
Fresh, room-temperature Wisconsin or Vermont cheese curds have the perfect squeaky texture and melt beautifully when fried.
Why did my cheese leak out during frying?
Your oil was likely too hot or you left the curds in too long. Keep the temperature steady and fry quickly.
Can I reheat these cheese curds?
Reheating makes them tough. Fresh is always best – eat them immediately after frying for maximum crunch and gooey cheese center.

Deep Fried Cheese Curds Recipe
- Total Time: 15 minutes
- Yield: 4 1x
Description
Cheese Curds sizzle straight from the fryer, delivering a crispy golden coating that crackles with each delightful bite. Grab some ranch or marinara for dipping and watch these Wisconsin classics disappear faster than you can say “cheese”!
Ingredients
Main Ingredients:
- 2 pounds cheese curds
- 1 ½ cups all-purpose flour
- 1 ½ quarts canola oil
Wet Ingredients:
- 1 ½ cups buttermilk
- 1 large egg
Seasonings and Leavening:
- 1 teaspoon baking soda
- 2 teaspoons garlic salt
Instructions
- Prepare a large pan or deep fryer and heat 1 ½ quarts canola oil to exactly 375°F using a kitchen thermometer for precise temperature control.
- Combine 1 ½ cups buttermilk, 1 ½ cups all-purpose flour, 1 teaspoon baking soda, 2 teaspoons garlic salt, and 1 large egg in a medium bowl, whisking thoroughly until your batter becomes completely smooth.
- Select 8-10 cheese curds from your 2-pound batch and carefully submerge them in the prepared batter, ensuring each curd is evenly coated.
- Gently lower the batter-covered curds into the 375°F oil, allowing them to fry for 15-20 seconds until they transform into a gorgeous golden brown color.
- Carefully extract the fried curds using a slotted spoon and transfer them onto a layer of paper towels, which will absorb excess oil.
- Return your oil temperature back to 375°F between batches and continue frying the remaining cheese curds, maintaining consistent heat and working in small clusters.
- Serve the crispy cheese curds immediately while they’re hot and at peak crunchiness, providing maximum flavor and texture.
Notes
- Cheese curds must be cold and fresh for the best texture and crispiest coating.
- Always pat cheese curds completely dry before battering to prevent oil splattering and ensure better adhesion.
- Test one curd first to check batter consistency and oil temperature, adjusting as needed before frying the whole batch.
- For a gluten-free version, swap all-purpose flour with rice flour or a gluten-free blend, which can create an even crispier exterior.
- Prep Time: 10 minutes
- Cook Time: 5 minutes
- Category: Deep-Fried
- Method: Frying
- Cuisine: American
Nutrition
- Serving Size: 4
- Calories: 697 kcal
- Sugar: 1 g
- Sodium: 1367 mg
- Fat: 49 g
- Saturated Fat: 30 g
- Unsaturated Fat: 18 g
- Trans Fat: 0.5 g
- Carbohydrates: 29 g
- Fiber: 1 g
- Protein: 39 g
- Cholesterol: 105 mg
Mason Carter
Founder
Expertise
Family Meal Routines, Simple One-pot Meals, Budget-friendly Cooking, Quick Dinner Planning, Batch Cooking Systems
Education
- Certificate: Culinary Arts
- Focus: Training in core cooking techniques, kitchen operations, and real food preparation through hands-on experience in professional-style kitchens.
Penn Foster Career School (Online)Mason is the founder of Families With Purpose and the heart behind its simple, family-focused recipes. Based in Greenville, South Carolina, he creates meals that fit into busy routines and bring people back to the table. He focuses on easy dinners, one-pot meals, budget-friendly cooking, and practical weekly meal planning. Mason has built a recipe collection shaped by real family life, with clear methods and repeatable meals that work on everyday schedules.