
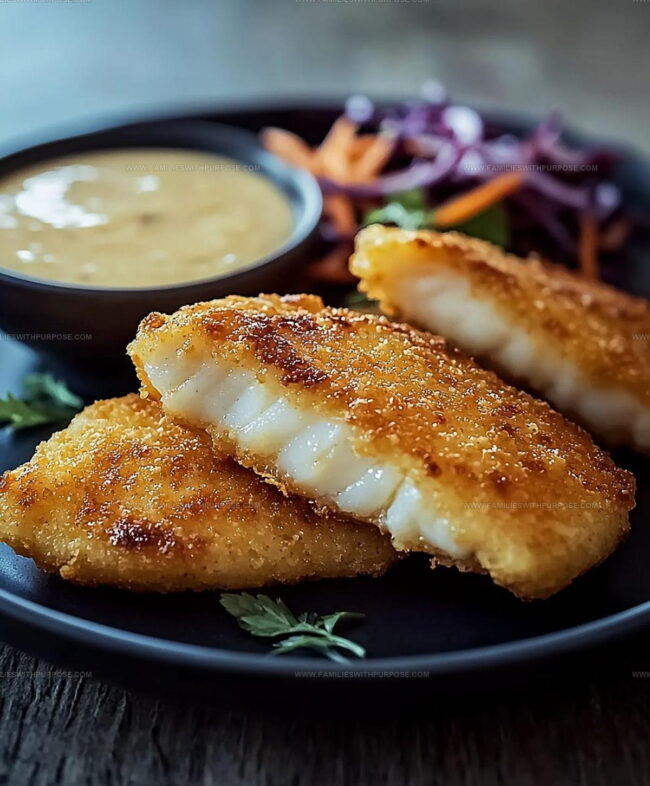
Crispy Fried Fish Recipe for a Golden Dinner Favorite
Fried fish recipe enthusiasts know there's something special about golden, crispy seafood that offers comfort to any table.
Whether dinner calls for something quick on a weeknight or you need an impressive dish for weekend gatherings, perfectly cooked fish delivers every time.
The appeal spans generations and cultures, making it a go-to choice for countless occasions throughout the year.
Light yet satisfying, this meal works beautifully alongside simple sides or as part of a larger spread.
The result is always rewarding: a meal that feels both homey and a touch celebratory.
When hunger strikes and you want something reliable that everyone will enjoy, few options compete with this classic favorite.
Best Reasons to Cook Fried Fish at Home
Ingredient Breakdown for Fried Fish
Main Fish:Breading Dry Ingredients:Wet and Crispy Coating:Frying and Serving:Tools That Fry Classic Fried Fish
How to Fry Classic Fried Fish
Prepare the Fish
Grab those 1.5 lbs of white fish fillets and pat them completely dry with paper towels. If the fillets are large, slice them into smaller pieces that will be easy to handle in the skillet. Sprinkle a tiny bit of salt and pepper over your fish for extra flavor.
Create Breading Stations
Set up three shallow dishes on your counter. This is where the magic of crispy fish happens. You’ll need space for flour, wet mixture, and breadcrumbs.
Mix Flour Blend
In the first dish, combine your 1 cup of all-purpose flour with these spices:
Whisk everything together until well combined.
Prepare Wet Mixture
In the second dish, whisk 1 cup milk and 1 large egg until smooth. The mixture should look slightly frothy and well blended.
Ready the Breadcrumbs
Pour 2 cups of Panko breadcrumbs into the third dish. Sprinkle a pinch of salt and pepper over them for extra seasoning.
Coat the Fish
Dunk each fish fillet first in the flour mixture, shaking off any extra. Next, dip it into the milk and egg blend, letting excess drip away. Finally, roll the fillet in breadcrumbs, pressing gently to make sure the coating sticks well.
Let Breading Set
Place your breaded fish pieces on a wire rack and let them rest for about 10 minutes. This helps the coating stick better during frying.
Heat the Oil
Pour 3-4 cups of vegetable oil into a large skillet. Heat the oil to exactly 350-375F, which is perfect for crispy frying.
Fry the Fish
Carefully slide the breaded fish into the hot oil. Don’t crowd the pan – give each piece space. Fry for 3-4 minutes on each side until the coating turns a beautiful golden brown. The fish is done when it reaches an internal temperature of 145F.
Drain and Rest
Use a slotted spoon to transfer the fried fish onto a wire rack lined with paper towels. This helps drain extra oil and keeps the coating crisp.
Serve and Enjoy
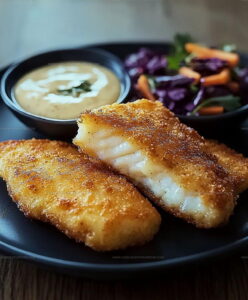
Plate your crispy fish immediately. Serve with fresh lemon wedges and tartar sauce on the side for anyone who wants extra flavor.
Notes That Matter for Fried Fish Texture
Which Fried Fish Variations Are Most Common
Simple Serving Ideas for Fried Fish
Best Storage Tips for Fried Fish
Fried Fish Reader Questions Answered
What type of fish works best for frying?
Choose white, mild fish like cod, haddock, tilapia, or halibut. These fish have a delicate texture and absorb seasoning beautifully without overpowering flavors.
How do I prevent the breading from falling off during frying?
Make sure your fish is completely dry before breading. Press the breadcrumbs firmly onto the fish and let the breaded fish rest for 10-15 minutes before frying to help the coating stick better.
Can I use a different coating instead of breadcrumbs?
Absolutely! Panko breadcrumbs, crushed cornflakes, or even crushed crackers work great. Each option gives a slightly different crunch and texture to your fish.
Why is maintaining oil temperature important?
Consistent oil temperature ensures crispy, golden-brown fish without becoming greasy. If the oil is too cool, the fish absorbs more oil; if too hot, the outside burns before the inside cooks.
How can I tell if the fish is fully cooked?
The fish should be golden brown on the outside and flake easily with a fork. The internal temperature should reach 145F, and the fish should look opaque and white throughout.
Fried Fish Recipe
- Total Time: 26-33 minutes
- Yield: 4 1x
Description
Golden crispy Fried Fish makes your weekend dinner feel like a seaside escape. Perfectly seasoned and crunchy, this classic dish brings comfort right to your plate.
Ingredients
Main Ingredients:
- 1.5 lbs white fish fillets
- 2 cups breadcrumbs
- 1 cup all-purpose flour
- 1 cup milk
Seasoning Ingredients:
- 1 teaspoon salt
- ½ teaspoon black pepper
- ½ teaspoon garlic powder
- ¼ teaspoon paprika
- ¼ teaspoon cayenne pepper
Binding and Serving Ingredients:
- 1 large egg
- 3–4 cups vegetable oil
- 1 lemon
- 1 tartar sauce
Instructions
- Thoroughly pat 1.5 lbs white fish fillets dry with paper towels. Slice into manageable 2-3 inch pieces if needed.
- Create three shallow dishes for breading: first with 1 cup flour mixture, second with 1 cup milk and 1 egg blend, third with 2 cups breadcrumbs.
- Whisk 1 cup flour with 1 teaspoon salt, ½ teaspoon black pepper, ½ teaspoon garlic powder, ¼ teaspoon paprika, and ¼ teaspoon cayenne pepper.
- In the second dish, combine 1 cup milk and 1 large egg, beating until smooth and uniform.
- Pour 2 cups breadcrumbs into the third dish. Sprinkle a pinch of salt and pepper for extra seasoning.
- Coat each fish piece first in flour mixture, shaking off excess. Dunk into milk-egg blend, allowing drips to fall away.
- Roll coated fish in breadcrumbs, pressing gently to ensure full coverage.
- Rest breaded fish pieces on a wire rack for 10-15 minutes to help coating adhere.
- Pour 3-4 cups vegetable oil into a heavy skillet. Heat to 350-375F, monitoring temperature with a kitchen thermometer.
- Gently slide breaded fish into hot oil, leaving space between pieces. Fry 3-4 minutes per side until golden brown.
- Check internal fish temperature reaches 145F using a meat thermometer.
- Transfer fried fish to a wire rack lined with paper towels to drain excess oil.
- Continue frying remaining pieces, maintaining consistent oil temperature.
- Serve immediately with fresh lemon wedges and optional tartar sauce.
Notes
- Ensure fish is super dry before breading to help the coating stick and create a crispy exterior.
- Use a thermometer to maintain consistent oil temperature, preventing greasy or undercooked fish.
- For a gluten-free version, swap wheat flour with rice flour or cornmeal and use gluten-free breadcrumbs.
- Let the breaded fish rest before frying to help the coating adhere better and create a crunchier texture.
- Prep Time: 20-25 minutes
- Cook Time: 6-8 minutes
- Category: Fried
- Method: Frying
- Cuisine: American
Nutrition
- Serving Size: 4
- Calories: 489 kcal
- Sugar: 1 g
- Sodium: 725 mg
- Fat: 18 g
- Saturated Fat: 3 g
- Unsaturated Fat: 14 g
- Trans Fat: 0 g
- Carbohydrates: 49 g
- Fiber: 2 g
- Protein: 38 g
- Cholesterol: 85 mg
Sophie Lane
Recipe Developer
Expertise
Family-friendly Meals, Simple Healthy Cooking, Ingredient Substitutions, Beginner-friendly Recipes, Flexible Meal Prep
Education
- Program: Professional Cook Certificate
- Focus: Online culinary training covering knife skills, cooking techniques, and plant-based and modern cooking approaches.
Schoolcraft CollegeSophie brings a calm and flexible approach to Families With Purpose. Based in Fort Collins, Colorado, she creates recipes that feel simple, clear, and easy to make at home. She focuses on family-friendly meals, healthy everyday cooking, ingredient swaps, and beginner-friendly ideas. Sophie helps make each recipe approachable and easy to follow, especially for busy families who need meals that can bend with the day.