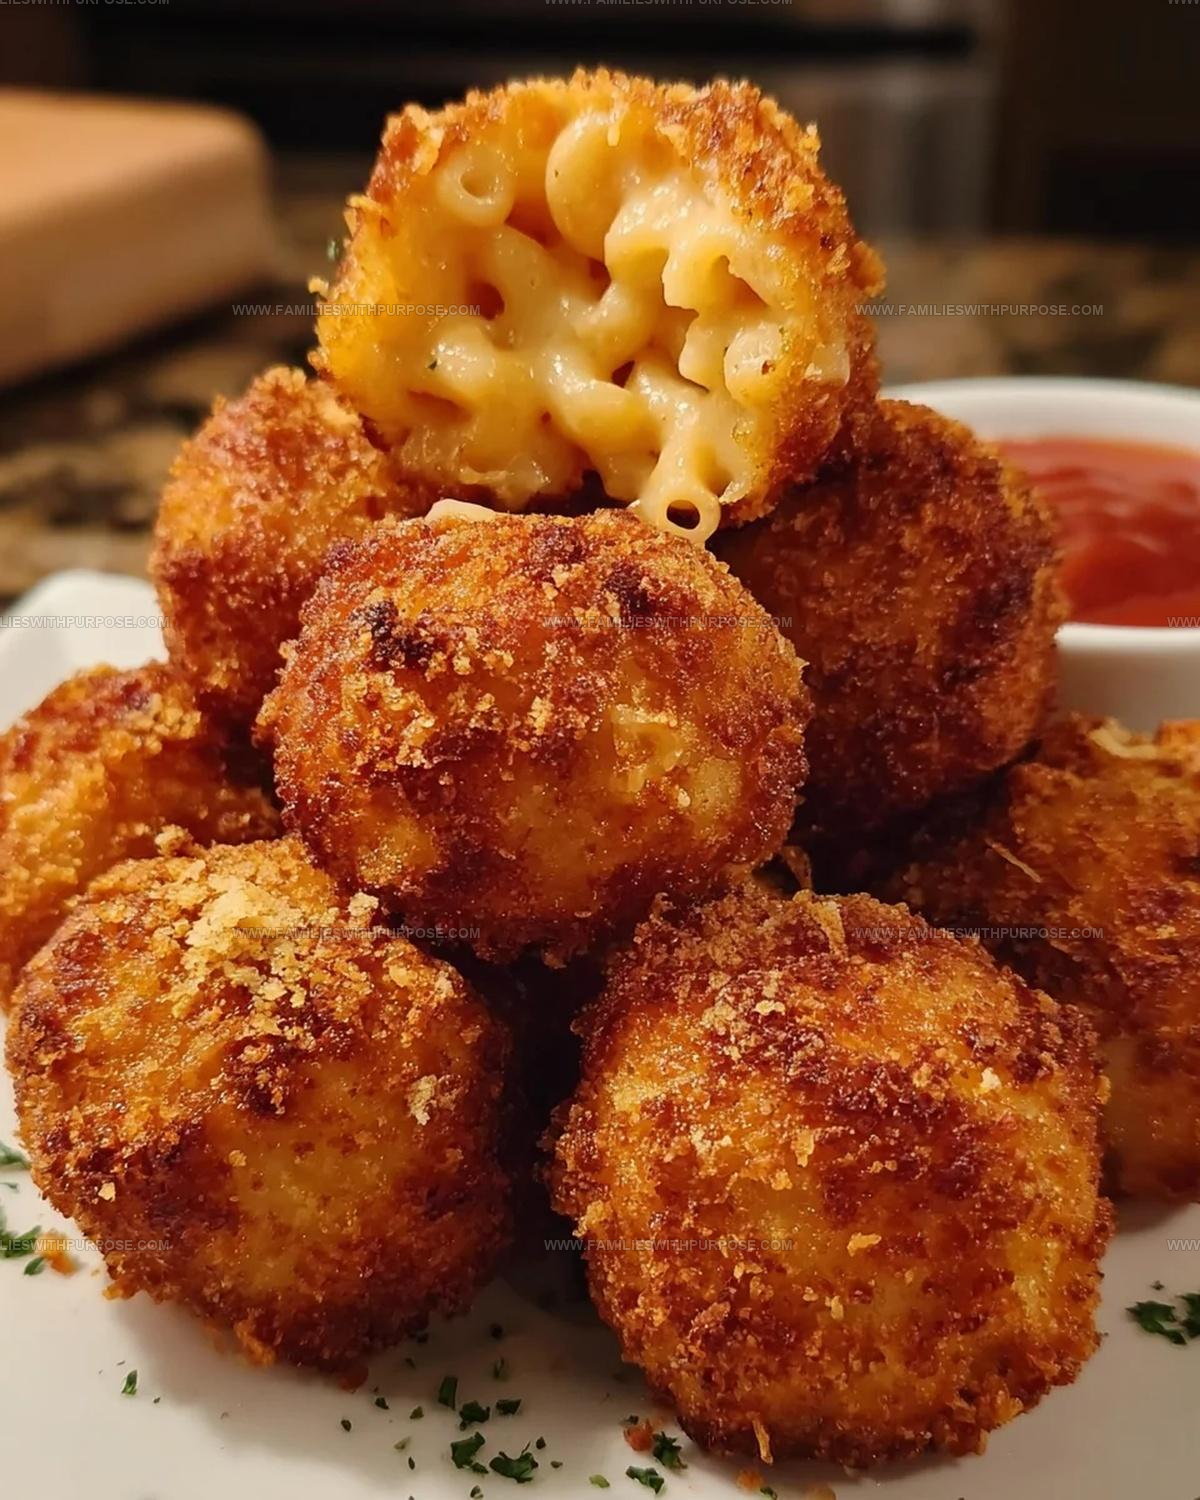
Crispy Mac And Cheese Balls Recipe With Golden Crunch
Fried mac cheese balls deliver pure comfort in every crispy, golden bite.
Creamy pasta tucked inside a crunchy coating creates a contrast that feels both familiar and exciting at the same time.
They work beautifully as party snacks, game day treats, or anytime you crave something satisfying and fun to eat.
The appeal crosses all age groups because everyone loves portable food that tastes indulgent.
Serving them offers smiles to faces and keeps guests coming back for more throughout any gathering.
They're surprisingly simple to prepare despite looking impressive on any table.
You can make them ahead for stress-free entertaining that still feels special and homemade.
Check out the full recipe below and see just how easy crowd-pleasing appetizers can be.
Why You’ll Love Fried Mac And Cheese Balls

What Ingredients Go Into Fried Mac Cheese Balls
Main Mac and Cheese Components:Seasoning Enhancers:Breading Ingredients:Frying Component:Necessary Tools for Fried Mac Cheese Balls
Fried Mac and Cheese Balls Preparation Steps
Prep the Mac and Cheese Base
Get that mac and cheese from the fridge – it needs to be super cold and firm. If yours just came out of the pot, pop it in the refrigerator for 2 hours. Grab a large mixing bowl and toss in these seasoning friends:
Mix everything into the chilled mac and cheese until it’s all combined.
Shape the Cheese Balls
Using your hands or a cookie scoop, roll the mixture into perfect 1-inch balls. Place each ball on a parchment-lined baking sheet. Slide the tray into the freezer for 30 minutes – this helps them stay together when frying.
Create the Coating Station
Set up three shallow bowls on your counter:
First bowl: 1 cup all-purpose flour
Second bowl: Whisk 2 large eggs with 2 tablespoons milk
Third bowl: Mix 1 1/2 cups panko breadcrumbs with:
Bread the Cheese Balls
Roll each ball through the stations – first flour, then egg wash, then breadcrumb mixture. Press gently so the coating sticks nicely. Place breaded balls back on the baking sheet.
Freeze Before Frying
Return the breaded balls to the freezer for 15 more minutes. This extra chill helps them stay intact during frying.
Heat the Oil
Pour 2-3 inches of vegetable oil into a heavy pot. Use a thermometer to get the temperature exactly to 350°F.
Fry to Golden Perfection
Carefully drop balls into the hot oil in small batches. Fry for 2-3 minutes, turning to get an all-over golden brown color. Don’t overcrowd the pot.
Drain and Serve
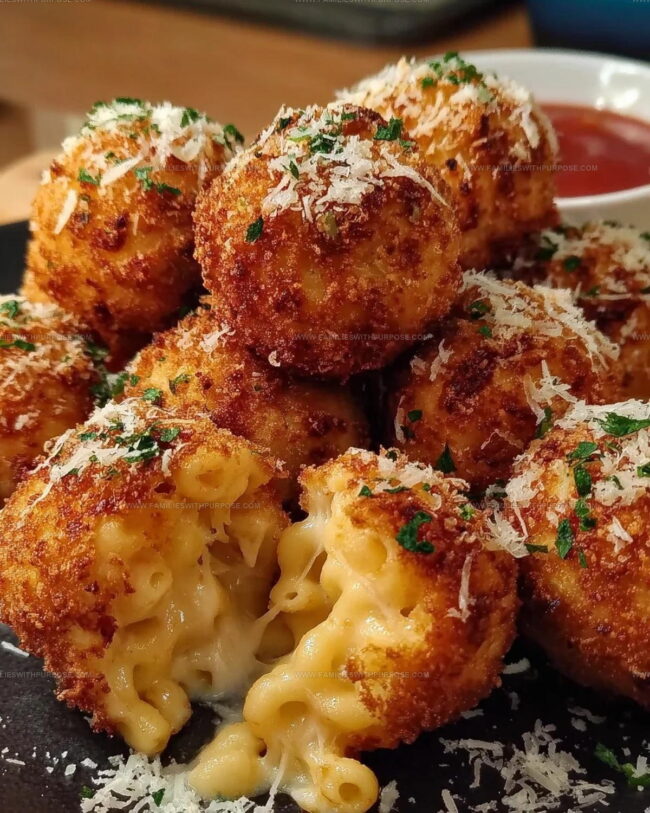
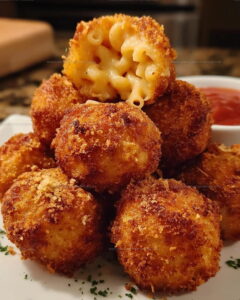
Lift fried balls out with a slotted spoon and let them drain on paper towels. Serve immediately with your favorite dipping sauce while they’re hot and crispy.
Perfect Frying Tips For Fried Mac Cheese Balls
Fried Mac and Cheese Ball Creative Spins
Snack-Style Ways to Serve Fried Mac Cheese Balls
Smart Storage Notes for Fried Mac Cheese Balls
Fried Mac and Cheese Balls Questions Answered
Can I make these ahead of time?
Absolutely! You can prepare the mac and cheese balls up to the breading stage, then freeze them on a baking sheet. Once frozen solid, transfer to a freezer bag and store for up to 2 months. Fry directly from frozen, adding an extra minute to cooking time.
Why do the mac and cheese balls need to be chilled?
Chilling helps the balls hold their shape during breading and frying. Cold mac and cheese is firmer and less likely to fall apart in hot oil, ensuring a perfect crispy exterior.
What if I do not have panko breadcrumbs?
Regular breadcrumbs work fine, but panko creates a crunchier, lighter coating. For extra texture, mix in some crushed crackers or cornflake crumbs with your breadcrumbs.
Can these be baked instead of fried?
Baking is possible, but the texture will not be as crispy. If you want to bake, spray the balls with cooking spray and bake at 425°F for 15-20 minutes, turning halfway through.
Fried Mac Cheese Balls Recipe
- Total Time: 2 hours 51 minutes
- Yield: 4 1x
Description
Crispy mac and cheese balls deliver pure comfort straight to your plate, turning leftover mac into a crowd-pleasing snack that disappears faster than you can fry them up. Coating these cheesy nuggets in seasoned breadcrumbs and deep-frying creates an irresistible golden crunch that makes appetizer time seriously delicious.
Ingredients
Main Ingredients:
- 3 cups mac and cheese, cooked and chilled
- 1 cup shredded cheddar cheese
- 1 ½ cups panko breadcrumbs
Seasoning:
- ½ teaspoon garlic powder
- ½ teaspoon onion powder
- ½ teaspoon smoked paprika
- 1 teaspoon salt
- ¼ teaspoon black pepper
Binding and Coating:
- 1 cup all-purpose flour
- 2 large eggs
- 2 tablespoons milk
- ½ cup grated Parmesan cheese
- Vegetable oil for deep frying
Instructions
- Chill your freshly prepared mac and cheese for 2 hours to ensure a firm consistency that supports ball formation.
- Blend the cold mac and cheese with 1 cup cheddar cheese, ½ teaspoon each of garlic powder, onion powder, smoked paprika, salt, and ¼ teaspoon black pepper until thoroughly incorporated.
- Shape the mixture into compact 1-inch spheres using your hands or a cookie scoop. Arrange them on a parchment-lined baking sheet.
- Place the mac and cheese balls in the freezer for 30 minutes to stabilize their structure before breading.
- Create three breading stations: 1 cup flour in the first bowl, 2 eggs whisked with 2 tablespoons milk in the second, and 1 ½ cups panko combined with ½ cup Parmesan, ½ teaspoon salt, and ½ teaspoon pepper in the third.
- Roll each ball first in flour, then dunk in egg mixture, and finally coat generously with panko mixture, pressing gently to ensure complete coverage.
- Return the breaded balls to the baking sheet and freeze for an additional 15 minutes to set the coating.
- Pour vegetable oil 2-3 inches deep in a heavy pot, heating to exactly 350°F using a kitchen thermometer for precision.
- Gently lower balls into hot oil in small batches, avoiding overcrowding. Fry for 2-3 minutes per side until your exterior turns a rich, golden brown.
- Extract balls with a slotted spoon and drain on paper towels to remove excess oil. Serve immediately while crisp and steaming hot.
Notes
- Chilling the mac and cheese is a game-changer for keeping these balls intact, so never skip the refrigeration step.
- Freezing before breading and after breading helps create an extra-crispy exterior that won’t fall apart in the hot oil.
- Use a deep-fry thermometer to ensure the oil stays at 350°F, which guarantees a perfectly crispy golden coating without burning.
- For gluten-free options, swap regular flour and panko with gluten-free alternatives, and the recipe remains just as delicious.
- Prep Time: 2 hours 45 minutes
- Cook Time: 6 minutes
- Category: Fried
- Method: Frying
- Cuisine: American
Nutrition
- Serving Size: 4
- Calories: 540 kcal
- Sugar: 2 g
- Sodium: 760 mg
- Fat: 30 g
- Saturated Fat: 14 g
- Unsaturated Fat: 14 g
- Trans Fat: 0.5 g
- Carbohydrates: 45 g
- Fiber: 2 g
- Protein: 20 g
- Cholesterol: 110 mg
Mason Carter
Founder
Expertise
Family Meal Routines, Simple One-pot Meals, Budget-friendly Cooking, Quick Dinner Planning, Batch Cooking Systems
Education
- Certificate: Culinary Arts
- Focus: Training in core cooking techniques, kitchen operations, and real food preparation through hands-on experience in professional-style kitchens.
Penn Foster Career School (Online)Mason is the founder of Families With Purpose and the heart behind its simple, family-focused recipes. Based in Greenville, South Carolina, he creates meals that fit into busy routines and bring people back to the table. He focuses on easy dinners, one-pot meals, budget-friendly cooking, and practical weekly meal planning. Mason has built a recipe collection shaped by real family life, with clear methods and repeatable meals that work on everyday schedules.