Fluffy Garlic Naan Bread Recipe From Scratch
Homemade garlic naan bread recipe brings the warm, pillowy flatbread from Indian restaurants right into your own kitchen.
Soft, chewy, and brushed with aromatic flavor, naan has become a beloved side dish that pairs beautifully with curries, soups, and grilled meats around the world.
Making naan at home might sound intimidating, but the process is surprisingly straightforward and incredibly rewarding.
The aroma filling your kitchen as it cooks is absolutely mouthwatering and creates such a cozy atmosphere.
Naan works perfectly for casual weeknight dinners or when hosting friends who appreciate authentic flavors.
Once you master the technique, you can enjoy fresh, hot flatbread whenever a craving strikes.
Most pantry staples are all you need to create something truly special that beats store-bought versions every time.
Roll up your sleeves and give homemade naan a go, you won't regret adding such a versatile bread to your cooking repertoire.
Why You’ll Love Homemade Garlic Naan Bread
Ingredient Essentials for Homemade Garlic Naan
Flour Base:Leavening Agent:Liquid Components:Flavor Enhancers:Seasoning:Finishing Touches:Best Tools for Homemade Garlic Naan Bread
Best Homemade Garlic Naan Bread Cooking Guide
Yeast Activation
Grab a medium bowl and pour in 1 cup of warm water (around 110°F). Sprinkle 1 tsp sugar and 1 packet of yeast (0.25 oz) into the water. Gently stir and let the mixture sit for 10 minutes. Watch for those tiny bubbles to form on the surface – that’s how you know your yeast is ready to rock.
Mix the Dough
Grab a large mixing bowl and toss in your dry and wet ingredients. Here’s what you’ll need:
Pour in the activated yeast mixture and start mixing. Get your hands in there and knead for about 8-10 minutes. Your goal is a smooth, soft dough that isn’t sticky.
First Rise
Cover your dough with a damp kitchen towel and park it in a warm spot for 1 hour. The dough should puff up and nearly double in size.
Divide and Shape
Punch down the dough to release the air. Split it into 8 equal portions. Roll each piece into an oval shape, aiming for about 8 inches long.
Skillet Cooking
Heat a cast-iron skillet over medium-high heat (around 425°F). No need to add extra oil. Place a rolled-out naan onto the hot surface. Watch for bubbles to form on top (about 1-2 minutes), then flip and cook the other side until golden brown.
Garlic Butter Finish
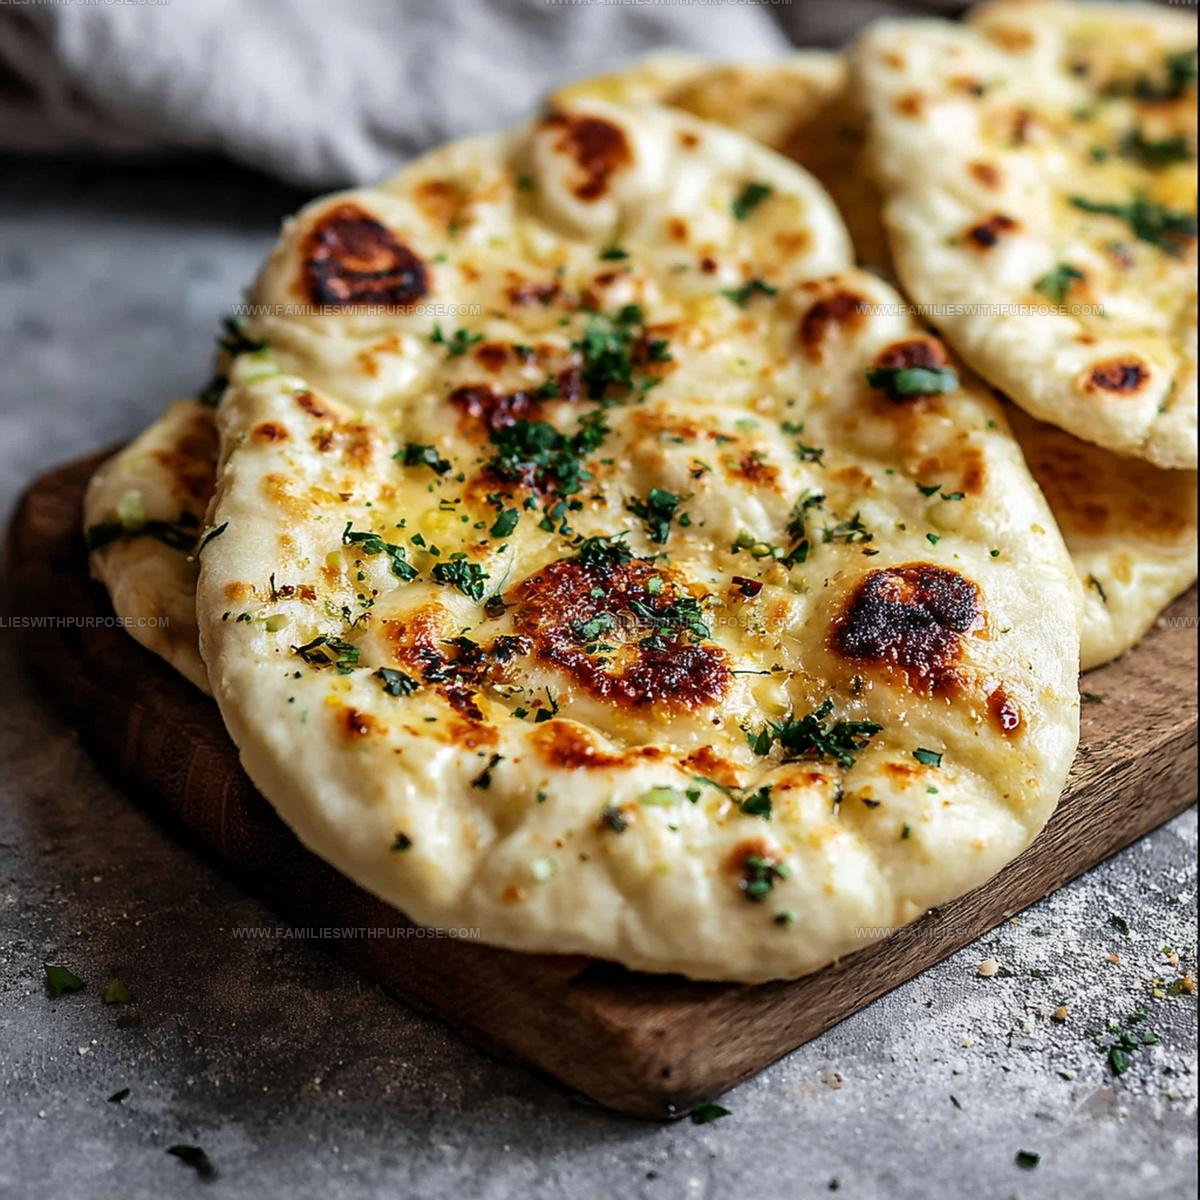
Melt 2 tbsp butter and mix in some minced garlic. Brush this delicious mixture over your hot naan. Sprinkle 2 tbsp chopped cilantro or parsley on top for a fresh kick. Serve immediately and enjoy the warm, fragrant bread.
What Pro Tips Matter Most for Homemade Garlic Naan
Garlic Naan Bread with Soft and Crispy Style Options
Simple Ways to Serve Garlic Naan
Best Storage Practices For Homemade Garlic Naan
Garlic Naan Bread Questions Readers Have
Why does the yeast need to sit and get frothy?
The frothy stage shows the yeast is active and alive, which helps your bread rise perfectly and develop a soft, airy texture.
Can regular flour work for this recipe?
Bread flour is best because its higher protein content creates better gluten development, making your naan more stretchy and tender.
How do I know the dough has been kneaded enough?
When the dough becomes smooth, elastic, and springs back when pressed, you’ve kneaded it correctly and developed the right gluten structure.
What if my dough doesn’t rise properly?
Ensure your yeast is fresh, the water is warm (not hot), and the rising area is draft-free and warm, around 80-90 degrees Fahrenheit.
Can I make the dough ahead of time?
Absolutely! Prepare the dough, let it rise, then refrigerate for up to 24 hours before shaping and cooking your naan.
How thin should I roll the naan?
Roll the dough to about 1/8-inch thickness for a traditional, light, and tender naan bread that cooks quickly and evenly.

Homemade Garlic Naan Bread Recipe
- Total Time: 1 hour 20-24 minutes
- Yield: 6 1x
Description
Fresh, warm Garlic Naan from your kitchen delivers restaurant-quality comfort with minimal effort. Perfectly seasoned flatbread accompanies curries, dips, and grilled meats, creating delicious moments around your dining table.
Ingredients
Main Ingredients:
- 3 cups all-purpose flour
- 1 cup warm water
- 1 packet (0.25 ounces) yeast
Flavor Enhancers:
- 4 tablespoons yogurt
- 2 tablespoons oil or ghee
- 3 tablespoons garlic, minced
- 2 tablespoons melted butter
Seasonings and Garnishes:
- 1 teaspoon sugar
- 1 teaspoon salt
- 2 tablespoons cilantro or parsley, chopped
Instructions
- Dissolve 1 tsp sugar and 1 packet yeast in 1 cup warm water. Allow the mixture to become frothy and bubbly for exactly 10 minutes at room temperature.
- Combine 3 cups flour, 1 tsp salt, 4 tbsp yogurt, 2 tbsp oil, and 3 tbsp minced garlic in a large mixing bowl. Pour in the activated yeast mixture and knead your dough for 8-10 minutes until it feels smooth and elastic.
- Cover the dough with a slightly damp kitchen towel. Let it rise in a warm kitchen corner for 60 minutes, watching it double in volume.
- Gently deflate your dough and separate it into 8 equal portions. Roll each piece into an oval shape approximately 8 inches long using gentle pressure.
- Warm a cast-iron skillet to medium-high heat (around 400°F). Place each rolled naan onto the hot surface and cook for 1-2 minutes until bubbles form across the surface.
- Flip the naan and cook the opposite side for another 1-2 minutes until golden brown spots appear. Repeat with remaining dough portions.
- Melt 2 tbsp butter and mix with additional minced garlic. Brush each hot naan generously with the garlic butter mixture.
- Sprinkle 2 tbsp chopped cilantro or parsley over the warm naan. Serve immediately to enjoy maximum flavor and softness.
Notes
- Rest the dough in a warm, draft-free spot to help it rise perfectly and develop a soft, fluffy texture.
- Use full-fat yogurt for extra richness and tender naan that doesn’t dry out quickly.
- Cast-iron skillet works best for achieving those gorgeous charred spots and authentic tandoor-like results.
- For gluten-free adaptation, swap wheat flour with a cup-for-cup gluten-free blend and add a pinch of xanthan gum to help bind the dough.
- Prep Time: 1 hour 18-20 minutes
- Cook Time: 2-4 minutes
- Category: Sautéed
- Method: Sautéing
- Cuisine: Indian
Nutrition
- Serving Size: 6
- Calories: 202 kcal
- Sugar: 1 g
- Sodium: 250 mg
- Fat: 6 g
- Saturated Fat: 2.5 g
- Unsaturated Fat: 3.5 g
- Trans Fat: 0 g
- Carbohydrates: 34 g
- Fiber: 1.5 g
- Protein: 6 g
- Cholesterol: 10 mg
Mason Carter
Founder
Expertise
Family Meal Routines, Simple One-pot Meals, Budget-friendly Cooking, Quick Dinner Planning, Batch Cooking Systems
Education
- Certificate: Culinary Arts
- Focus: Training in core cooking techniques, kitchen operations, and real food preparation through hands-on experience in professional-style kitchens.
Penn Foster Career School (Online)Mason is the founder of Families With Purpose and the heart behind its simple, family-focused recipes. Based in Greenville, South Carolina, he creates meals that fit into busy routines and bring people back to the table. He focuses on easy dinners, one-pot meals, budget-friendly cooking, and practical weekly meal planning. Mason has built a recipe collection shaped by real family life, with clear methods and repeatable meals that work on everyday schedules.