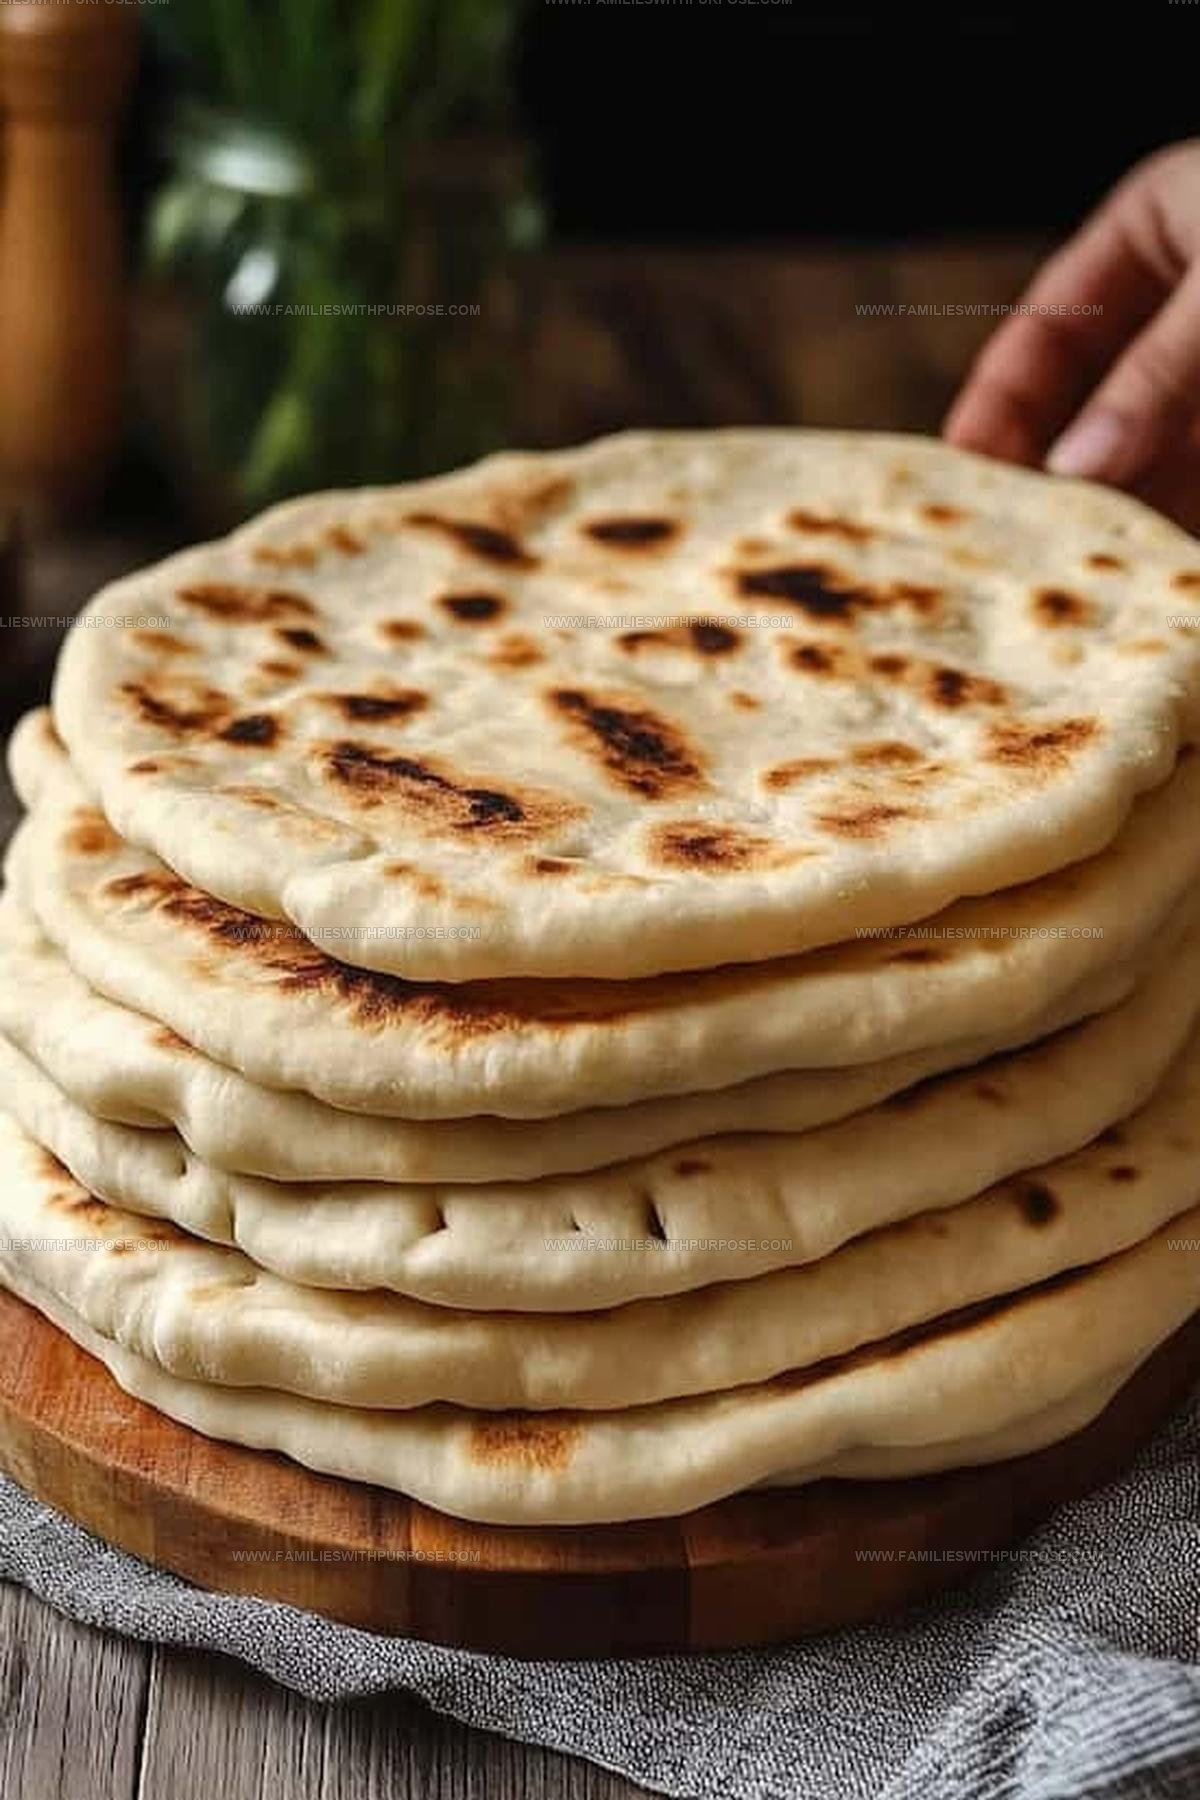
Fluffy Pita Bread Recipe for Authentic Mediterranean Sandwiches
Soft, pillowy homemade pita bread transforms ordinary meals into extraordinary experiences.
Mediterranean kitchens have perfected this delightful staple over generations, creating a cornerstone of comfort food.
Warm, freshly baked pockets promise pure satisfaction with minimal effort and maximum flavor.
Crispy exterior and tender interior create magic on your plate, offering versatile enjoyment for countless dishes.
Fresh bread straight from your own oven carries an unmatched charm that grocery store versions simply cannot replicate.
Simple ingredients and straightforward techniques make this recipe accessible for home cooks of every skill level.
Why Homemade Pita Bread Is So Versatile
What You’ll Need for Homemade Pita Bread
Kitchen Tools Needed for Homemade Pita
How Do You Prepare Pita Bread
Activate the Yeast
Grab a small bowl and pour in 1 ¼ cups warm water at exactly 110°F. Add 1 tablespoon sugar and 2 teaspoons active dry yeast. Give it a gentle stir and let the mixture sit for 5-10 minutes until it gets super bubbly and foamy.
Prepare the Dough Base
In a large mixing bowl, combine your dry ingredients:
Pour in the foamy yeast mixture and 2 tablespoons olive oil.
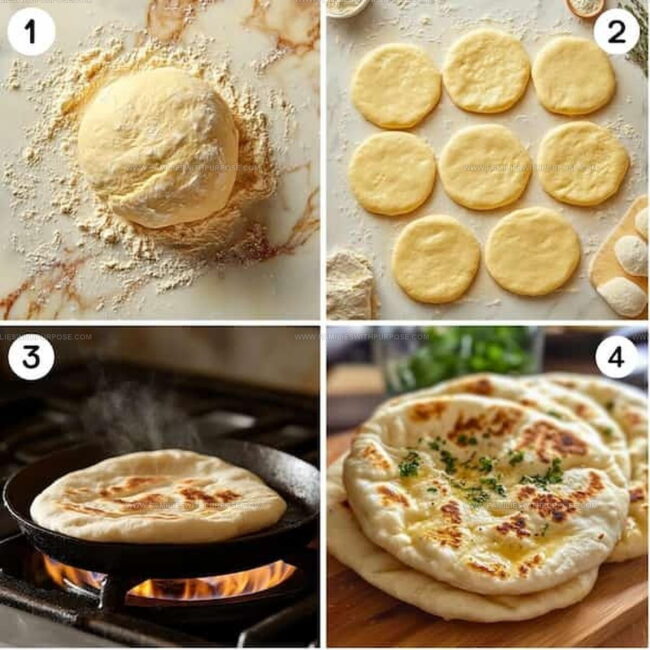
Knead the Dough
Stir everything until the dough starts coming together. Dump it onto a floured surface and start kneading. Work those muscles for 8-10 minutes until the dough feels smooth and stretchy.
First Rise
Grab a clean bowl and lightly grease it. Pop the dough inside and cover with a kitchen towel. Find a cozy, warm spot in your kitchen and let the dough rest and rise for 1-1.5 hours. You want it to double in size.
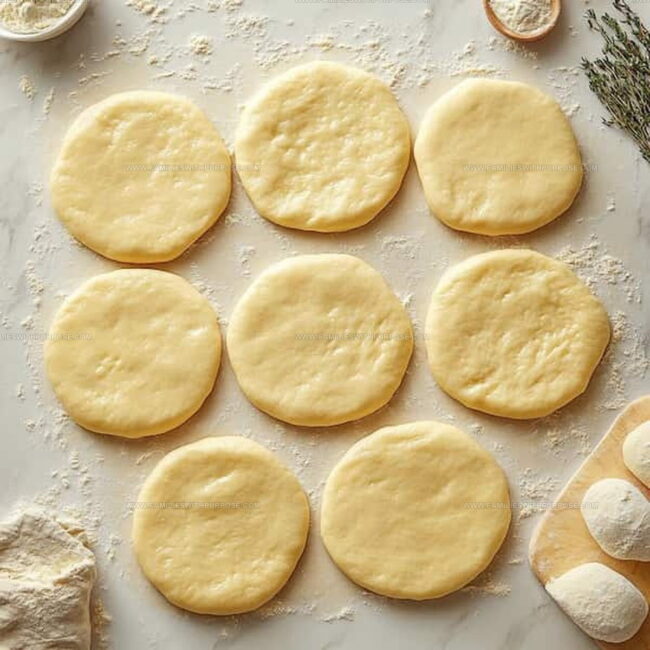
Portion the Dough
After rising, give the dough a good punch to deflate it. Slice it into 8 equal pieces using a bench scraper. Roll each piece into a nice round ball and let them chill for 10 minutes.
Roll Out the Pitas
Dust your work surface with flour. Take each dough ball and roll it into a 6-inch circle, keeping it about ¼ inch thick. Keep the rolled circles covered with a towel so they don’t dry out.
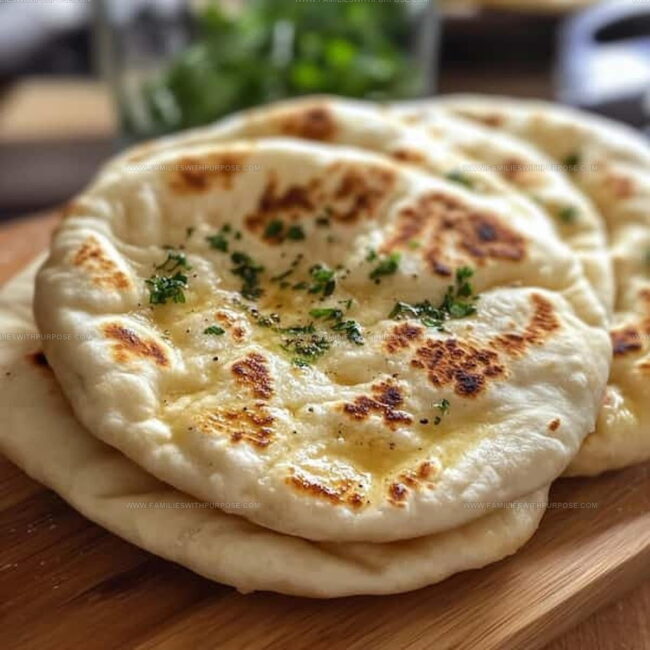
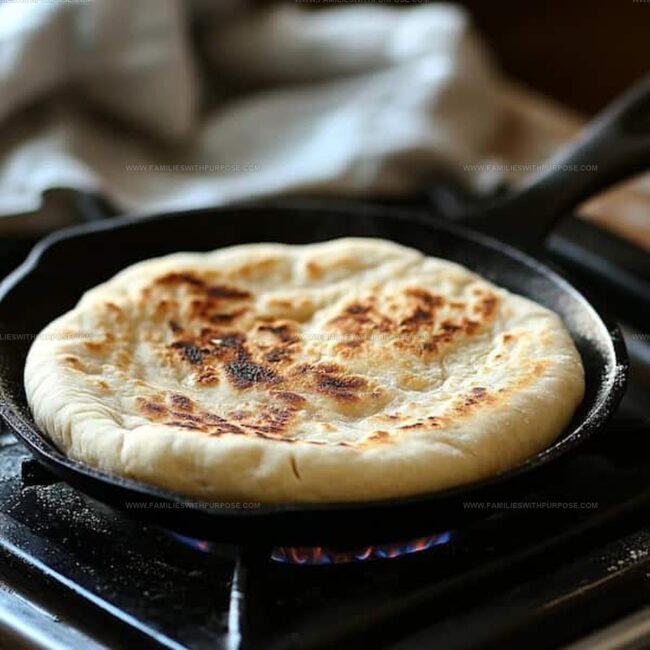
Cook the Pitas
Heat a large cast-iron skillet to medium-high heat. Slide a pita into the hot pan and cook for 1-2 minutes until bubbles start forming. Flip it over and cook another 1-2 minutes, pressing gently with a spatula. Give it one more quick flip and cook for 30 more seconds. Repeat with remaining dough circles.
Little Things That Help With Homemade Pita Bread
Different Takes on Homemade Pita Bread
Classic Serving Ideas for Homemade Pita Bread
Proper Recipe Storage for Homemade Pita Bread
Frequently Asked Questions About Homemade Pita Bread
What makes pita bread puff up?
The gas created by yeast during baking causes the bread to inflate and create a pocket inside. Steam builds up between the dough layers, creating that classic pita balloon effect.
Can bread flour work instead of all-purpose flour?
Bread flour has higher protein content and will make slightly chewier pitas. The recipe works best with all-purpose flour for a softer texture.
How do experts get perfect pita shape?
Roll your dough evenly with consistent pressure. Keep the thickness around ¼ inch and use a light touch when rolling to maintain a circular shape.
Why did my pita not create a pocket?
Your skillet might not be hot enough. Ensure medium-high heat and avoid moving the pita too much while cooking to help it puff correctly.
Is a cast-iron skillet essential for making pitas?
Not mandatory, but recommended. Cast-iron provides even heat distribution and helps create that perfect golden-brown surface. A heavy griddle works well too.
Can pitas be made without a stand mixer?
Absolutely! Hand-kneading works perfectly. Just ensure you knead the dough for 8-10 minutes until smooth and elastic.

Homemade Pita Bread Recipe
- Total Time: 1 hour 45 minutes
- Yield: 8 1x
Description
Warm, pillowy pita bread emerges from your kitchen with simple ingredients and easy steps. Homemade comfort starts here, bringing Mediterranean tradition right to your table.
Ingredients
Main Ingredients:
- 3 ½ cups all-purpose flour
- 1 ¼ cups warm water
Leavening Agents:
- 2 teaspoons active dry yeast
- 1 tablespoon sugar
Seasonings and Liquids:
- 1 ½ teaspoons salt
- 2 tablespoons olive oil
Instructions
- Dissolve 1 tablespoon sugar and 2 teaspoons active dry yeast in 1 ¼ cups warm water at 110°F. Allow mixture to activate and become foamy in 5-10 minutes.
- Combine 3 ½ cups flour and 1 ½ teaspoons salt in a large mixing bowl. Create a well in the center.
- Pour the activated yeast liquid and 2 tablespoons olive oil into the flour mixture. Mix until a shaggy dough forms.
- Transfer your dough to a floured surface. Knead firmly for 8-10 minutes until the texture becomes smooth and stretchy.
- Coat a clean bowl with olive oil. Place your dough inside and cover with a damp cloth. Let it rise in a warm area for 1-1.5 hours until doubled in volume.
- Deflate the dough by gently pressing down. Divide into 8 equal portions using a bench scraper.
- Shape each portion into a round ball. Let the balls rest, covered, for 10 minutes to relax the gluten.
- Roll each ball into a 6-inch circle, approximately ¼ inch thick on a lightly floured surface.
- Heat a cast-iron skillet to medium-high heat. Carefully place one dough circle in the hot pan.
- Cook the first side for 1-2 minutes until bubbles start to form across the surface.
- Flip the pita and cook an additional 1-2 minutes, pressing gently with a spatula to encourage puffing.
- Turn the pita one more time and cook for a final 30 seconds until lightly golden brown.
- Transfer to a clean kitchen towel and cover to keep soft. Repeat with remaining dough circles.
Notes
- Keep water temperature around 110°F to activate yeast without killing it, which ensures proper rising and soft texture.
- Knead the dough thoroughly to develop gluten, creating those signature soft and stretchy pita pockets.
- Rest the portioned dough balls helps relax the gluten, making rolling easier and preventing tough bread.
- Use a hot cast-iron skillet or griddle to create quick, high heat that helps pitas puff up beautifully and develop light char marks.
- Prep Time: 1 hour 30 minutes
- Cook Time: 15 minutes
- Category: Sautéed
- Method: Sautéing
- Cuisine: Middle Eastern
Nutrition
- Serving Size: 8
- Calories: 138 kcal
- Sugar: 1.2 g
- Sodium: 293 mg
- Fat: 3.6 g
- Saturated Fat: 0.5 g
- Unsaturated Fat: 3.1 g
- Trans Fat: 0 g
- Carbohydrates: 24 g
- Fiber: 1.2 g
- Protein: 4.3 g
- Cholesterol: 0 mg
Sophie Lane
Recipe Developer
Expertise
Family-friendly Meals, Simple Healthy Cooking, Ingredient Substitutions, Beginner-friendly Recipes, Flexible Meal Prep
Education
- Program: Professional Cook Certificate
- Focus: Online culinary training covering knife skills, cooking techniques, and plant-based and modern cooking approaches.
Schoolcraft CollegeSophie brings a calm and flexible approach to Families With Purpose. Based in Fort Collins, Colorado, she creates recipes that feel simple, clear, and easy to make at home. She focuses on family-friendly meals, healthy everyday cooking, ingredient swaps, and beginner-friendly ideas. Sophie helps make each recipe approachable and easy to follow, especially for busy families who need meals that can bend with the day.