Jamie Oliver Chicken Fajitas Recipe With Sizzling Peppers
Jamie Oliver chicken fajitas bring bold Mexican flavors right to your weeknight dinner table with minimal fuss and maximum satisfaction.
Sizzling strips of seasoned protein combined with colorful peppers create a meal that feels special without requiring hours in the kitchen.
The beauty of fajitas lies in their interactive nature, everyone can build their own perfect wrap at the table.
Families love how quickly everything comes together, making busy evenings stress-free and delicious.
The smoky, spiced flavors appeal to both adventurous eaters and those who prefer milder tastes.
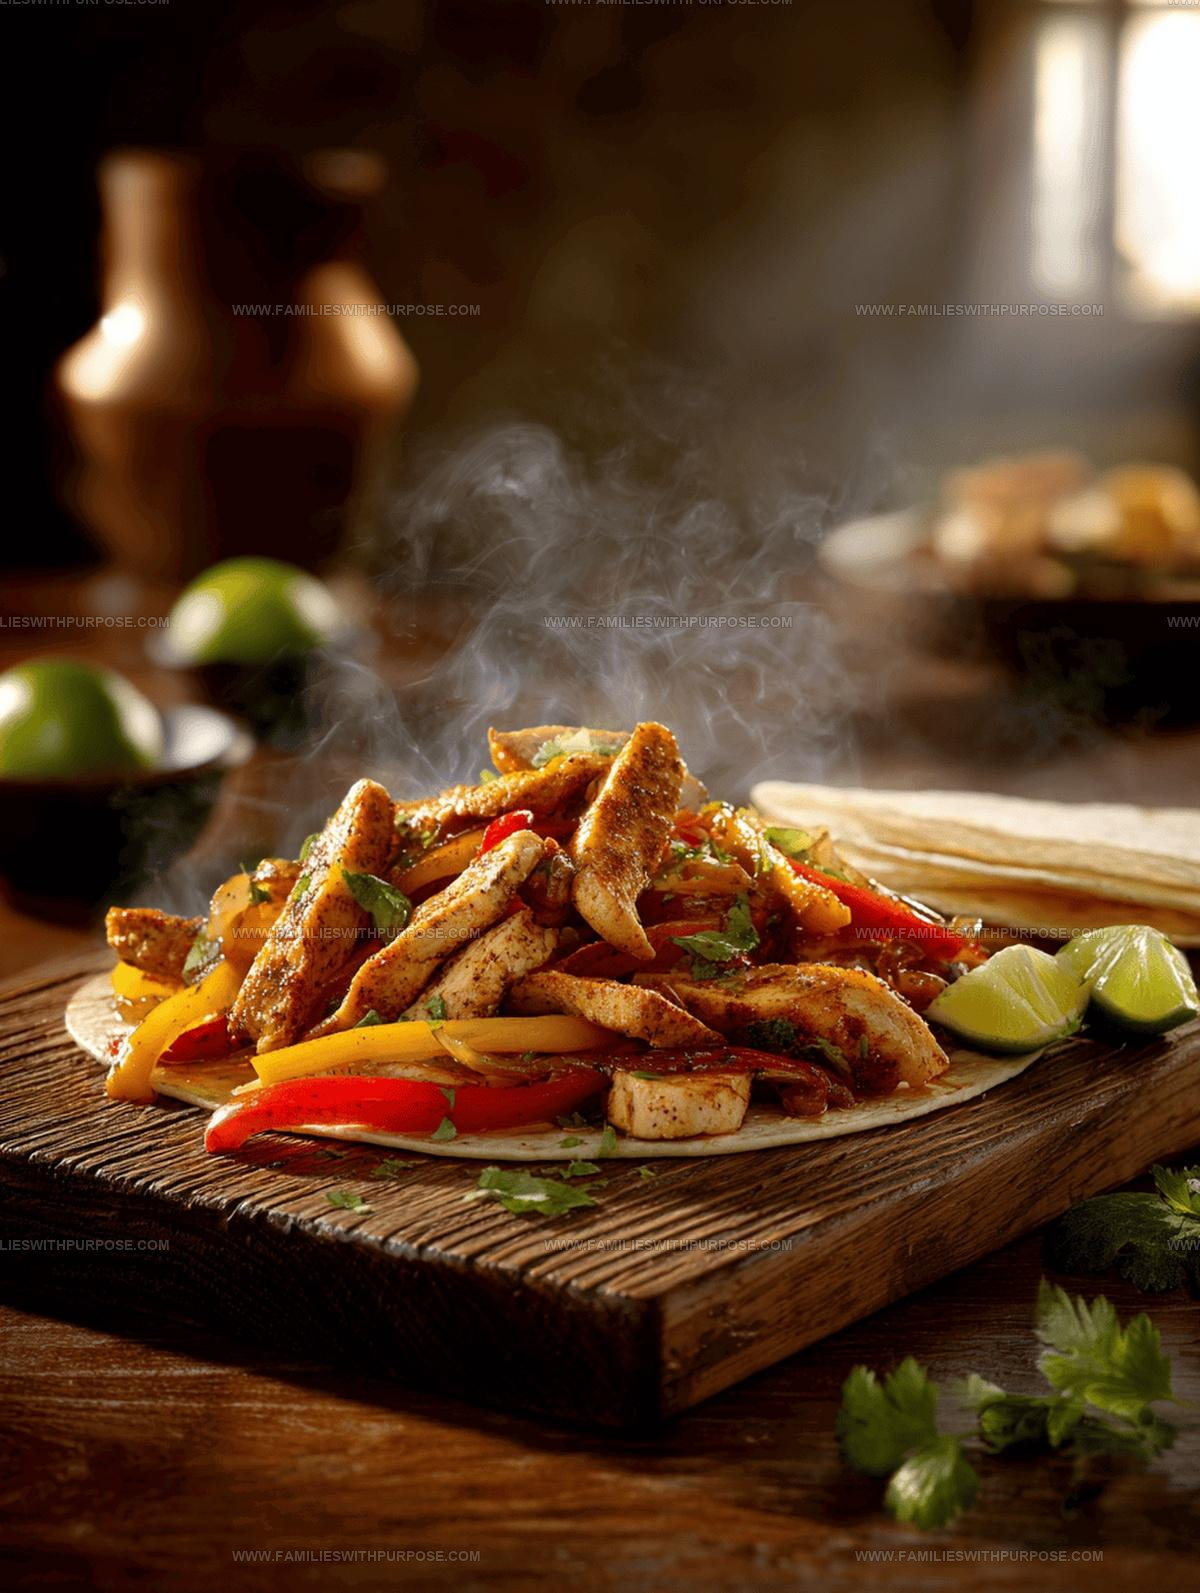
Serve them hot off the pan with warm tortillas and watch how quickly plates empty.
When comfort food needs a flavorful twist, fajitas always deliver satisfaction that keeps everyone coming back for seconds.
Why Jamie Oliver Chicken Fajitas Is Worth Making
Core Ingredients in Jamie Oliver Chicken Fajitas
Main Proteins:Vegetable Base:Flavor Enhancers:Kitchen Tools Overview for Jamie Oliver Chicken Fajitas
How to Prepare Chicken Fajitas
Prep the Chicken
Grab those chicken breasts and slice them into thin, even strips. Sprinkle each piece with a generous pinch of salt, pepper, smoked paprika, and chili powder.
Toss the chicken around until every piece gets a nice, even coating of seasonings.
Sear the Chicken
Fire up a large skillet over medium-high heat and pour in 1 tablespoon of oil. Once the oil is shimmering and hot, carefully add your seasoned chicken strips.
Let them sizzle and dance in the pan, turning occasionally, until they turn a beautiful golden brown – this should take about 5-7 minutes.
Set Chicken Aside
Transfer your perfectly seared chicken to a clean plate and keep it warm. Don’t wash that skillet – those delicious browned bits are flavor gold!
Char the Vegetables
Toss your veggies into the same hot skillet:
Crank the heat to high and let them sizzle. Stir frequently so they get those gorgeous charred edges without burning. Give them about 8 minutes to get soft and caramelized.
Combine and Finish
Slide the chicken back into the skillet with your charred vegetables.
Grab those 2 fresh limes and squeeze their juice all over everything. Gently toss to mix all the flavors together.
Let everything heat through for about 2 more minutes.
Final Check and Serve
Take a quick taste and adjust the seasoning if needed. Sprinkle a bit more salt or squeeze an extra lime if you want.
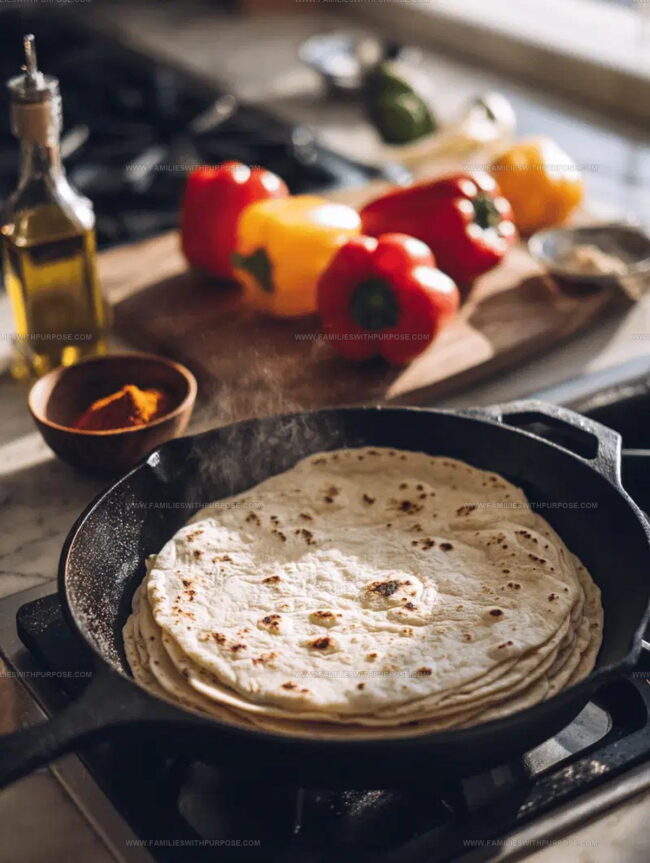
Serve the fajitas piping hot, straight from the skillet. Warm tortillas on the side make this meal complete.
Helpful Cooking Notes for Jamie Oliver Chicken Fajitas
Flexible Options for Jamie Oliver Chicken Fajitas
How to Serve Jamie Oliver Chicken Fajitas
Proper Storage Guide For Jamie Oliver Chicken Fajitas
Jamie Oliver Chicken Fajitas Q&A
What makes these fajitas different from other recipes?
These fajitas have a signature rustic touch with smoky paprika and chili powder that creates deeper flavor layers compared to standard versions.
Can I substitute the chicken with another protein?
Absolutely! Sliced steak, shrimp, or tofu work perfectly with these same spices and cooking technique.
How spicy are these fajitas?
The recipe has mild heat from chili powder, but you can adjust by adding more or less powder to match your personal spice tolerance.
Do I need special equipment to make these?
A large skillet is the only essential tool – no fancy cookware required for creating these delicious fajitas.
What if my vegetables start burning while cooking?
Keep the heat high but stir frequently to prevent burning, ensuring beautiful caramelization without scorching.
Can I prep ingredients ahead of time?
Definitely! Slice chicken and vegetables in advance, storing separately in the refrigerator to streamline your cooking process.

Jamie Oliver Chicken Fajitas Recipe
- Total Time: 20-22 minutes
- Yield: 4 to 6 1x
Description
Sizzling jamie olivers chicken fajitas bring Mexican-inspired flavors straight to your dinner table with minimal effort. Wrap tender spiced chicken, colorful peppers, and warm tortillas for a quick, delicious meal that sparks family excitement.
Ingredients
Main Ingredients:
- 2 pounds chicken breast
- 3 bell peppers
- 1 large onion
Seasonings and Spices:
- 2 teaspoons smoked paprika
- 1 teaspoon chili powder
- 1 salt
- 1 pepper
Liquids and Extras:
- 2 limes
- 1 tablespoon oil
Instructions
- Slice 2 pounds of chicken breast into thin, uniform strips using a sharp knife to ensure even cooking.
- Sprinkle 2 teaspoons smoked paprika, 1 teaspoon chili powder, salt, and pepper over the chicken strips. Massage the seasonings thoroughly to coat every piece.
- Place a large skillet over medium-high heat and warm 1 tablespoon oil until it shimmers and ripples across the surface.
- Carefully add chicken strips to the hot skillet. Allow them to sear for 5-7 minutes, turning occasionally to achieve a golden-brown exterior without overcrowding the pan.
- Transfer seared chicken to a clean plate, keeping the delicious pan drippings behind.
- Immediately add sliced bell peppers and onions to the same skillet. Cook at high heat for 8 minutes, stirring frequently to create slight charring and caramelization.
- Return chicken to the skillet with peppers and onions. Squeeze the juice from 2 fresh limes over the mixture.
- Gently toss all ingredients together, allowing them to meld for 2 minutes at medium-high heat until everything is piping hot and fragrant.
- Verify chicken is fully cooked by checking internal temperature reaches 165°F. Taste and adjust seasoning with additional salt, pepper, or lime juice as needed.
Notes
- Slice chicken against the grain for more tender, easier-to-eat strips that absorb seasonings better.
- Let your skillet get seriously hot before adding chicken to ensure a perfect golden-brown sear that locks in flavor.
- Choose bell peppers in different colors for a vibrant presentation and varied sweet-pepper taste profiles.
- Season generously and taste as you go, adjusting spices and lime juice to make the dish your own signature version.
- Prep Time: 5 minutes
- Cook Time: 15-17 minutes
- Category: Sautéed
- Method: Sautéing
- Cuisine: Mexican
Nutrition
- Serving Size: 4 to 6
- Calories: 193 kcal
- Sugar: 3 g
- Sodium: 150 mg
- Fat: 6 g
- Saturated Fat: 1 g
- Unsaturated Fat: 5 g
- Trans Fat: 0 g
- Carbohydrates: 8 g
- Fiber: 2 g
- Protein: 28 g
- Cholesterol: 70 mg
Mason Carter
Founder
Expertise
Family Meal Routines, Simple One-pot Meals, Budget-friendly Cooking, Quick Dinner Planning, Batch Cooking Systems
Education
- Certificate: Culinary Arts
- Focus: Training in core cooking techniques, kitchen operations, and real food preparation through hands-on experience in professional-style kitchens.
Penn Foster Career School (Online)Mason is the founder of Families With Purpose and the heart behind its simple, family-focused recipes. Based in Greenville, South Carolina, he creates meals that fit into busy routines and bring people back to the table. He focuses on easy dinners, one-pot meals, budget-friendly cooking, and practical weekly meal planning. Mason has built a recipe collection shaped by real family life, with clear methods and repeatable meals that work on everyday schedules.