Kimchi Fried Rice Recipe for a Bold Korean Dinner
Kimchi fried rice hits differently when hunger strikes and comfort food is the only answer.
Bold flavors meet satisfying textures in what has become a weeknight staple across countless kitchens worldwide.
Korean home cooking gave us a brilliant solution for busy evenings that never compromises on taste.
One pan is all it takes to pull together a meal that feels both nourishing and exciting.
Leftovers suddenly become something special rather than just a reheated afterthought.
If you need proof that simple cooking can be deeply satisfying, here it is right in front of you.
Why Kimchi Fried Rice Is Worth Making
Ingredient Breakdown for Kimchi Fried Rice
Main Rice Component:Kimchi Base:Vegetable Blend:Flavor Enhancers:Cooking Fats:Optional Protein Options:What Tools Fry Kimchi Rice
How to Cook Kimchi Fried Rice

Prep the Rice
Grab those 2 cups of chilled rice from the fridge. Day-old rice works best because it’s less sticky and will give your dish that perfect crispy texture.
Chop and Gather
Quickly dice up your ingredients for easy cooking. Grab your cutting board and knife, then prepare:
Create the Flavor Base
Mix your sauce in a small bowl with these ingredients:
Whisk everything together until smooth and well combined.
Heat the Cooking Surface
Grab a large skillet and warm 2 tablespoons vegetable oil with 1 tablespoon butter over medium-high heat (375°F). The butter will add a rich flavor to your dish.
Sauté the Aromatics
Toss in your chopped onions and white parts of green onions. Let them dance in the hot oil for 2-3 minutes until they turn translucent and start to smell amazing.
Build More Flavor
Add your minced garlic and diced carrots to the pan. Stir and cook for another 1-2 minutes until everything starts to soften and release its delicious aroma.
Kimchi Time
Dump in the chopped kimchi. Let it sizzle and cook for 3-5 minutes, stirring frequently to prevent sticking and develop deep flavor.
Rice Integration
Slide your chilled rice into the pan. Break up any clumps and mix thoroughly with the vegetables. Stir-fry for 2-3 minutes until everything is heated through.
Sauce It Up
Pour your prepared sauce over the rice. Stir constantly for 2-3 minutes to ensure every grain gets coated with that spicy, tangy goodness.
Optional Protein Boost
If you’re adding protein, now’s the time. Toss in your favorite – diced chicken, bacon, or tofu – and stir for another minute to heat through.
Final Touches
Taste and adjust seasonings. Want more heat? Sprinkle some extra gochugaru. Need more salt? A quick dash of soy sauce does the trick.
Serve and Garnish
Transfer to a plate and top with a crispy fried egg. Sprinkle sesame seeds, seaweed flakes, and green onion slices on top. Drizzle with sriracha if you’re feeling extra spicy.
Helpful Tips for Kimchi Fried Rice
Classic Kimchi Fried Rice Variations
How Do You Serve Kimchi Fried Rice
How to Store Kimchi Fried Rice Without Losing Flavor?
Kimchi Fried Rice Recipe FAQs
What makes kimchi fried rice so special?
Kimchi fried rice transforms leftover ingredients into a flavor-packed meal that’s quick, satisfying, and packed with tangy, spicy Korean flavors.
Can vegetarians enjoy this recipe?
Absolutely! Skip the protein or add tofu for a delicious vegetarian version that doesn’t compromise on taste.
How spicy is kimchi fried rice?
The spice level depends on your kimchi and gochujang. Start with less spicy ingredients and adjust to your heat tolerance.
Do I need special equipment to make this dish?
A standard skillet or wok works perfectly. No fancy tools required for this simple, comforting recipe.
What if my rice isn’t day-old?
Spread fresh rice on a baking sheet and refrigerate for an hour to remove excess moisture, helping create that perfect crispy texture.
Can I meal prep kimchi fried rice?
Definitely! Prepare components ahead and store separately. Combine and reheat when ready to eat for a quick, delicious meal.

Kimchi Fried Rice Recipe
- Total Time: 27-37 minutes
- Yield: 3 1x
Description
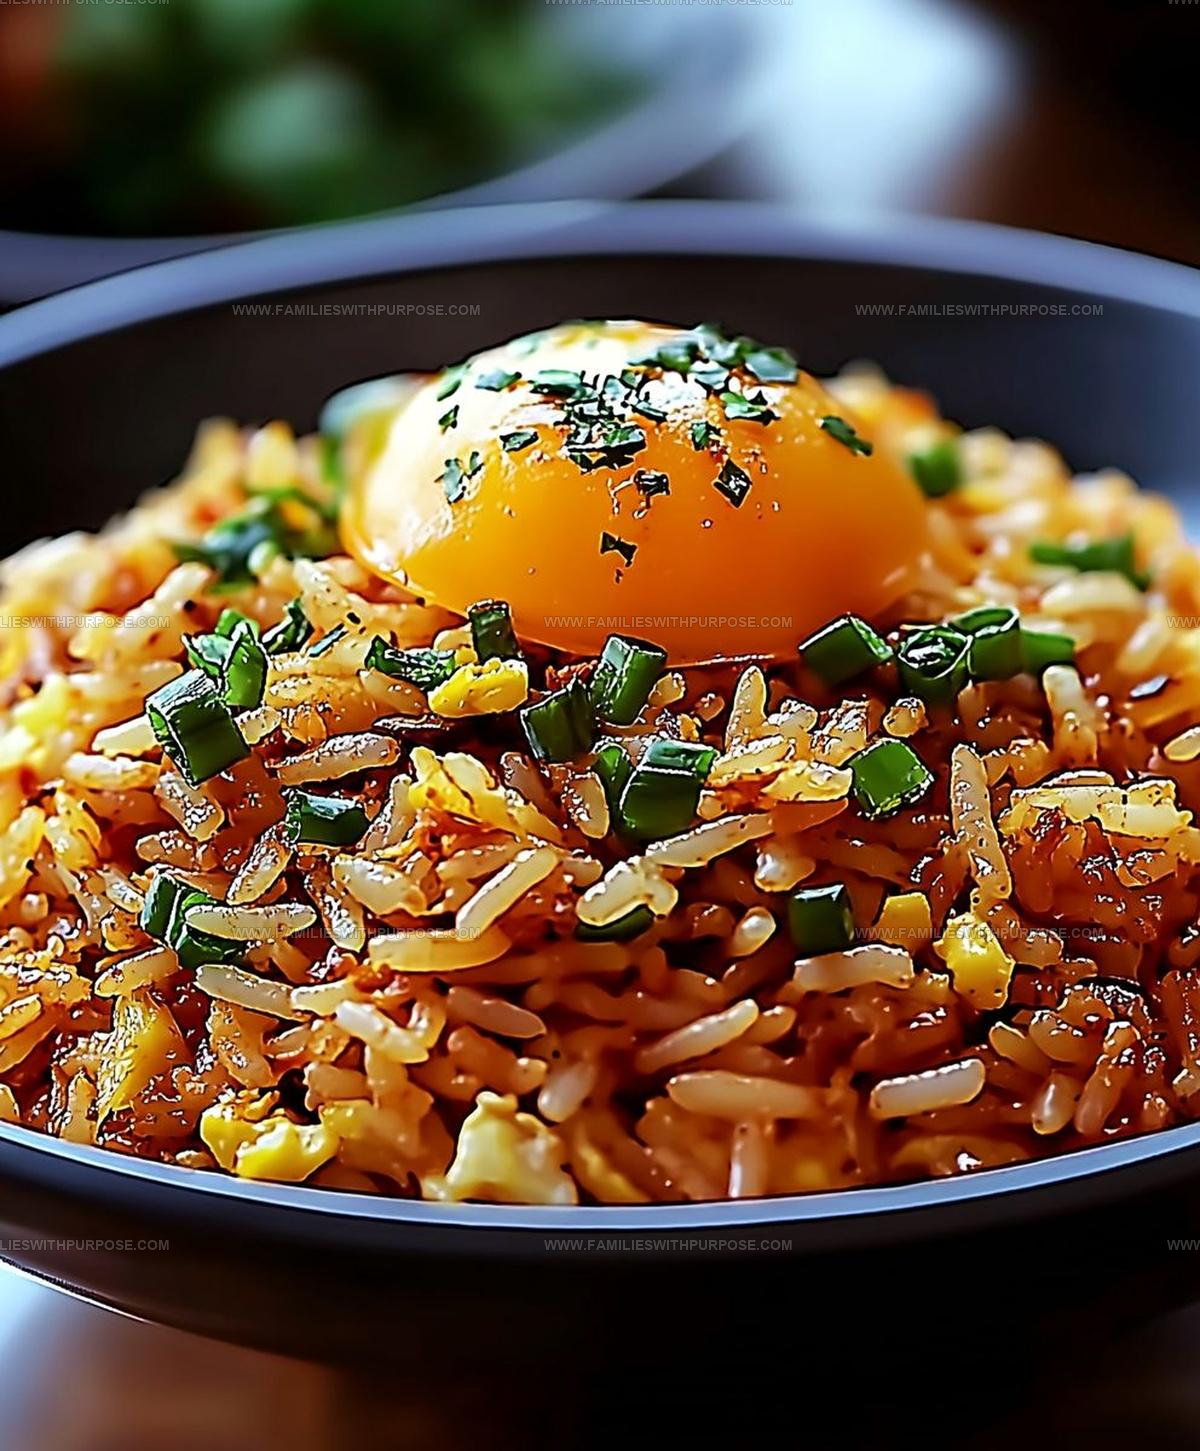
Kimchi fried rice brings Korean comfort straight to your plate with crispy, tangy flavors that dance together perfectly. Sizzling rice, spicy kimchi, and a runny egg create a delicious meal that feels like a warm hug from Seoul.
Ingredients
Main Ingredients:
- 2 cups rice
- 1 cup kimchi
- ½ cup onion
- ½ cup carrot
- 1 fried egg
Seasonings and Flavor Enhancers:
- 1 tablespoon gochujang
- 1 tablespoon soy sauce
- 1 tablespoon kimchi juice
- 1 teaspoon sesame oil
- 1 teaspoon sugar
- 2 cloves garlic
- ¼ cup green onions
- ½ teaspoon gochugaru
Cooking Oils and Optional Protein:
- 2 tablespoons vegetable oil
- 1 tablespoon butter
- ½ cup cooked bacon
- ½ cup cooked spam
- ½ cup cooked chicken
- ½ cup tofu
- Sesame seeds
- Seaweed flakes
- Sriracha
Instructions
- Chill your freshly cooked rice on a baking sheet for one hour at refrigerator temperature. Day-old rice works best for crispy texture.
- Dice ½ cup onion, ½ cup carrot, and 1 cup kimchi into small, uniform pieces. Mince 2 garlic cloves finely.
- Whisk together 1 tablespoon gochujang, 1 tablespoon soy sauce, 1 teaspoon sesame oil, 1 teaspoon sugar, and 1 tablespoon kimchi juice in a small bowl.
- Heat 2 tablespoons vegetable oil and 1 tablespoon butter in a large skillet at medium-high heat for 2 minutes until butter stops foaming.
- Saute chopped onions and white parts of green onions for 2-3 minutes until they turn translucent and release their aroma.
- Toss in minced garlic and diced carrots. Cook for 1-2 minutes, stirring constantly to prevent burning.
- Add chopped kimchi to the skillet. Stir and cook for 3-5 minutes until kimchi softens and releases its tangy flavor.
- Dump in 2 cups cooked rice. Break apart any clumps and mix thoroughly with vegetables for 2-3 minutes.
- Pour prepared sauce over rice. Stir-fry for another 2-3 minutes until sauce coats every grain evenly.
- Optional: Mix in your chosen protein like diced chicken or tofu, cooking for an additional 1-2 minutes.
- Fry one egg in a separate pan at medium heat for 3-4 minutes until whites are set and yolk remains runny.
- Transfer rice to serving plate. Top with fried egg and sprinkle 1 tablespoon green onion slices and 1 teaspoon sesame seeds.
- Serve immediately while rice remains hot and crispy. Drizzle extra sriracha if you want more heat.
Notes
- Always use cold, day-old rice to prevent mushy texture and ensure each grain separates perfectly during stir-frying.
- Drain kimchi well before chopping to control moisture and prevent soggy fried rice, reserving some juice for extra flavor.
- Select a wide, heavy-bottomed skillet or wok to get proper heat distribution and achieve those delicious crispy rice edges.
- For a gluten-free version, swap soy sauce with tamari and check that gochujang is certified gluten-free before using.
- Prep Time: 15-20 minutes
- Cook Time: 12-17 minutes
- Category: Stir-Fried
- Method: Sautéing
- Cuisine: Korean
Nutrition
- Serving Size: 3
- Calories: 340 kcal
- Sugar: 5 g
- Sodium: 700 mg
- Fat: 16 g
- Saturated Fat: 4 g
- Unsaturated Fat: 11 g
- Trans Fat: 0.1 g
- Carbohydrates: 40 g
- Fiber: 3 g
- Protein: 12 g
- Cholesterol: 50 mg
Sophie Lane
Recipe Developer
Expertise
Family-friendly Meals, Simple Healthy Cooking, Ingredient Substitutions, Beginner-friendly Recipes, Flexible Meal Prep
Education
- Program: Professional Cook Certificate
- Focus: Online culinary training covering knife skills, cooking techniques, and plant-based and modern cooking approaches.
Schoolcraft CollegeSophie brings a calm and flexible approach to Families With Purpose. Based in Fort Collins, Colorado, she creates recipes that feel simple, clear, and easy to make at home. She focuses on family-friendly meals, healthy everyday cooking, ingredient swaps, and beginner-friendly ideas. Sophie helps make each recipe approachable and easy to follow, especially for busy families who need meals that can bend with the day.