Lemon Chicken Piccata Recipe for a Bright Dinner
Chicken piccata delivers that perfect balance of bright, satisfying flavors that makes any dinner feel special without requiring hours in the kitchen.
The dish has roots in Italian-American cooking and has become a weeknight favorite for families who want something beyond the usual rotation.
Light yet filling, it works beautifully whether you're hosting company or simply treating yourself after a long day.
The preparation comes together quickly, making it ideal for busy evenings when time is limited but you still want real food on the table.
Restaurants charge premium prices for what turns out to be a surprisingly approachable dish at home.
Everything about it feels elegant while remaining totally doable for home cooks of all levels.
What Makes Chicken Piccata a Timeless Favorite
What Makes Chicken Piccata
Main Protein:Coating Ingredients:Cooking Fats:Sauce Components:Garnish:Tools That Shape Chicken Piccata
How to Cook Chicken Piccata Properly
Flatten Chicken Breasts
Place each chicken breast between plastic wrap sheets. Grab a meat mallet or rolling pin and pound those breasts until they’re perfectly even, about 1/4 inch thick. This helps them cook super quickly and evenly.
Create Seasoned Flour Coating
Mix together the coating in a shallow dish:
Stir everything until well combined.
Coat the Chicken
Dredge each chicken breast in the flour mixture. Make sure both sides get a nice, even coating. Tap off any extra flour – we don’t want clumpy breading.
First Batch of Chicken
Heat 2 tablespoons olive oil and 2 tablespoons butter in a large skillet over medium-high heat. Carefully place two chicken breasts in the hot pan. Cook for 3-4 minutes on each side until they turn a gorgeous golden brown. Check that the internal temperature hits 165°F.
Keep First Batch Warm
Transfer the first two cooked chicken breasts to a plate. Cover loosely with foil to keep them toasty while you cook the remaining pieces.
Cook Remaining Chicken
Add the last 2 tablespoons of olive oil and 2 tablespoons of butter to the skillet. Cook the other two chicken breasts exactly the same way – 3-4 minutes per side until golden and cooked through.
Create Sauce Base
With the skillet still on medium heat, pour in 1/2 cup white wine. Use a spatula to scrape up all those delicious browned bits stuck to the bottom of the pan.
Build the Sauce
Add to the skillet:
Let everything simmer for 2-3 minutes until the sauce starts to thicken slightly.
Add Final Sauce Touches
Stir in 2 tablespoons of drained capers. Taste and adjust the seasoning if needed.
Finish the Dish
Return all the chicken to the skillet. Spoon the sauce over each piece, making sure they’re nicely coated. Let everything warm together for a minute.
Serve and Garnish
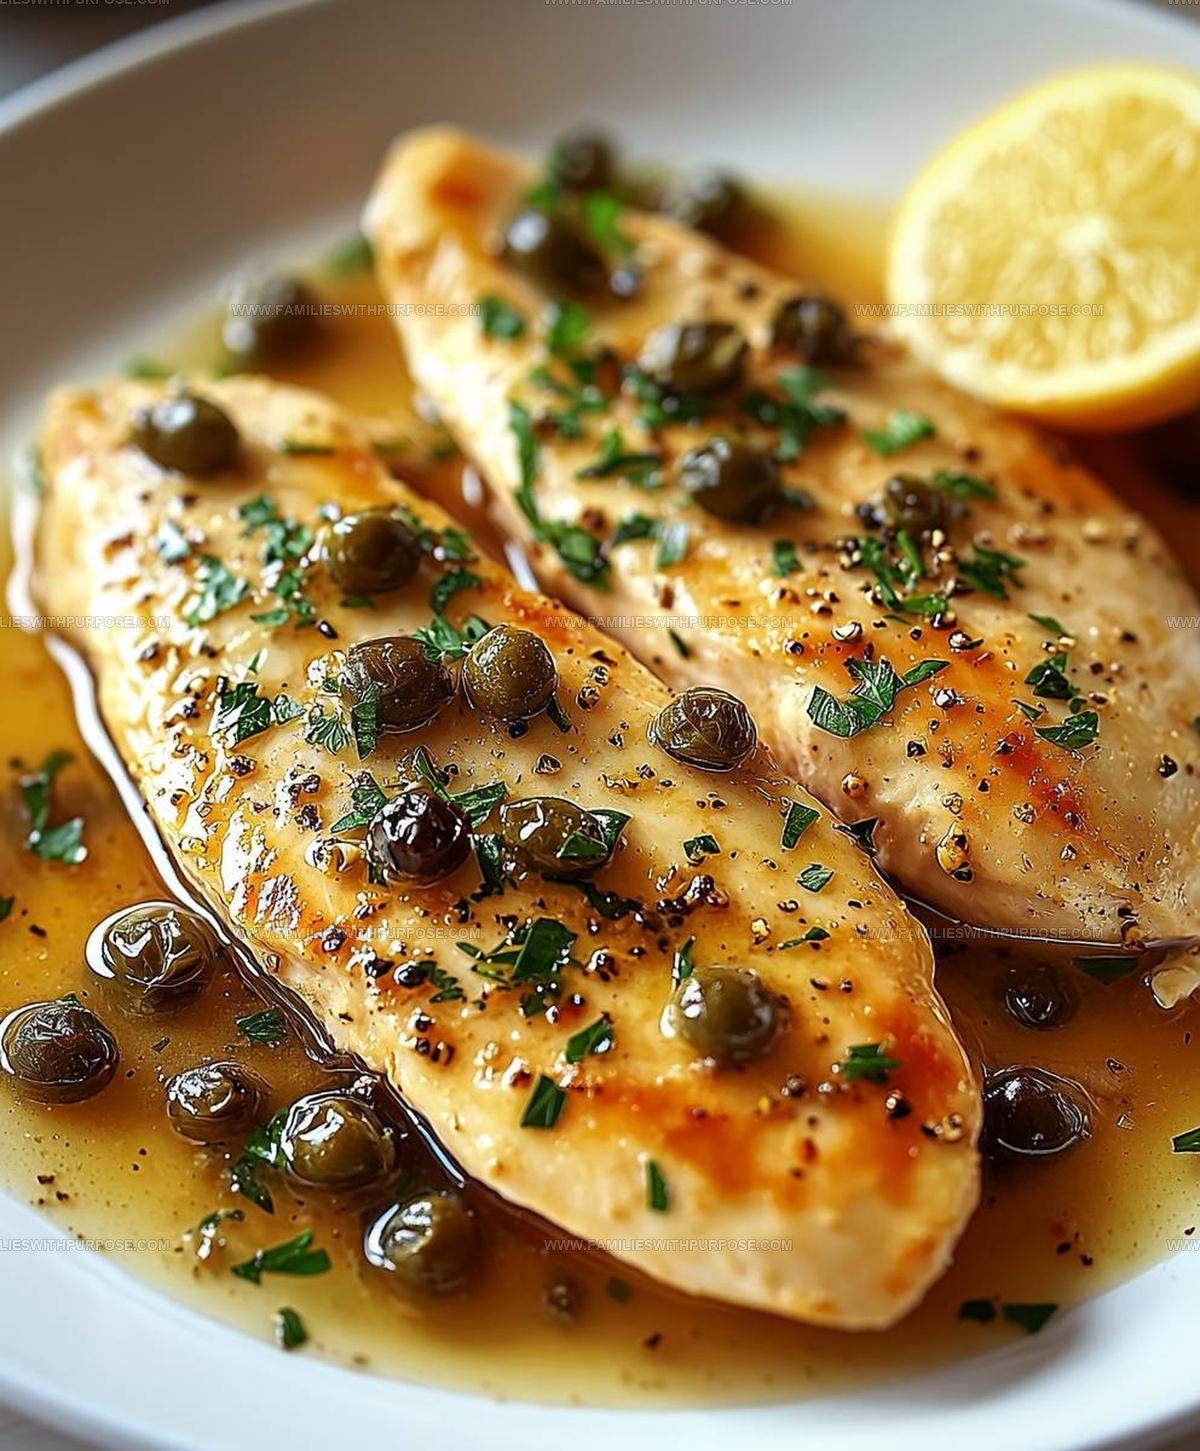
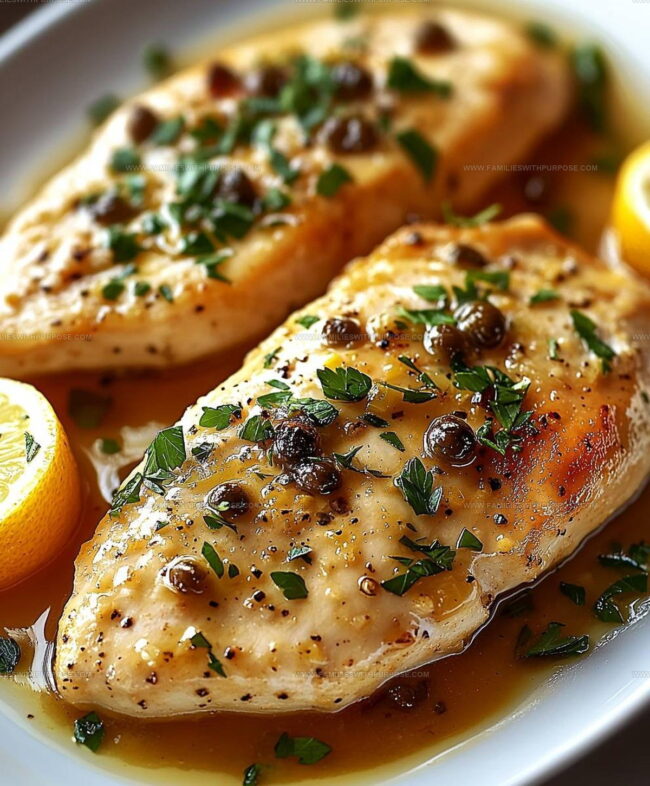
Sprinkle 2 tablespoons chopped fresh parsley over the top. Serve immediately with lemon wedges on the side. This is fantastic over pasta, mashed potatoes, rice, or roasted vegetables.
What Makes Chicken Piccata Taste Restaurant-Worthy
What Chicken Piccata Variations Adjust the Tang
Classic Pairings for Chicken Piccata
Quick Storage Ideas for Chicken Piccata
FAQs for Chicken Piccata
Can I use chicken thighs instead of breasts?
Chicken thighs work beautifully, but they’ll need a slightly longer cooking time since they’re thicker and have more fat. Adjust your heat and cooking duration to ensure they reach the right internal temperature.
What if I don’t have white wine?
No worries! Replace the white wine with chicken broth or a splash of dry vermouth. The goal is to add depth and help deglaze the pan, capturing all those delicious browned bits.
How do I know when the chicken is fully cooked?
Look for a golden-brown exterior and an internal temperature of 165F. Cut into the thickest part – the meat should be white throughout with no pink areas.
Can I make this recipe gluten-free?
Absolutely! Swap regular flour for a gluten-free blend or almond flour. The coating will still create that perfect crispy exterior.
What type of capers should I use?
Jarred capers work great. Just rinse them before adding to remove excess salt. Smaller capers tend to have a more delicate flavor in this dish.

Lemon Caper Chicken Piccata Recipe
- Total Time: 28-30 minutes
- Yield: 4 1x
Description
Chicken Piccata brings zesty lemon and tangy capers together in a quick skillet dance that makes dinner feel like a restaurant-quality treat. Crispy chicken cutlets dressed in a silky sauce turn an ordinary weeknight meal into something special you’ll savor with pure delight.
Ingredients
Main Ingredients:
- 4 boneless, skinless chicken breasts
- ½ cup all-purpose flour
- ¼ cup dry white wine
- ¼ cup chicken broth
- ¼ cup lemon juice
Seasonings and Cheese:
- ¼ cup grated Parmesan cheese
- 1 teaspoon salt
- ½ teaspoon black pepper
- 2 tablespoons capers
Fats and Garnish:
- 4 tablespoons olive oil
- 4 tablespoons butter
- 2 tablespoons fresh parsley
- Lemon wedges
Instructions
- Sandwich each chicken breast between plastic wrap sheets. Flatten to a uniform ¼-inch thickness using a meat mallet or rolling pin.
- Mix ½ cup flour, ¼ cup Parmesan, 1 teaspoon salt, and ½ teaspoon pepper in a shallow dish.
- Thoroughly coat each chicken breast in the seasoned flour mixture, ensuring complete coverage. Tap off excess flour.
- Heat 2 tablespoons olive oil and 2 tablespoons butter in a large skillet over medium-high heat until butter melts and begins to bubble.
- Carefully place two chicken breasts in the hot skillet. Cook for 3-4 minutes per side until golden brown and internal temperature reaches 165F.
- Transfer first batch of cooked chicken to a plate. Loosely cover with foil to retain warmth.
- Add remaining 2 tablespoons olive oil and 2 tablespoons butter to the skillet. Cook remaining chicken breasts using the same method.
- Pour ½ cup white wine into the skillet. Scrape up all the delicious browned bits from the pan’s bottom.
- Allow wine to simmer for 2-3 minutes, reducing slightly.
- Add ¼ cup chicken broth and ¼ cup fresh lemon juice. Stir to combine and create a cohesive sauce.
- Simmer sauce for 2-3 minutes until it slightly thickens.
- Stir in 2 tablespoons drained capers.
- Taste sauce and adjust seasoning as needed.
- Return chicken to the skillet, coating each piece thoroughly with the tangy sauce.
- Let chicken warm in sauce for 1-2 minutes to absorb flavors.
- Sprinkle 2 tablespoons fresh chopped parsley over the chicken.
- Serve immediately with lemon wedges alongside your favorite side dish.
Notes
- Pound the chicken evenly to ensure consistent cooking and tender meat, which helps prevent dry or tough portions.
- Use a blend of olive oil and butter for the best flavor and golden-brown crust that adds richness to the dish.
- Choose a dry white wine like Pinot Grigio or Sauvignon Blanc for the sauce, avoiding sweet varieties that can throw off the balance.
- For a gluten-free version, substitute all-purpose flour with almond flour or cornstarch, which will still create a nice crispy coating.
- Prep Time: 10 minutes
- Cook Time: 18-20 minutes
- Category: Sautéed
- Method: Sautéing
- Cuisine: Italian
Nutrition
- Serving Size: 4
- Calories: 384 kcal
- Sugar: 1 g
- Sodium: 598 mg
- Fat: 23 g
- Saturated Fat: 7 g
- Unsaturated Fat: 14 g
- Trans Fat: 0 g
- Carbohydrates: 9 g
- Fiber: 1 g
- Protein: 38 g
- Cholesterol: 125 mg
Sophie Lane
Recipe Developer
Expertise
Family-friendly Meals, Simple Healthy Cooking, Ingredient Substitutions, Beginner-friendly Recipes, Flexible Meal Prep
Education
- Program: Professional Cook Certificate
- Focus: Online culinary training covering knife skills, cooking techniques, and plant-based and modern cooking approaches.
Schoolcraft CollegeSophie brings a calm and flexible approach to Families With Purpose. Based in Fort Collins, Colorado, she creates recipes that feel simple, clear, and easy to make at home. She focuses on family-friendly meals, healthy everyday cooking, ingredient swaps, and beginner-friendly ideas. Sophie helps make each recipe approachable and easy to follow, especially for busy families who need meals that can bend with the day.