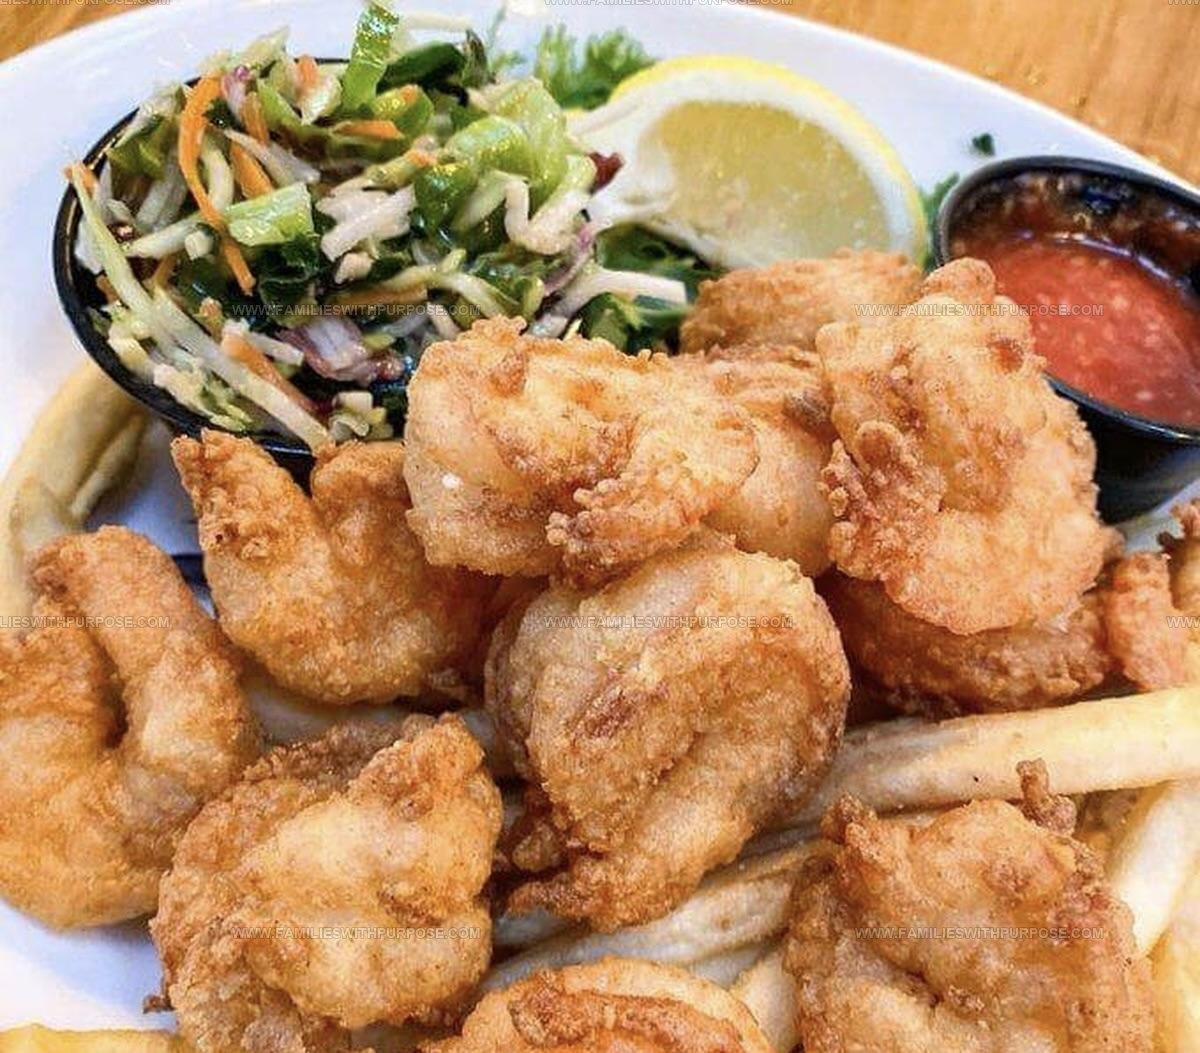
Crispy Fried Shrimp Recipe for Golden Seafood Lovers
Perfect fried shriom earns its place as one of the most beloved seafood classics on menus across coastal towns and landlocked diners alike.
Golden, crispy, and satisfying in every bite, it appeals to families seeking comfort food and seafood enthusiasts craving something familiar yet special.
The exterior shatters at first contact while revealing tender, juicy seafood inside that practically melts on contact.
Part of what makes it so popular is how well it pairs with countless sides, from crispy fries to fresh salads, making it incredibly versatile for any occasion.
Home cooks often feel intimidated by frying, but when you follow a solid method, results rival anything from a restaurant kitchen.
Achieving that signature crunch without greasiness requires attention to a few key details that make all the difference between good and truly exceptional.
Perfecting fried shrimp at home means enjoying restaurant-quality seafood whenever the craving strikes without leaving the house.
Why Perfect Fried Shrimp Stands Out
Essential Ingredients for Perfect Fried Shrimp
Main Proteins:Breading Components:Seasoning Blend:Cooking Essentials:Kitchen Tools Needed for Fried Shrimp
Preparing Perfect Fried Shrimp Step by Step
Prep the Shrimp
Get those 1 lb large shrimp totally dry by grabbing paper towels and giving them a thorough pat down. Moisture is the enemy of crispy fried goodness, so make sure each shrimp looks completely dry.
Create Flour Mixture
Grab a shallow dish and mix up your breading base. Combine the dry ingredients for maximum flavor:
Stir everything together until well blended.
Whip Up Egg Wash
In a separate bowl, whisk together the wet ingredients that will help your breading stick perfectly:
Blend until smooth and ready for dipping.
Set Up Breadcrumb Station
Pour 2 cups panko breadcrumbs into a third shallow dish. These will create that amazing crispy exterior.
First Coating
Dunk each shrimp into the flour mixture. Shake off any excess – you want a light, even coating that will help the next layer stick.
Egg Dip
Take your flour-coated shrimp and give it a quick bath in the egg wash. Let any extra liquid drip back into the bowl.
Breadcrumb Roll
Roll the shrimp in panko breadcrumbs. Press gently to make sure every inch gets a perfect crispy layer.
Heat the Oil
Pour 1/2 cup vegetable oil into a large skillet. Heat to exactly 375°F – temperature matters for perfect frying.
Fry in Batches
Carefully slide breaded shrimp into the hot oil. Don’t crowd the pan – work in batches to keep everything crispy.
Golden Perfection
Fry each batch for 2-3 minutes, flipping once. Watch for that gorgeous golden-brown color that screams deliciousness.
Drain and Rest
Use a slotted spoon to transfer shrimp onto a paper towel-lined plate. This helps drain extra oil.
Final Touch
Sprinkle a pinch of salt over the hot shrimp if you want an extra flavor boost.
Serve and Enjoy
Plate those crispy shrimp with fresh lemon wedges. Squeeze lemon over top right before eating for a bright, zesty finish.
Making It Better With Perfect Fried Shrimp
Easy Variations for Perfect Fried Shrimp
How To Enjoy Perfect Fried Shrimp
Practical Storage Advice for Perfect Fried Shrimp
Perfect Fried Shrimp Common Cooking Questions
Why do I need three separate dishes for breading?
Each dish serves a crucial purpose – flour helps seasoning stick, egg wash helps breading adhere, and panko creates that perfect crispy exterior.
Can I use different breadcrumbs?
Panko works best because it creates a lighter, crunchier coating compared to regular breadcrumbs. Regular breadcrumbs will make your shrimp heavier.
How do I know when the oil is exactly 375°F without a thermometer?
Look for shimmering oil with tiny waves, or drop a breadcrumb that sizzles immediately but doesn’t burn.
Should the shrimp be room temperature before frying?
Cold shrimp straight from the refrigerator can make oil splatter, so let them sit out for 10-15 minutes before breading.
What if my breading falls off while frying?
Make sure each coating layer is thin and even, and don’t overcrowd the pan – this helps breading stay attached.
Can frozen shrimp work for this recipe?
Thaw completely, pat extremely dry, and follow the same breading process for best results.

Perfect Fried Shrimp Recipe
- Total Time: 25 minutes
- Yield: 4 1x
Description
Crispy Fried Shrimp delivers a golden, crunchy seafood delight that comes straight from coastal kitchens to your dinner plate. Grab some fresh shrimp, coat them in seasoned breading, and prepare for a seriously delicious meal that brings restaurant-quality flavor right to your own kitchen.
Ingredients
Main Ingredients:
- 1 lb shrimp
- 2 cups panko breadcrumbs
- 1 cup all-purpose flour
Support Ingredients:
- 2 large eggs
- ¼ cup milk
Seasoning Ingredients:
- 1 tsp salt
- ½ tsp black pepper
- ½ tsp paprika
- ¼ tsp garlic powder
- ½ cup vegetable oil
- 1 lemon
Instructions
- Thoroughly dry each shrimp using paper towels, removing every trace of moisture for optimal crispiness.
- Combine 1 cup flour with 1 tsp salt, ½ tsp black pepper, ½ tsp paprika, and ¼ tsp garlic powder in a shallow dish.
- Whisk 2 large eggs with ¼ cup milk in a separate shallow bowl until smooth and well blended.
- Pour 2 cups panko breadcrumbs into a third shallow dish, spreading them evenly.
- Coat each shrimp completely in seasoned flour mixture, shaking off any excess powder.
- Dunk floured shrimp into egg mixture, allowing extra liquid to drip back into the bowl.
- Roll shrimp in panko breadcrumbs, pressing gently to ensure a complete, even coating.
- Pour ½ cup vegetable oil into a large skillet and heat to exactly 375°F using a digital thermometer.
- Gently slide breaded shrimp into hot oil, working in small batches to maintain proper temperature.
- Fry shrimp for precisely 2-3 minutes, flipping once halfway through cooking.
- Look for a deep golden brown color and crispy exterior as your doneness indicator.
- Transfer fried shrimp to a paper towel-lined plate using a slotted spoon to drain excess oil.
- Sprinkle a light pinch of salt over the shrimp if desired for extra seasoning.
- Serve immediately alongside fresh lemon wedges for bright, zesty squeezing.
Notes
- Thoroughly pat shrimp dry before breading to ensure maximum crispiness and prevent soggy coating.
- Use fresh panko breadcrumbs for the crunchiest exterior that stays crisp even after cooling.
- Maintain consistent oil temperature around 375°F for perfectly golden and evenly cooked shrimp without greasiness.
- For a gluten-free version, swap wheat flour with rice flour and use gluten-free panko or crushed rice cereal for breading.
- Prep Time: 15 minutes
- Cook Time: 10 minutes
- Category: Fried
- Method: Frying
- Cuisine: American
Nutrition
- Serving Size: 4
- Calories: 438 kcal
- Sugar: 1 g
- Sodium: 635 mg
- Fat: 23 g
- Saturated Fat: 3.5 g
- Unsaturated Fat: 18 g
- Trans Fat: 0 g
- Carbohydrates: 37 g
- Fiber: 2 g
- Protein: 27 g
- Cholesterol: 195 mg
Mason Carter
Founder
Expertise
Family Meal Routines, Simple One-pot Meals, Budget-friendly Cooking, Quick Dinner Planning, Batch Cooking Systems
Education
- Certificate: Culinary Arts
- Focus: Training in core cooking techniques, kitchen operations, and real food preparation through hands-on experience in professional-style kitchens.
Penn Foster Career School (Online)Mason is the founder of Families With Purpose and the heart behind its simple, family-focused recipes. Based in Greenville, South Carolina, he creates meals that fit into busy routines and bring people back to the table. He focuses on easy dinners, one-pot meals, budget-friendly cooking, and practical weekly meal planning. Mason has built a recipe collection shaped by real family life, with clear methods and repeatable meals that work on everyday schedules.