Pickle-Brined Fried Chicken Recipe To Crisp Perfectly
Pickle Brined Fried Chicken brings crispy, juicy perfection with a flavor twist that makes every bite memorable.
The savory crunch paired with an unexpected tang creates a bold experience for anyone who loves comfort food with personality.
Whether you serve it at a weekend gathering or enjoy it on a weeknight, this dish knows how to steal the show.
The golden exterior gives way to tender meat that stays moist and flavorful throughout.
People who taste it often come back for seconds because the balance of salt and subtle sourness hits just right.
This recipe works beautifully for casual meals and special occasions alike.
What Makes Pickle-Brined Fried Chicken a Tangy Bite to Love
What Builds Pickle Brined Fried Chicken
Main Protein:Brining Liquid:Coating Dry Ingredients:Wet Coating:Frying Medium:Pickle-Brined Fried Chicken: Tools for Frying Setup
Step-by-Step Guide to Pickle-Brined Fried Chicken
Pickle Juice Bath
Grab those 4 chicken breasts and pour 1 cup (240 ml) of dill pickle juice over them in a container. Seal it up tight and park the whole thing in your refrigerator for 4 to 8 hours. The longer they soak, the more tangy flavor they’ll soak up.
Mix the Crispy Coating
Grab a wide bowl and blend your dry ingredients for a killer crust:
Whisk everything together until it looks perfectly combined.
Buttermilk Dip
Pour 1 cup (240 ml) buttermilk into a separate shallow dish. Pull your chicken from the pickle juice and let the excess drip off.
Flour Coating Magic
Dunk each chicken breast first into the buttermilk, then roll it through your seasoned flour mixture. Press the flour gently so it sticks to every nook and cranny of the chicken.
Heat the Oil
Pour 1 cup (240 ml) vegetable oil into a large skillet. Warm it to 350°F (175°C) over medium-high heat. Use a cooking thermometer to check the temperature for perfect results.
Fry to Golden Perfection
Carefully place each coated chicken breast into the hot oil. Fry for 6-7 minutes on the first side until deep golden brown. Flip and cook another 6-7 minutes until the internal temperature hits 165°F (74°C).
Drain and Rest
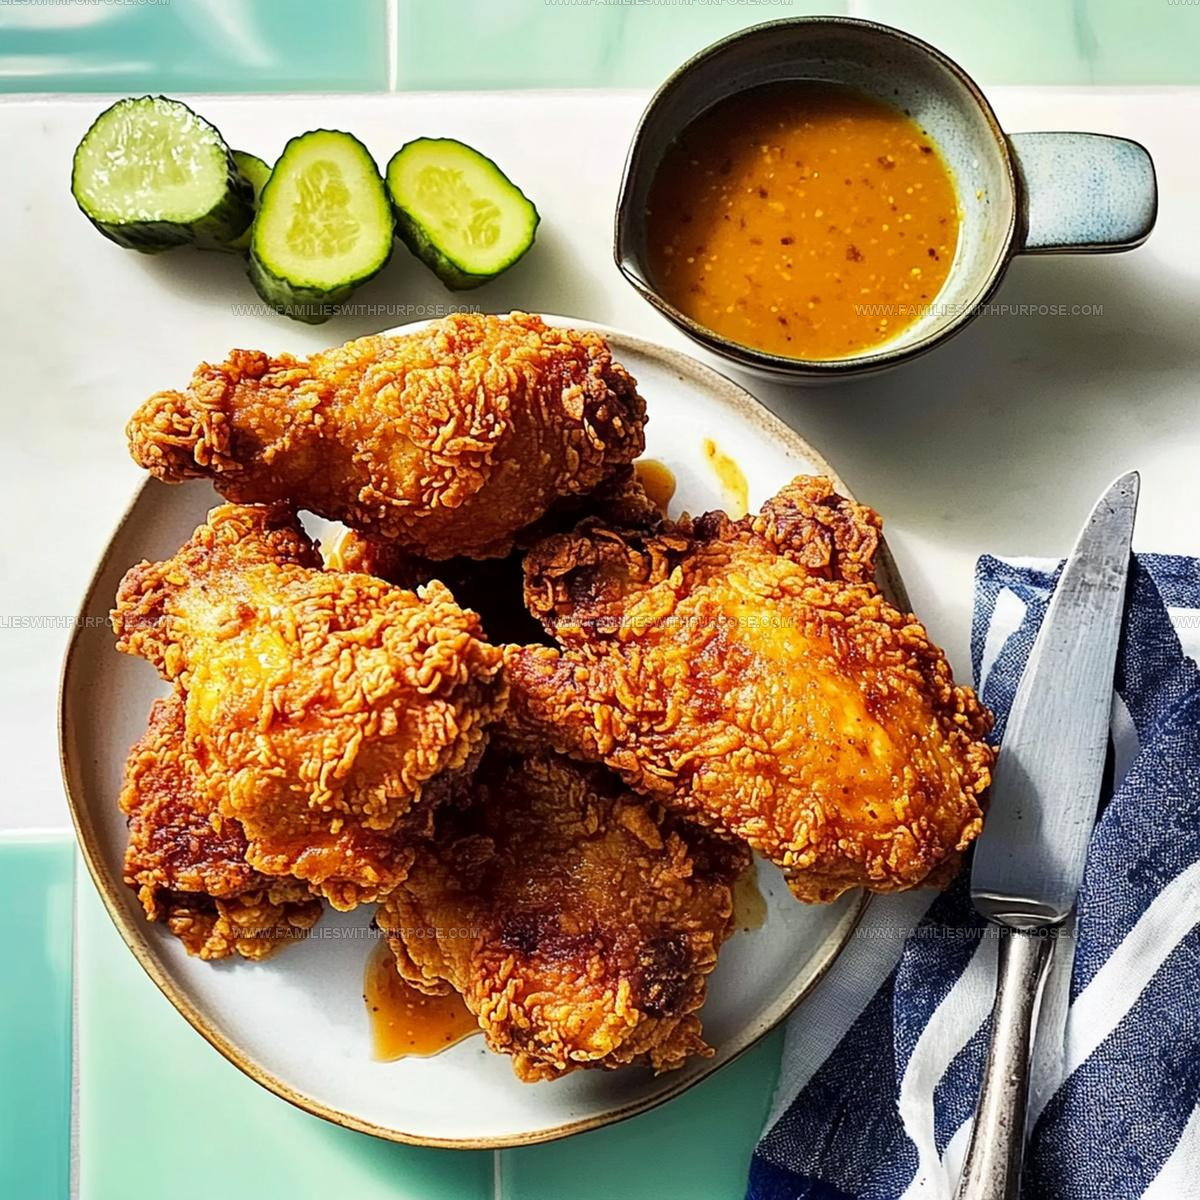
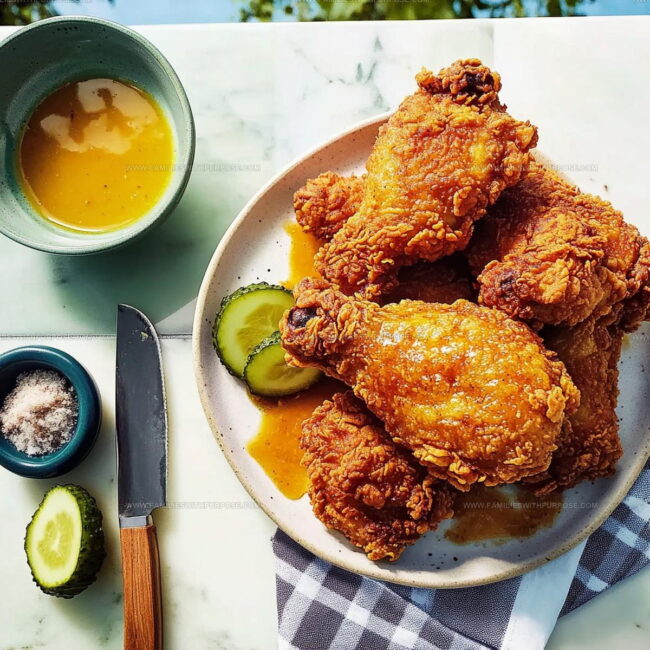
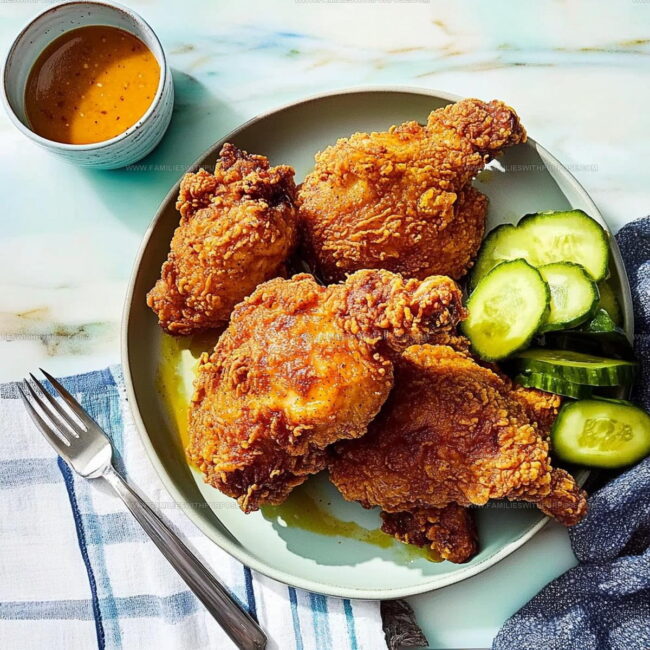
Transfer the fried chicken onto a paper towel-lined plate. Let them rest for 3-4 minutes to drain excess oil and let the juices settle. Serve hot and crispy!
Frying Know-How for Pickle Brined Fried Chicken
Flavor Routes for Pickle Brined Fried Chicken
How Pickle Brined Fried Chicken Is Best Presented
Holding Pickle Brined Fried Chicken After Cooking
All About Pickle-Brined Fried Chicken Questions
Why pickle juice for brining?
Pickle juice adds incredible tanginess and helps tenderize the chicken, creating a juicier, more flavorful piece of fried chicken that’s packed with zesty flavor.
Can I use different types of pickles?
Absolutely! Dill pickle juice works best, but bread and butter or other varieties will also create delicious results. Just avoid sweet pickle varieties.
What if I don’t have buttermilk?
No worries – you can make a quick substitute by mixing milk with a tablespoon of vinegar or lemon juice. Let it sit for 5 minutes before using.
How do I know the oil is hot enough?
Use a cooking thermometer to check that the oil reaches 350°F. If you don’t have one, drop a small piece of bread into the oil – it should sizzle and brown within seconds.
Can I make this chicken ahead of time?
Definitely! Prep the chicken the night before, and keep the breaded pieces refrigerated until you’re ready to fry. Just pat them dry before cooking to ensure extra crispiness.
Is pickle brined chicken really different from regular fried chicken?
The pickle juice creates a more tender, tangy chicken with a deeper flavor that regular brining can’t match.

Pickle-Brined Fried Chicken Recipe
- Total Time: 4 hours 12-16 minutes
- Yield: 4 1x
Description
Pickle Brined Fried Chicken delivers a tangy Southern twist that makes crispy chicken something special. Brining in pickle juice creates an incredibly juicy crunch that brings serious flavor to your dinner plate.
Ingredients
Proteins:
- 4 boneless, skinless chicken breasts
Dry Coating:
- 1 cup all-purpose flour
- 1 teaspoon garlic powder
- 1 teaspoon smoked paprika
- 1 teaspoon salt
- ½ teaspoon black pepper
Wet Ingredients:
- 1 cup dill pickle juice
- 1 cup buttermilk
- 1 cup vegetable oil for frying
Instructions
- Submerge 4 boneless, skinless chicken breasts in 1 cup dill pickle juice inside a sealed container. Refrigerate for 4-6 hours, allowing the tangy brine to infuse deep flavor.
- Create seasoned coating by whisking 1 cup all-purpose flour with 1 tsp garlic powder, 1 tsp smoked paprika, 1 tsp salt, and ½ tsp black pepper in a wide, shallow dish.
- Retrieve chicken from pickle juice and gently pat each piece dry with paper towels. Dunk each breast into 1 cup buttermilk, ensuring complete coverage.
- Roll buttermilk-coated chicken through seasoned flour mixture, pressing gently to help coating adhere completely and create a crispy exterior.
- Pour 1 cup vegetable oil into a large cast-iron skillet. Heat to precisely 350°F, monitoring temperature with a digital thermometer.
- Carefully lower coated chicken pieces into hot oil, maintaining distance between them. Fry for 6-7 minutes on first side until golden brown.
- Flip chicken and cook opposite side for additional 5-6 minutes, ensuring internal temperature reaches 165°F using an instant-read thermometer.
- Transfer fried chicken onto wire rack lined with paper towels, allowing excess oil to drain for 2-3 minutes before serving.
Notes
- Pickle juice tenderizes chicken and adds a tangy, zesty flavor that makes this recipe stand out from traditional fried chicken.
- Brining overnight develops deeper flavor, so plan ahead and let the chicken soak in pickle juice for maximum taste and juiciness.
- Use a meat thermometer to check the internal temperature, ensuring your chicken is perfectly cooked without becoming dry or overdone.
- For a gluten-free version, swap wheat flour with almond flour or gluten-free breadcrumbs to keep the crispy coating intact.
- Prep Time: 4 hours
- Cook Time: 12-16 minutes
- Category: Fried
- Method: Frying
- Cuisine: American
Nutrition
- Serving Size: 4
- Calories: 450 kcal
- Sugar: 1 g
- Sodium: 800 mg
- Fat: 25 g
- Saturated Fat: 5 g
- Unsaturated Fat: 18 g
- Trans Fat: 0.5 g
- Carbohydrates: 30 g
- Fiber: 1 g
- Protein: 35 g
- Cholesterol: 90 mg
Sophie Lane
Recipe Developer
Expertise
Family-friendly Meals, Simple Healthy Cooking, Ingredient Substitutions, Beginner-friendly Recipes, Flexible Meal Prep
Education
- Program: Professional Cook Certificate
- Focus: Online culinary training covering knife skills, cooking techniques, and plant-based and modern cooking approaches.
Schoolcraft CollegeSophie brings a calm and flexible approach to Families With Purpose. Based in Fort Collins, Colorado, she creates recipes that feel simple, clear, and easy to make at home. She focuses on family-friendly meals, healthy everyday cooking, ingredient swaps, and beginner-friendly ideas. Sophie helps make each recipe approachable and easy to follow, especially for busy families who need meals that can bend with the day.