
Salted Caramel Rice Krispie Treats Recipe That Beats Store-Bought
Salted caramel rice krispie treats promise pure comfort and pure joy in every delightful bite.
Sweet and salty sensations dance across your palate with remarkable harmony.
Classic childhood memories merge seamlessly with sophisticated flavor profiles that surprise and delight.
Crispy, gooey textures create a magical moment of pure indulgence perfect for any gathering or spontaneous craving.
Childhood nostalgia meets grown-up sophistication through this simple yet stunning dessert experience.
Minimal effort yields maximum satisfaction with these crowd-pleasing squares that disappear faster than you might anticipate.
What Makes Salted Caramel Rice Krispie Treats Worth Making

Essential Ingredients for Salted Caramel Rice Krispies
Cereal Base:Binding Ingredients:Flavor Enhancers:What Kitchen Tools Do You Need for Salted Caramel Rice Krispie Treats
Preparing Salted Caramel Rice Krispie Treats Step By Step
Melt Butter
Grab a large saucepan and set it over medium heat at 350°F. Drop in 1 cup (2 sticks) of unsalted butter and let it melt smoothly.
Create Marshmallow Base
Lower the heat to 250°F. Add 1 package (10 oz) of mini marshmallows to the melted butter. Stir constantly until the marshmallows transform into a silky, creamy mixture.
Add Caramel Flavor
Take the pan off the heat. Pour in these delicious elements:
Stir everything until it blends into a golden, glossy sauce.
Mix Cereal
Grab a large mixing bowl and dump in 6 cups of Rice Krispies cereal. Pour the warm marshmallow-caramel mixture over the cereal. Use a wooden spoon to coat every single crispy piece.
Prepare the Pan
Line a 9×13-inch baking pan with parchment paper. Spread the sticky cereal mixture evenly across the pan. Press it down firmly using a greased spatula or your clean hands.
Final Touches
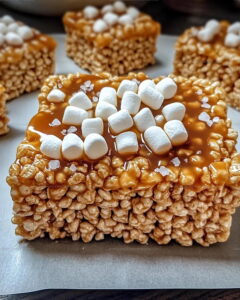
Drizzle some extra salted caramel sauce across the top. Sprinkle a pinch of sea salt over the surface for that perfect salty-sweet crunch.
Cool and Serve
Let the treats rest at room temperature for 30 minutes. Once set, slice into squares and enjoy your homemade caramel masterpiece.
Cook Smarter With Salted Caramel Rice Krispie Treats

Easy Variations for Salted Caramel Rice Krispie Treats
Classic Serving Ideas for Salted Caramel Rice Krispie Treats
Salted Caramel Rice Krispie Treats Storage Recommendations
Salted Caramel Rice Krispie Treats Common Questions
Can I use regular marshmallows instead of mini ones?
Regular marshmallows work perfectly. Just chop them up or use the same weight as mini marshmallows for consistent melting.
What type of caramel sauce works best?
Store-bought salted caramel sauce is great, but homemade caramel gives extra richness. Just ensure it’s smooth and pourable.
How do I prevent the mixture from sticking to my hands?
Grease your hands with butter or cooking spray before pressing the treats into the pan. This makes spreading much easier.
Should the caramel sauce be warm when adding?
Room temperature caramel works best. If it’s too cold, gently warm it to ensure smooth mixing.
Can these treats be made gluten-free?
Replace regular Rice Krispies with a gluten-free crispy rice cereal to make the entire recipe gluten-free.
How thick should the treats be in the pan?
Aim for about 3/4 to 1 inch thick. Press firmly and evenly for consistent texture throughout.
Salted Caramel Rice Krispie Treats Recipe
- Total Time: 35 minutes
- Yield: 12 1x
Description
Salted Caramel Rice Krispie Treats bring childhood nostalgia right to your kitchen with a grown-up twist. Melted marshmallows, crispy rice cereal, and a drizzle of caramel make these treats a perfect sweet-salty snack that everyone will devour.
Ingredients
Main Ingredients:
- 6 cups Rice Krispies cereal
- 1 package (10 oz) mini marshmallows
- 1 cup (2 sticks) unsalted butter
Flavor Enhancers:
- ½ cup salted caramel sauce
- 1 teaspoon vanilla extract
- ½ teaspoon sea salt
Instructions
- Melt 2 sticks (1 cup) unsalted butter in a large saucepan over medium heat, stirring constantly to prevent burning.
- Reduce heat to low and add entire 10 oz package of mini marshmallows, stirring until they completely dissolve into a smooth, glossy mixture.
- Remove pan from heat and incorporate ½ cup salted caramel sauce and 1 tsp vanilla extract, blending until fully integrated.
- Transfer 6 cups Rice Krispies cereal into a spacious mixing bowl and pour the warm marshmallow-caramel blend over the cereal.
- Gently fold the mixture, ensuring every single cereal piece gets thoroughly coated with the caramel marshmallow mixture.
- Line a 9×13-inch baking pan with parchment paper, allowing slight overhang for easier removal.
- Using a greased spatula or clean hands, firmly press the mixture evenly into the pan, creating a compact, smooth surface.
- Drizzle additional salted caramel sauce across the top and sprinkle ½ tsp sea salt, adding extra salt crystals for enhanced flavor.
- Allow treats to set at room temperature for 30 minutes until they become firm and easy to slice.
- Cut into square or rectangular pieces using a sharp knife for clean edges.
Notes
- Let the marshmallow-caramel mixture cool slightly before adding to cereal to prevent soggy treats.
- Use a piece of wax paper or a greased spatula when pressing the mixture into the pan for a smooth, even surface.
- Refrigerate the pan for faster setting if you’re short on time, but room temperature works best for ideal texture.
- Store treats in an airtight container at room temperature for up to 3 days to keep them soft and fresh.
- Prep Time: 10 minutes
- Cook Time: 5 minutes
- Category: Sautéed
- Method: Sautéing
- Cuisine: American
Nutrition
- Serving Size: 12
- Calories: 230 kcal
- Sugar: 15 g
- Sodium: 180 mg
- Fat: 10 g
- Saturated Fat: 6 g
- Unsaturated Fat: 3 g
- Trans Fat: 0.1 g
- Carbohydrates: 32 g
- Fiber: 0.5 g
- Protein: 2 g
- Cholesterol: 20 mg
Mason Carter
Founder
Expertise
Family Meal Routines, Simple One-pot Meals, Budget-friendly Cooking, Quick Dinner Planning, Batch Cooking Systems
Education
- Certificate: Culinary Arts
- Focus: Training in core cooking techniques, kitchen operations, and real food preparation through hands-on experience in professional-style kitchens.
Penn Foster Career School (Online)Mason is the founder of Families With Purpose and the heart behind its simple, family-focused recipes. Based in Greenville, South Carolina, he creates meals that fit into busy routines and bring people back to the table. He focuses on easy dinners, one-pot meals, budget-friendly cooking, and practical weekly meal planning. Mason has built a recipe collection shaped by real family life, with clear methods and repeatable meals that work on everyday schedules.