
Seared Duck Breast Recipe With Crispy Golden Skin
Seared duck breast recipe enthusiasts know that few proteins deliver such an impressive combination of rich flavor and elegant presentation on the dinner plate.
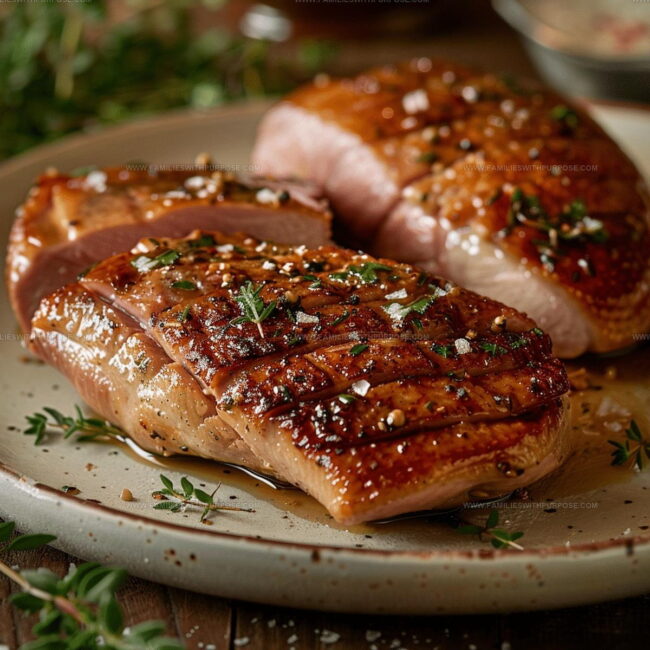
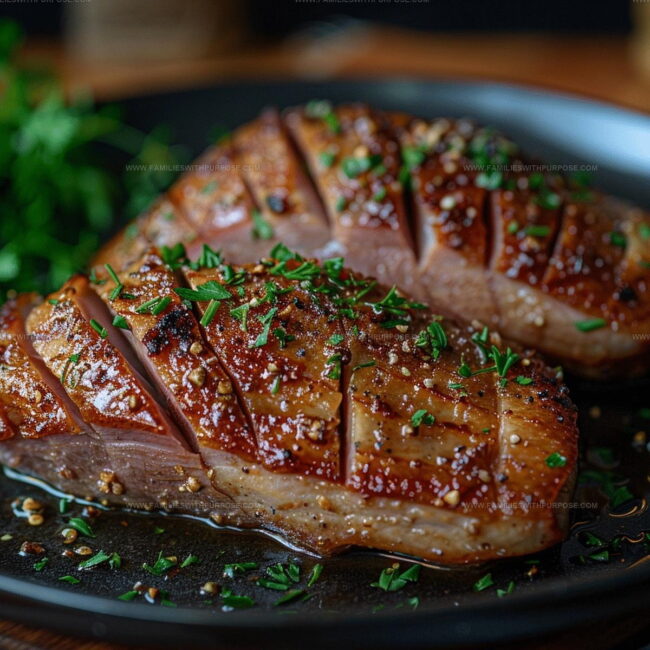
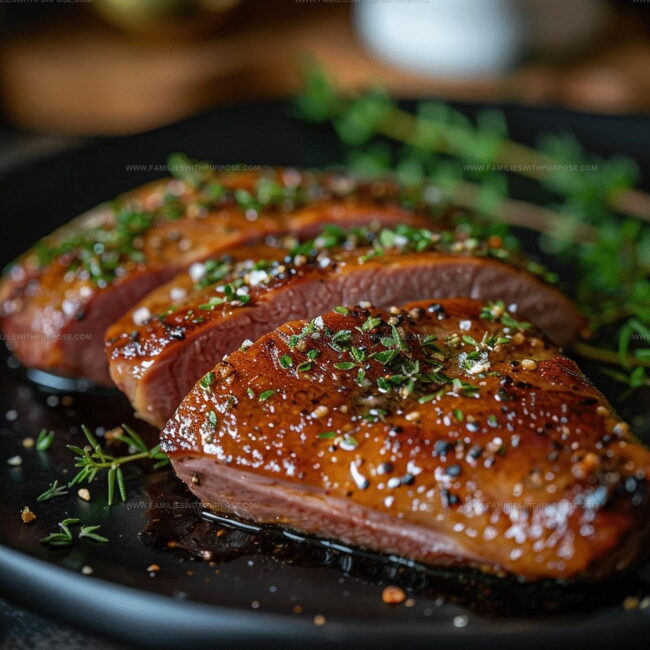
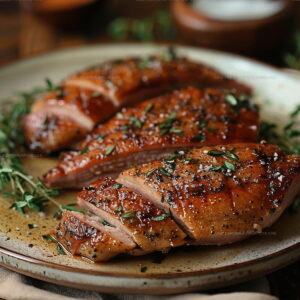
When cooked properly, duck becomes tender and succulent with a beautifully crispy exterior that contrasts perfectly with the juicy meat beneath.
What makes this dish so appealing is how it feels simultaneously special enough for celebrations yet approachable enough for weeknight meals when you want something memorable.
The natural depth of flavor means minimal effort yields maximum impact, making it ideal for both confident cooks and those just beginning to expand their protein repertoire.
Duck pairs beautifully with countless accompaniments, from sweet fruit reductions to earthy root vegetables, giving you flexibility based on the season or occasion.
If you love restaurant-style meals at home without spending hours in the kitchen, this protein deserves a spot in the rotation.
One perfectly cooked breast can turn an ordinary evening into something worth savoring and remembering.
Why Duck Breast Is Worth Cooking at Home
Duck Breast Ingredients List
Main Protein:Seasoning Blend:Cooking Preparation:Essential Kitchen Tools for Duck Breast
Duck Breast Pan-Seared Cooking Guide
Prep the Oven
Crank up your oven to exactly 400°F and grab a skillet that can handle both stovetop and oven action.
Prepare the Duck
Take your 2 duck breasts and create a delicate diamond pattern on the skin. Slice carefully through the fat without touching the meat underneath.
Season Generously
Sprinkle salt and pepper all over those duck breasts. Feel free to get creative with additional seasonings if you’re feeling adventurous:
Start the Skin Rendering
Place those breasts skin-side down in a completely cold skillet. This trick helps render out the fat perfectly.
Slow Cook the Skin
Turn your burner to medium-low heat. Let the skin crisp up for exactly 8-10 minutes. Watch for that gorgeous golden-brown color developing.
Flip and Transfer
Carefully flip the breasts over and slide the entire skillet into the 400°F oven. No need to add anything else.
Roast to Perfection
Roast for 6-8 minutes if you prefer medium-rare. Keep an eye on the internal temperature – it’s your best friend for perfectly cooked duck.
Rest and Serve
Pull the skillet out of the oven and let those breasts rest for 3-4 minutes. This helps the juices redistribute, keeping the meat tender and delicious.
Slice and Plate
Slice the duck against the grain and serve immediately. The crispy skin and tender meat will make your meal feel totally gourmet.
Practical Notes for Duck Breast
Duck Breast with Cooking Style Options
Best Ways to Serve Duck Breast with Simple Sides
How to Store Duck Breast Without Losing Texture
Duck Breast Recipe Common Questions
Can I cook duck breast without a cast-iron skillet?
Absolutely! A heavy-bottomed, oven-safe skillet works perfectly. The key is having a pan that conducts heat evenly and can go from stovetop to oven.
What if my duck skin doesn’t get crispy?
Make sure your skillet starts cold and render the fat slowly over medium-low heat. Press the skin down gently with a spatula to help it crisp up nicely.
How do I know when duck breast is perfectly cooked?
Use a meat thermometer. For medium-rare, aim for an internal temperature of 135°F. The meat should look pink and juicy when you slice it.
Can I prepare duck breast ahead of time?
Seasoning the duck breasts 30 minutes before cooking helps develop deeper flavor. Just keep them refrigerated and pat dry before cooking.
Is duck breast difficult to cook?
Not at all! The technique is straightforward. Pay attention to temperature and timing, and you’ll create restaurant-quality results right in your kitchen.
What should I do with the rendered duck fat?
Save that liquid gold! Strain and store it in the refrigerator. It’s fantastic for roasting potatoes or adding flavor to other dishes.
Seared Duck Breast Recipe
- Total Time: 19-23 minutes
- Yield: 2 1x
Description
Seared Duck Breast delivers a restaurant-quality dinner straight from your kitchen with minimal effort and maximum flavor. Simple techniques and smart seasoning turn this elegant protein into a delightful meal that feels both sophisticated and approachable.
Ingredients
Main Ingredients:
- 2 duck breasts
Seasoning Ingredients:
- Salt
- Pepper
Optional Flavor Enhancers:
- Herbs (optional)
- Spices (optional)
Instructions
- Preheat your oven to a precise 400°F, ensuring the rack is positioned in the center for even cooking.
- Using a sharp knife, delicately create a diamond-shaped pattern across the duck skin, cutting through the fat but not piercing the meat underneath.
- Generously sprinkle 1 teaspoon of salt and ½ teaspoon of freshly ground black pepper over both sides of the 2 duck breasts, massaging the seasoning into the surface.
- Place the duck breasts skin-side down in a cold, heavy cast-iron skillet, ensuring they do not overlap.
- Set the burner to medium-low heat and let the duck render its fat slowly for exactly 8-10 minutes, watching the skin transform into a crispy golden-brown canvas.
- Carefully flip the breasts using tongs, revealing the now-caramelized skin and allowing the underside to briefly kiss the hot pan for 1-2 minutes.
- Transfer the skillet directly into the 400°F oven and roast for 6-8 minutes if you prefer medium-rare, checking the internal temperature reaches 135°F with a meat thermometer.
- Remove the skillet from the oven and let the duck breasts rest undisturbed for 5 minutes, allowing the juices to redistribute before slicing against the grain.
Notes
- Start with a cold skillet to render the fat slowly and create an extra-crispy skin that will make your duck breast absolutely delicious.
- Use a sharp knife when scoring the skin, creating shallow crosshatch marks that help release fat and ensure maximum crispiness.
- Let the duck breast rest after cooking to allow the juices to redistribute, which keeps the meat tender and prevents dryness.
- For a lower-fat version, trim excess fat before cooking and use a lean cooking method like roasting on a rack to help drain away additional fat.
- Prep Time: 5 minutes
- Cook Time: 14-18 minutes
- Category: Pan-Seared
- Method: Roasting
- Cuisine: French
Nutrition
- Serving Size: 2
- Calories: 400 kcal
- Sugar: 0 g
- Sodium: 500 mg
- Fat: 28 g
- Saturated Fat: 8 g
- Unsaturated Fat: 18 g
- Trans Fat: 0.5 g
- Carbohydrates: 0 g
- Fiber: 0 g
- Protein: 35 g
- Cholesterol: 90 mg
Mason Carter
Founder
Expertise
Family Meal Routines, Simple One-pot Meals, Budget-friendly Cooking, Quick Dinner Planning, Batch Cooking Systems
Education
- Certificate: Culinary Arts
- Focus: Training in core cooking techniques, kitchen operations, and real food preparation through hands-on experience in professional-style kitchens.
Penn Foster Career School (Online)Mason is the founder of Families With Purpose and the heart behind its simple, family-focused recipes. Based in Greenville, South Carolina, he creates meals that fit into busy routines and bring people back to the table. He focuses on easy dinners, one-pot meals, budget-friendly cooking, and practical weekly meal planning. Mason has built a recipe collection shaped by real family life, with clear methods and repeatable meals that work on everyday schedules.