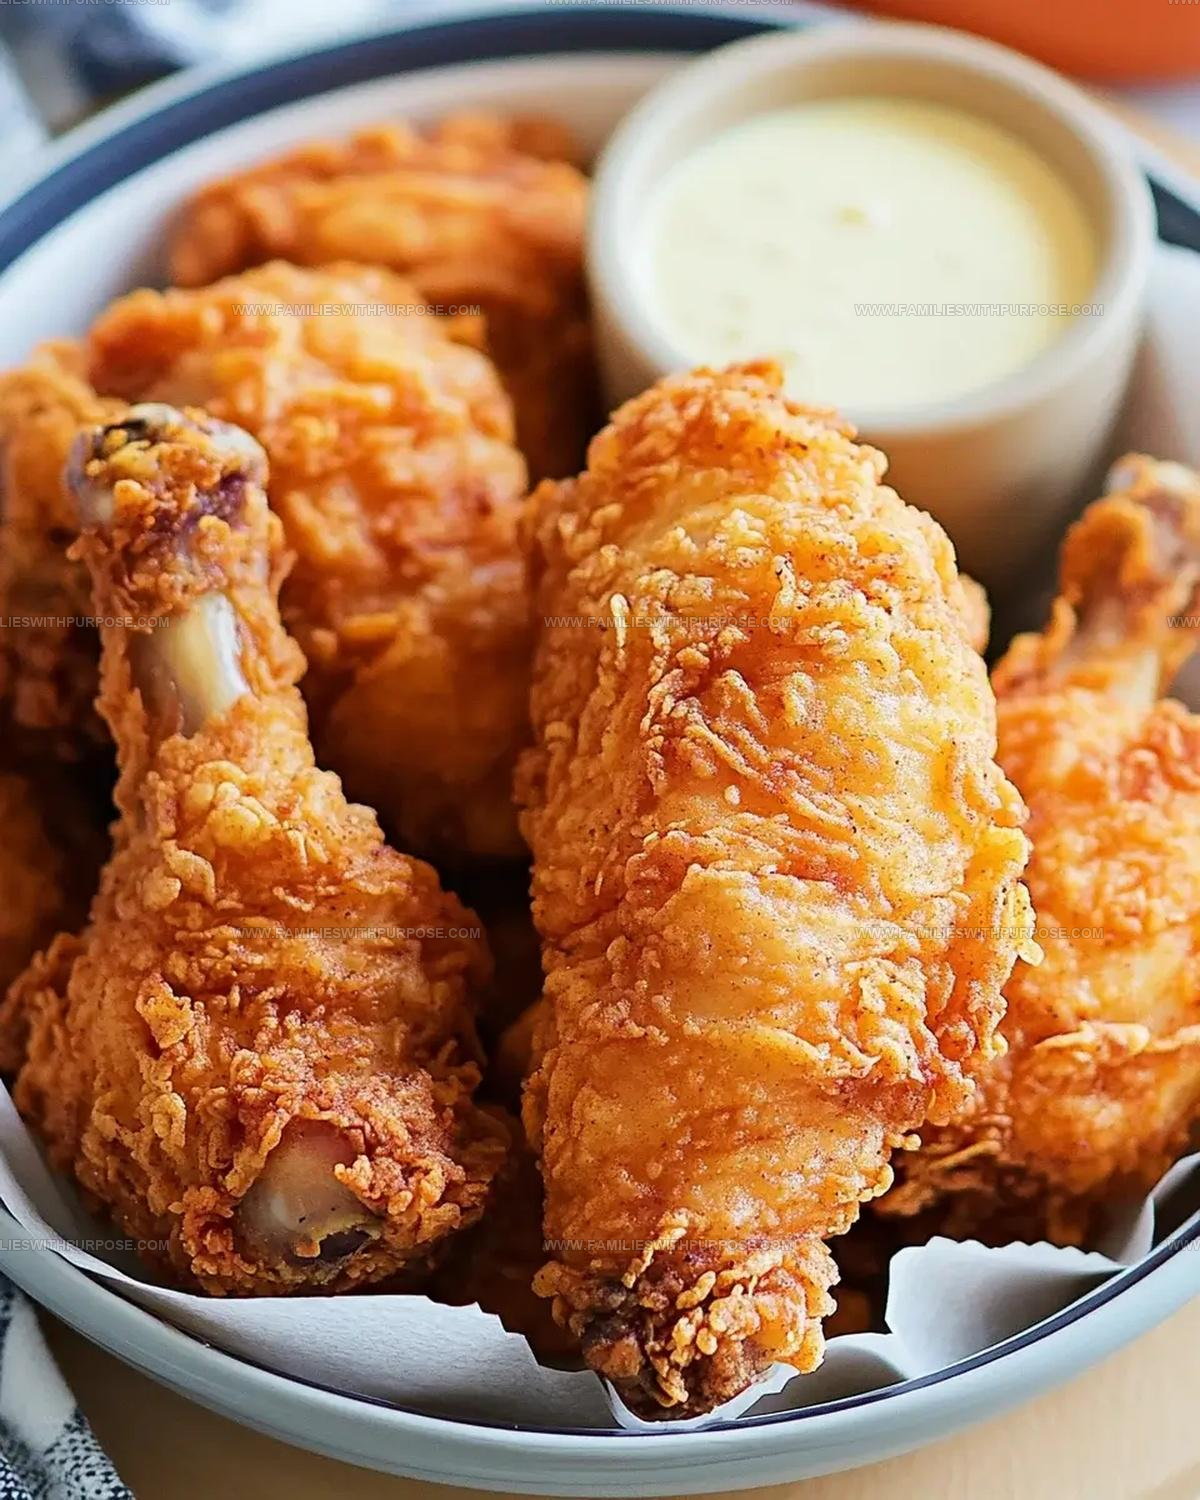
Crispy Buttermilk Fried Chicken Recipe That Stays Crunchy
Southern buttermilk fried chicken represents comfort food at its finest, promising a crispy exterior that gives way to juicy, tender meat underneath.
Generations of home cooks have perfected this classic dish that screams pure satisfaction.
Crackling golden-brown breading promises an experience beyond mere sustenance, inviting memories of family gatherings and summer picnics.
Seasoned with generations of culinary wisdom, this recipe connects you to rich southern cooking traditions.
Regional techniques merge with timeless flavor profiles that speak directly to heartwarming meal moments.
Crispy layers of seasoned coating create sensory excitement guaranteed to spark enthusiasm around any dining table.
Prepare to welcome a crowd-pleasing recipe that promises pure deliciousness with every single bite.
Standout Reasons To Try Buttermilk Fried Chicken
Main Ingredients For Buttermilk Fried Chicken
Chicken Base:Marinade:Seasoned Flour Coating:Seasonings:Frying:Basic Kitchen Equipment for Buttermilk Fried Chicken
Step-By-Step Guide to Buttermilk Fried Chicken

Marinate Chicken
Grab a large bowl and mix 2 cups buttermilk with 2 teaspoons hot sauce. Drop in 3 pounds of chicken pieces, making sure every bit gets covered. Pop the bowl in the refrigerator for 4 hours or overnight to let those flavors soak deep into the meat.
Create Seasoned Flour Coating
In another bowl, whisk together your crispy coating:
Prepare Chicken for Frying
Pull chicken from the buttermilk bath, letting excess liquid drip off. Roll each piece in the seasoned flour, pressing gently so the coating sticks nicely. Shake off any extra flour to prevent clumping.
Heat Cooking Oil
Pour vegetable oil into a large skillet, filling about 2 inches deep. Warm the oil to exactly 350°F – use a thermometer to get this right.
Fry the Chicken
Carefully lower chicken pieces into the hot oil, leaving space between each piece. Cook for 12-15 minutes, flipping occasionally to ensure even browning. Check that the internal temperature reaches 165°F for safe eating.
Rest and Serve
Transfer fried chicken to a wire rack or paper towels to drain extra oil. Let the chicken rest for a few minutes so the coating sets and stays crisp. Serve hot and enjoy your perfectly golden, crunchy chicken.
What Are the Best Buttermilk Fried Chicken Cooking Tips
Popular Variations of Buttermilk Fried Chicken
Classic Serving Ideas for Buttermilk Fried Chicken
Storage And Reheating Notes For Buttermilk Fried Chicken
Popular Questions On Buttermilk Fried Chicken
Why use buttermilk for soaking chicken?
Buttermilk helps tenderize your chicken and adds a tangy flavor while making the meat incredibly juicy and soft.
Can different chicken parts work in this recipe?
Absolutely – drumsticks, thighs, breasts, and wings all taste delicious when prepared with this method.
How do I know the oil temperature is correct?
Use a kitchen thermometer to check that your oil stays steady at 350°F for perfect crispy results without burning.
What happens if the chicken isn’t cooked to 165°F?
Your chicken could contain harmful bacteria, so always check the internal temperature with a meat thermometer for safe eating.
Can the flour mixture be made ahead of time?
Definitely – mix your dry ingredients and store in an airtight container for up to two weeks, ready whenever a fried chicken craving hits.
Is cayenne pepper mandatory in the recipe?
Not at all – skip it if you prefer less heat, or adjust the amount based on your spice tolerance.
Southern Buttermilk Fried Chicken Recipe
- Total Time: 22-25 minutes
- Yield: 6 1x
Description
Buttermilk fried chicken delivers crispy, juicy perfection straight from my Southern grandmother’s kitchen. Seasoned, marinated, and fried to golden-brown deliciousness, this recipe guarantees a mouthwatering meal your family will devour.
Ingredients
Main Protein:
- 3 pounds chicken pieces
Marinade:
- 2 cups buttermilk
- 2 teaspoons hot sauce
Coating and Seasoning:
- 2 cups all-purpose flour
- 1 tablespoon paprika
- 1 teaspoon garlic powder
- 1 teaspoon onion powder
- 1 teaspoon salt
- ½ teaspoon black pepper
- ½ teaspoon cayenne pepper
- Vegetable oil for frying
Instructions
- Submerge 3 pounds of chicken pieces in a bowl with 2 cups buttermilk and 2 teaspoons hot sauce. Refrigerate for 4-8 hours to enhance flavor and tenderness.
- Mix 2 cups flour with 1 tablespoon paprika, 1 teaspoon garlic powder, 1 teaspoon onion powder, 1 teaspoon salt, ½ teaspoon black pepper, and ½ teaspoon cayenne pepper in a wide, shallow dish.
- Remove chicken from buttermilk, letting excess liquid drip off for clean coating.
- Thoroughly coat each chicken piece in seasoned flour mixture, pressing gently to ensure complete coverage.
- Heat vegetable oil to exactly 350°F in a large cast-iron skillet, filling about 2 inches deep.
- Carefully place chicken pieces into hot oil, leaving space between each piece to prevent overcrowding.
- Fry chicken for 12-15 minutes, rotating every 4-5 minutes to achieve uniform golden-brown exterior.
- Check internal temperature with a meat thermometer, ensuring it reaches 165°F for safe consumption.
- Transfer fried chicken to a wire rack or paper towels to drain excess oil and preserve crispy texture.
- Allow chicken to rest 3-5 minutes before serving to let juices redistribute and coating set.
Notes
- Marinate the chicken in buttermilk overnight for maximum tenderness and flavor infusion.
- Use a cast-iron skillet for even heat distribution and superior crispy coating.
- Pat the chicken pieces completely dry before dredging to ensure a super-crisp exterior.
- Maintain consistent oil temperature around 350°F for perfectly golden, crunchy chicken without greasy results.
- Prep Time: 10 minutes
- Cook Time: 12-15 minutes
- Category: Fried
- Method: Frying
- Cuisine: American
Nutrition
- Serving Size: 6
- Calories: 470 kcal
- Sugar: 1 g
- Sodium: 550 mg
- Fat: 25 g
- Saturated Fat: 6 g
- Unsaturated Fat: 17 g
- Trans Fat: 0.2 g
- Carbohydrates: 28 g
- Fiber: 1.5 g
- Protein: 38 g
- Cholesterol: 110 mg
Mason Carter
Founder
Expertise
Family Meal Routines, Simple One-pot Meals, Budget-friendly Cooking, Quick Dinner Planning, Batch Cooking Systems
Education
- Certificate: Culinary Arts
- Focus: Training in core cooking techniques, kitchen operations, and real food preparation through hands-on experience in professional-style kitchens.
Penn Foster Career School (Online)Mason is the founder of Families With Purpose and the heart behind its simple, family-focused recipes. Based in Greenville, South Carolina, he creates meals that fit into busy routines and bring people back to the table. He focuses on easy dinners, one-pot meals, budget-friendly cooking, and practical weekly meal planning. Mason has built a recipe collection shaped by real family life, with clear methods and repeatable meals that work on everyday schedules.