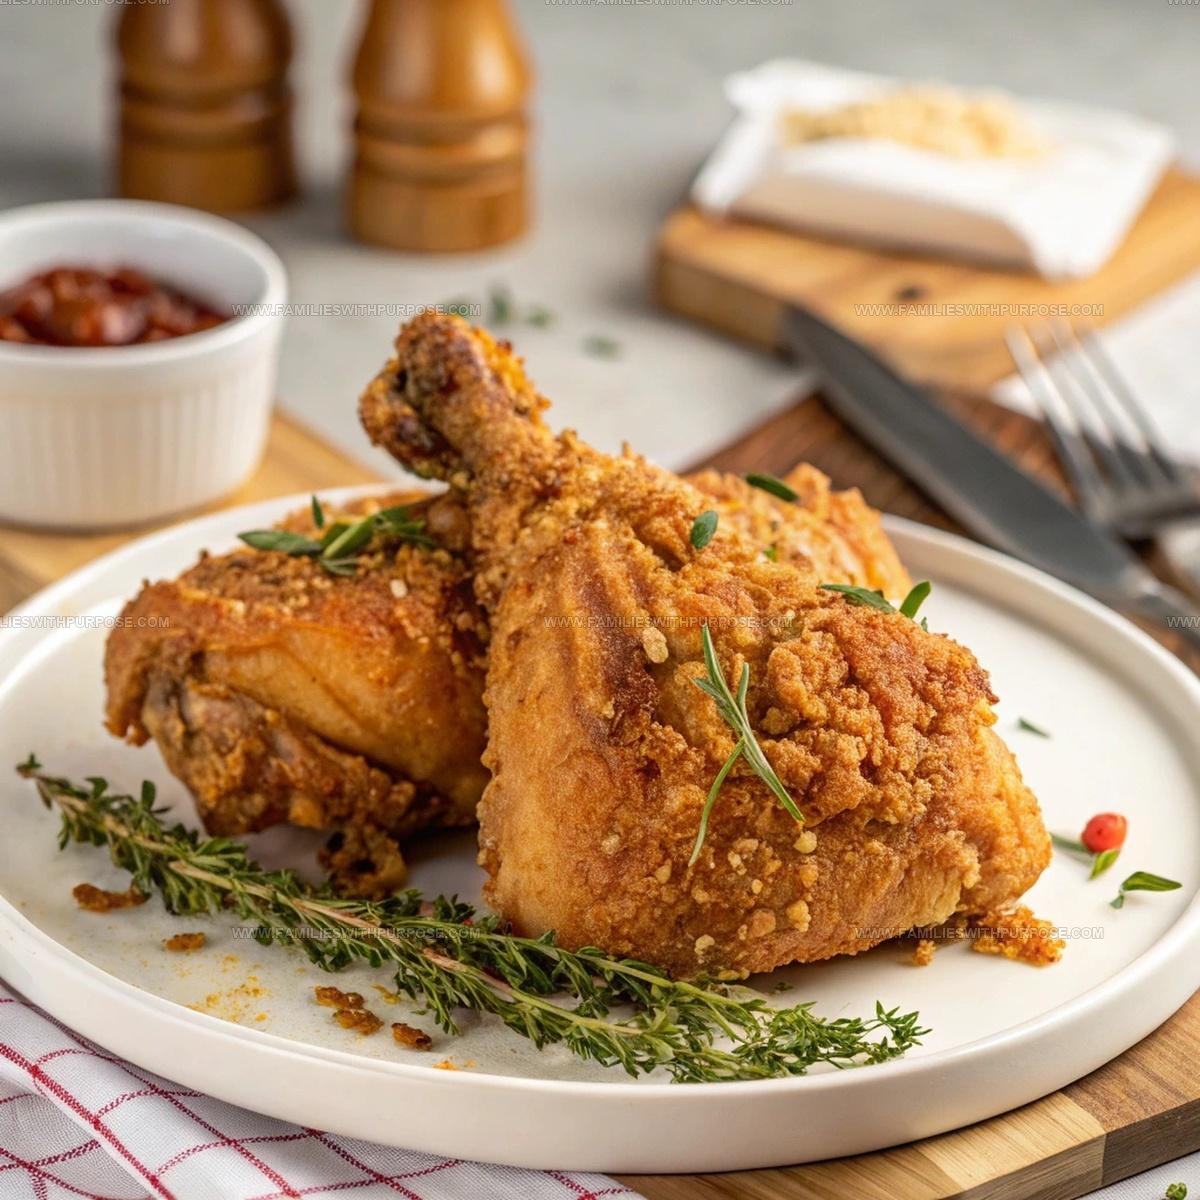
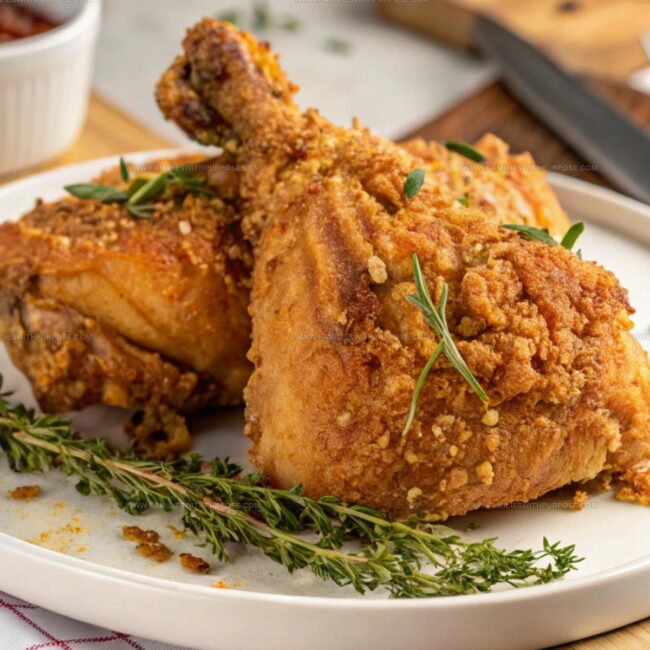
Crispy Fried Chicken Recipe with Tender Inside
Fried Chicken makes any meal feel like a celebration, whether you're feeding a crowd or just treating yourself to something special.
The crispy, golden coating paired with juicy, tender meat creates a comfort food favorite that never goes out of style.
People across generations and cultures have embraced this dish because it delivers pure satisfaction with every bite.
The aroma alone can make mouths water and bring everyone running to the table.
You can serve it for Sunday dinner, pack it for picnics, or enjoy it straight from the pan as a midnight snack.
Few dishes match the universal appeal and crowd-pleasing power of this classic.
Head to the recipe below and start cooking up happiness today!
Why Fried Chicken Is Crispy, Juicy Perfection
Fried Chicken Ingredients Breakdown
Main Protein:Marinade Ingredients:Coating Ingredients:Frying Ingredient:Tools & Frying Gear for Fried Chicken
How to Prepare Fried Chicken
Prepare Chicken Marinade
Grab 2 pounds of chicken pieces and place them in a large bowl. Pour 2 cups of buttermilk over your chicken, making sure every single piece gets completely covered. The buttermilk will help tenderize your meat and add fantastic flavor.
Marinate Overnight
Cover the bowl and stash it in the refrigerator for at least 4 hours, but overnight works best. This gives the buttermilk time to work its uplifting and make your chicken super tender.
Mix Coating Ingredients
Grab a big mixing bowl and combine:
If you want some heat, toss in 1 teaspoon cayenne pepper.
Prepare Coating Station
Remove the chicken from the buttermilk, letting excess liquid drip off. Set up your coating station with the flour mixture in one shallow dish. Press each chicken piece firmly into the seasoned flour, making sure every nook gets covered.
Double Coating Technique
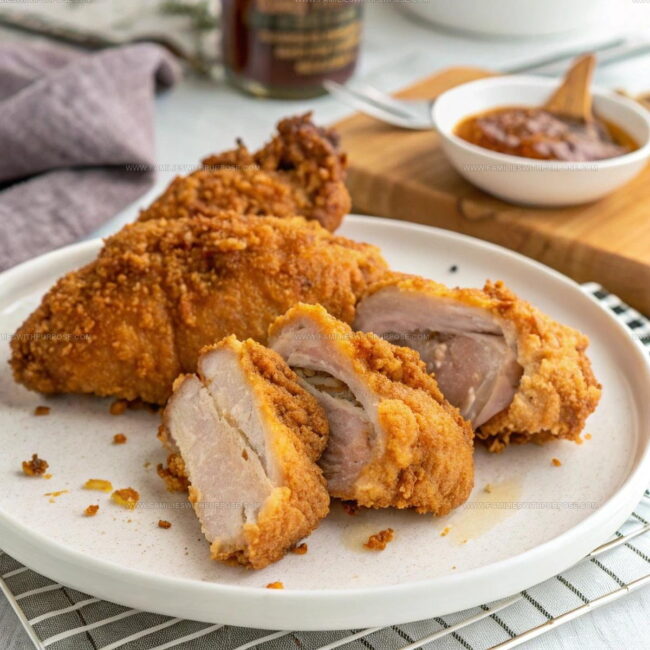
For extra crispiness, dip your flour-coated chicken into beaten eggs, then back into the flour mixture. Press the coating firmly so it sticks well. This double-dipping creates an incredible crunchy exterior.
Rest Coated Chicken
Let your coated chicken pieces rest on a wire rack for 10-15 minutes. This helps the coating set and stick better during frying.
Heat Oil
Pour 4 cups vegetable or peanut oil into a deep fryer or large pot. Heat the oil to exactly 350°F (175°C). Use a thermometer to check the temperature for perfect frying.
Fry Chicken
Carefully lower chicken pieces into the hot oil, working in batches to avoid overcrowding. Fry each batch for 12-15 minutes, turning occasionally to ensure even golden-brown coloring.
Check Temperature
Use a meat thermometer to confirm the chicken’s internal temperature reaches 165°F (75°C). This ensures your chicken is perfectly cooked and safe to eat.
Drain and Rest
Transfer the fried chicken to a wire rack set over a baking sheet to drain excess oil. Let the chicken rest for 5 minutes before serving to help the juices redistribute.
Serve and Enjoy
Serve your crispy fried chicken hot with your favorite sides like hot sauce, coleslaw, or fresh biscuits. Enjoy the delicious crunch and flavor!
Pro Tips for Golden, Crunchy Fried Chicken
Fried Chicken Variations to Explore
Serving Fried Chicken Hot
Best Way to Store Fried Chicken for Later
Fried Chicken FAQs for Quick Guidance
Why buttermilk for marinating?
Buttermilk helps tenderize the chicken and adds incredible flavor. The acids break down protein, making meat super soft and juicy.
Can fresh chicken work?
Always use fresh chicken. Frozen chicken changes texture and won’t absorb marinade properly.
What if cornstarch runs out?
Cornstarch helps create extra crispiness. If missing, replace with equal amounts of all-purpose flour, but the coating won’t be quite as crunchy.
How do know chicken is fully cooked?
Use a meat thermometer. The internal temperature must reach 165°F in the thickest part to ensure safe eating.
Why rest chicken after coating?
Resting helps flour coating stick better and creates a crispier exterior when frying. The coating sets and becomes more stable during those 10-15 minutes.
What oil works best?
Peanut or vegetable oil are perfect. They have high smoke points and neutral flavors that work great for deep frying chicken.

Southern-Style Buttermilk Fried Chicken Recipe
- Total Time: 4 hours 37-40 minutes
- Yield: 4 1x
Description
My classic Southern Fried Chicken recipe delivers pure comfort straight from my grandmother’s kitchen. Crispy golden breading and tender meat combine for a delicious meal that reminds me of family dinners back home.
Ingredients
Main Ingredients:
- 2 lbs chicken pieces
- 4 cups vegetable oil or peanut oil
- 2 cups buttermilk
- 2 cups all-purpose flour
Seasoning and Spices:
- 1 tablespoon paprika
- 1 teaspoon salt
- 1 teaspoon black pepper
- 1 teaspoon garlic powder
- ½ teaspoon salt
- ½ teaspoon black pepper
- ½ teaspoon garlic powder
Supporting Ingredients:
- ½ cup cornstarch
- 1 teaspoon onion powder
- 1 teaspoon cayenne pepper
Instructions
- Submerge chicken pieces completely in buttermilk, ensuring every surface gets coated with the tangy marinade.
- Refrigerate the chicken for 4-8 hours, allowing the buttermilk to tenderize and flavor the meat deeply.
- Combine flour, cornstarch, and all dry seasoning ingredients in a wide, shallow dish, mixing thoroughly to distribute spices evenly.
- Drain chicken from buttermilk, letting excess liquid drip back into the original container.
- Roll each chicken piece generously in seasoned flour mixture, pressing firmly to create a thick, adherent coating.
- Place coated chicken on a clean wire rack, allowing the breading to set for 10-15 minutes at room temperature.
- Heat 4 cups vegetable oil in a deep, heavy-bottomed pot to exactly 350°F, using a digital thermometer for precision.
- Carefully lower chicken pieces into hot oil, maintaining spacing to prevent overcrowding and ensure even cooking.
- Fry chicken for 12-15 minutes, turning occasionally to achieve uniform golden-brown coloration.
- Check internal temperature with a meat thermometer – it must reach 165°F at the thickest part of the meat.
- Transfer fried chicken to a wire rack positioned over a baking sheet to drain excess oil.
- Allow chicken to rest for 5 minutes before serving to help juices redistribute and maintain crispiness.
Notes
- Marinate the chicken in buttermilk overnight to create incredibly tender, juicy meat that falls off the bone.
- Double-dredging the chicken in seasoned flour and eggs creates an extra-crispy, thick coating that seals in moisture.
- Let the coated chicken rest before frying to help the breading adhere better and prevent it from falling off during cooking.
- Check the oil temperature carefully to ensure perfect golden-brown crispiness without burning the outside or undercooking the inside.
- Prep Time: 4 hours 25 minutes
- Cook Time: 12-15 minutes
- Category: Fried
- Method: Frying
- Cuisine: Southern American
Nutrition
- Serving Size: 4
- Calories: 575 kcal
- Sugar: 1 g
- Sodium: 870 mg
- Fat: 35 g
- Saturated Fat: 7 g
- Unsaturated Fat: 25 g
- Trans Fat: 0.5 g
- Carbohydrates: 32 g
- Fiber: 2 g
- Protein: 45 g
- Cholesterol: 120 mg
Sophie Lane
Recipe Developer
Expertise
Family-friendly Meals, Simple Healthy Cooking, Ingredient Substitutions, Beginner-friendly Recipes, Flexible Meal Prep
Education
- Program: Professional Cook Certificate
- Focus: Online culinary training covering knife skills, cooking techniques, and plant-based and modern cooking approaches.
Schoolcraft CollegeSophie brings a calm and flexible approach to Families With Purpose. Based in Fort Collins, Colorado, she creates recipes that feel simple, clear, and easy to make at home. She focuses on family-friendly meals, healthy everyday cooking, ingredient swaps, and beginner-friendly ideas. Sophie helps make each recipe approachable and easy to follow, especially for busy families who need meals that can bend with the day.