Stovetop Mac & Cheese Recipe For Quick Creamy Comfort
No-Bake Stovetop Mac and Cheese captures the ultimate comfort food experience right on your kitchen counter in minutes.
This creamy classic has been warming hearts and filling bellies for generations, making it a weeknight staple that never goes out of style.
Busy evenings call for recipes that don't demand much fuss, and this one answers with simplicity and satisfaction.
The beauty lies in how effortlessly it comes together while still delivering that rich, velvety texture everyone craves.
Families love having a reliable dish they can count on when time is tight but appetites are big.
Kids ask for seconds, and adults appreciate the no-nonsense approach that skips the oven entirely.
Make this tonight and watch plates empty faster than you can refill them.
Quick Comfort Reasons to Love Stovetop Mac and Cheese
What Ingredients Make No Bake Stovetop Mac and Cheese?
Main Pasta:Dairy Base:Cheese Blend:Seasoning Blend:Finishing Touches:Tools for Stovetop Mac and Cheese
No-Oven Directions for Stovetop Mac and Cheese
Boil the Pasta
Get a large pot of water boiling and toss in a generous pinch of salt. Drop 8 oz (226 grams) of elbow macaroni into the bubbling water. Cook at a rolling boil for 8-10 minutes until the pasta is tender but still has a slight bite. Drain the pasta in a colander and set it aside while you prepare the cheesy magic.
Create the Butter Base
Return the same pot to the stove at medium heat (350°F). Melt 2 tablespoons (28 grams) of unsalted butter until it starts to bubble gently. Sprinkle 2 tablespoons (16 grams) of all-purpose flour into the melted butter. Stir constantly for about 60 seconds to cook out the raw flour taste and create a smooth foundation for your sauce.
Pour in the Creamy Liquid
Slowly stream 1 cup (240 ml) of whole milk and 1 cup (240 ml) of heavy cream into the pot. Whisk continuously to blend the butter mixture with the dairy. Keep stirring for 3 minutes until the sauce thickens and coats the back of your wooden spoon.
Melt the Cheese
Lower the heat to 300°F and add your cheese blend:
Stir until the cheese transforms into a smooth, glossy sauce that looks absolutely delicious.
Season the Sauce
Sprinkle in your flavor boosters:
Mix everything thoroughly so each bite will be packed with flavor.
Combine Pasta and Sauce
Dump the cooked macaroni back into the pot. Gently fold the pasta through the cheese sauce, making sure every noodle gets a perfect coating of creamy goodness.
Serve Immediately
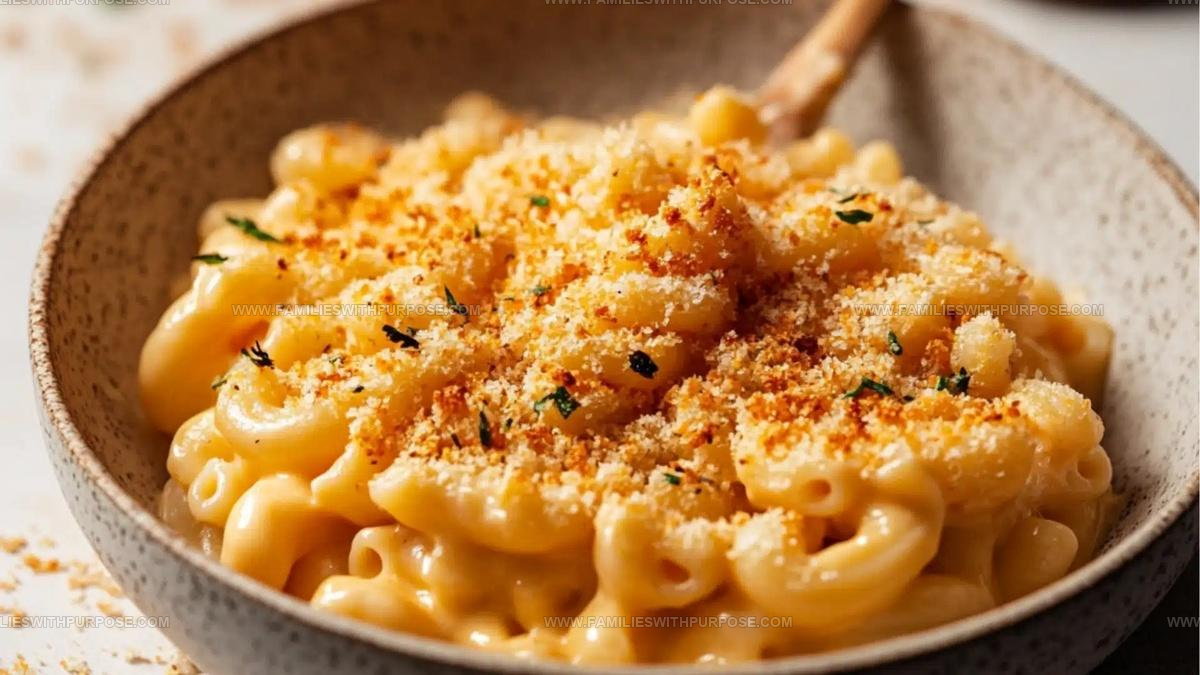
Scoop the mac and cheese into bowls while it’s steaming hot. If you’re feeling fancy, sprinkle some extra cheese or a dash of paprika on top. Dinner is served!
Cooking Notes for No Bake Stovetop Mac and Cheese
How Can No Bake Stovetop Mac and Cheese Be Changed?
Serving Ideas for No Bake Stovetop Mac and Cheese
How Should No Bake Stovetop Mac and Cheese Be Stored?
No Bake Stovetop Mac and Cheese Simple Answers
What cheese works best for this mac and cheese?
Sharp cheddar and mozzarella create a perfect creamy blend, but feel free to experiment with your favorite cheeses that melt smoothly.
Can this recipe be made gluten-free?
Swap regular flour with a gluten-free flour blend or cornstarch to thicken your sauce without changing the delicious flavor.
How do I prevent a grainy cheese sauce?
Always add cheese off the heat and stir gently to keep your sauce silky and smooth. Lower heat helps prevent separation.
Should the pasta be hot or cold when mixing with sauce?
Use warm pasta straight after draining to help the cheese sauce coat each noodle perfectly and stay extra creamy.
What if my sauce gets too thick?
Simply add a splash of milk or pasta water to thin it out and restore the perfect consistency.
Can I make this ahead of time?
While best fresh, you can reheat gently with a little extra milk to restore the sauce’s creamy texture.

Stovetop Creamy Mac And Cheese Recipe
- Total Time: 15 minutes
- Yield: 4 1x
Description
Mac and Cheese brings creamy comfort straight from your stovetop without turning on the oven. Cheesy noodles come together faster than ordering takeout, making dinner a delightful breeze for hungry families.
Ingredients
Primary Ingredients:
- 8 ounces (226 grams) elbow macaroni
- 2 cups shredded cheddar cheese
- 1 cup whole milk
- 1 cup heavy cream
Supporting Ingredients:
- 2 tablespoons unsalted butter
- 2 tablespoons all-purpose flour
- 0.5 cup shredded mozzarella
- 0.5 teaspoon garlic powder
- 0.5 teaspoon onion powder
- 0.5 teaspoon Dijon mustard
- Salt
- Pepper
Seasoning Ingredients:
- Salt
- Pepper
Instructions
- Boil 8 oz (226g) elbow macaroni in salted water at 212°F (100°C) for 8-9 minutes until tender. Drain pasta completely and set aside.
- Melt 2 tbsp unsalted butter in the same large pot over medium heat at 350°F (175°C). Whisk 2 tbsp all-purpose flour into melted butter, stirring constantly for 60 seconds.
- Pour 1 cup whole milk and 1 cup heavy cream into the roux, whisking continuously. Simmer for 3 minutes until sauce thickens and reaches 180°F (82°C).
- Reduce heat to low at 200°F (93°C). Sprinkle 2 cups shredded cheddar and ½ cup mozzarella into the sauce. Stir until cheese melts completely and sauce becomes smooth.
- Add ½ tsp garlic powder, ½ tsp onion powder, ½ tsp Dijon mustard, salt, and pepper to the cheese sauce. Mix thoroughly to distribute seasonings evenly.
- Fold drained pasta into cheese sauce, ensuring every noodle gets coated with creamy mixture. Stir gently for 1 minute to heat pasta through.
- Transfer mac and cheese to serving dishes. Optional: Garnish with extra cheese, chopped parsley, or paprika for added flavor and visual appeal.
Notes
- Drain pasta just before it reaches full tenderness to prevent mushy mac and cheese, as it will continue cooking when mixed with the hot sauce.
- Shred cheese yourself instead of using pre-shredded varieties, which contain anti-caking agents that can make the sauce grainy.
- For a lighter version, swap heavy cream with whole milk and use reduced-fat cheeses without sacrificing creamy texture.
- Add protein like crispy bacon bits, diced ham, or cooked chicken to transform this quick mac and cheese into a complete meal.
- Prep Time: 5 minutes
- Cook Time: 10 minutes
- Category: Boiled
- Method: Boiling
- Cuisine: American
Nutrition
- Serving Size: 4
- Calories: 495 kcal
- Sugar: 3 g
- Sodium: 330 mg
- Fat: 32 g
- Saturated Fat: 19 g
- Unsaturated Fat: 12 g
- Trans Fat: 0.5 g
- Carbohydrates: 33 g
- Fiber: 1.5 g
- Protein: 22 g
- Cholesterol: 95 mg
Sophie Lane
Recipe Developer
Expertise
Family-friendly Meals, Simple Healthy Cooking, Ingredient Substitutions, Beginner-friendly Recipes, Flexible Meal Prep
Education
- Program: Professional Cook Certificate
- Focus: Online culinary training covering knife skills, cooking techniques, and plant-based and modern cooking approaches.
Schoolcraft CollegeSophie brings a calm and flexible approach to Families With Purpose. Based in Fort Collins, Colorado, she creates recipes that feel simple, clear, and easy to make at home. She focuses on family-friendly meals, healthy everyday cooking, ingredient swaps, and beginner-friendly ideas. Sophie helps make each recipe approachable and easy to follow, especially for busy families who need meals that can bend with the day.