
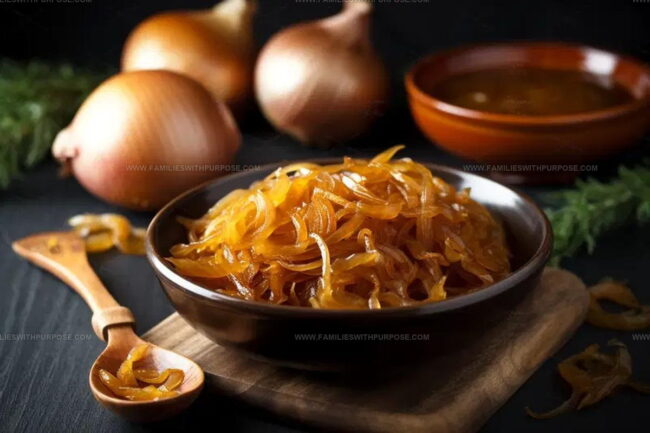
Sweet Caramelized Onions Recipe You’ll Want on Everything
Sweet caramelized onions recipe fans know that patience in the kitchen delivers one of the most versatile flavor boosters around.
Slow cooking puts out natural sugars that create a deep, rich taste perfect for adding complexity to countless meals throughout the week.
The golden-brown result works beautifully on sandwiches, folded into dips, or piled high on burgers and pizzas.
Beyond the incredible flavor, you get a condiment that keeps well and stretches across breakfast, lunch, and dinner with ease.
Beginners find the process forgiving, while experienced cooks appreciate how such simple preparation yields sophisticated results.
The aroma alone fills the house with warmth and comfort that makes everyone gather in the kitchen.
Once you master the technique, having a jar on hand becomes second nature for busy weeknights when flavor matters most.
Why Caramelized Onions Add Depth
A Closer Look at Caramelized Onions Ingredients
Main Ingredients:What Tools Are Needed for Caramelized Onions
How to Caramelize Sweet Onions
Prepare Pan
Heat a large stainless steel or enameled cast iron pan over medium-high heat. Add 2 tbsp canola oil to coat the bottom of the pan.
Slice Onions
Grab 2 to 3 large onions and slice them finely. The thinner the slices, the faster they’ll caramelize.
Start Cooking Onions
Spread the sliced onions evenly across the hot pan. Stir constantly to prevent sticking and ensure even cooking for about 5 minutes.
First Water Technique
After the onions start to brown:
Splash the water into the pan and use a wooden spoon to scrape up the browned bits from the bottom. This adds deep flavor to your onions.
Continue Caramelizing
Keep cooking and stirring. When the pan starts to brown again, repeat the water technique:
Scrape and stir to prevent burning.
Add Baking Soda
Sprinkle 1/3 tsp baking soda over the onions. This helps speed up the caramelization process and creates a beautiful golden color.
Final Caramelization
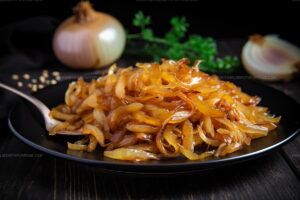
Continue cooking for about 10 more minutes, stirring frequently. Watch for a deep brown color that signals perfectly caramelized onions.
Season Onions
Remove the pan from heat and sprinkle 1/2 tsp salt over the caramelized onions. Stir to distribute the seasoning evenly.
Serve or Store
Transfer the caramelized onions to a serving dish or storage container. They’re ready to enhance any dish with their rich, sweet flavor.
Winning Tips for Caramelized Onions
Best Onion Preparation Variations
Best Ways to Use Sweet Caramelized Onions
Storage Guide for Caramelized Onions
Caramelized Onions FAQs Explained
Can I use oil instead of butter?
Absolutely! Olive oil or vegetable oil work perfectly. Each fat brings a slightly different flavor, but the caramelization process remains the same.
What if my onions start to burn?
Drop the heat and add water immediately. Stirring constantly helps prevent burning and ensures even caramelization.
Do different onion types change the result?
Sweet onions like Vidalia caramelize faster and taste slightly sweeter. Yellow onions provide a classic, robust flavor that works great in most recipes.
Should the pan be non-stick?
A stainless steel or cast iron pan creates better fond, which means more complex flavor. Non-stick pans work but won’t develop as rich a caramelization.
Can these onions be made ahead of time?
Definitely! Store them in an airtight container in the refrigerator for up to five days. They taste fantastic cold or reheated.
Why do you add water during cooking?
Water helps lift the delicious browned bits from the pan, preventing burning and creating deeper flavor layers.
Sweet Caramelized Onions Recipe
- Total Time: 20 minutes
- Yield: 3 to 4 1x
Description
Crafting quick caramelized onions is pure kitchen magic with just a bit of olive oil and patience. These golden-brown beauties elevate sandwiches, pizzas, and salads with their rich, sweet flavor that makes your taste buds dance.
Ingredients
Main Ingredients:
- 2 to 3 large onions
Supporting Ingredients:
- 2 tablespoons canola oil
- ½ teaspoon salt
Flavor Enhancer:
- ⅓ teaspoon baking soda
Instructions
- Warm 2 tablespoons of canola oil in a large stainless steel or cast iron skillet over high heat for 2 minutes until shimmering.
- Carefully slide 2 to 3 finely sliced onions into the hot pan, spreading them evenly across the surface.
- Stir the onions constantly with a wooden spoon for 5 minutes, ensuring they coat the pan’s bottom and develop a pale brown fond.
- Pour 2 tablespoons of water into the skillet, using your spoon to scrape up all the delicious browned bits from the pan’s bottom.
- Continue stirring the onions as another layer of fond develops over 2 minutes, then add another 2 tablespoons of water and scrape again.
- Repeat the water-and-scrape technique, stirring frequently until your onions turn a deep, rich brown color, which takes approximately 15 minutes total.
- Sprinkle ½ teaspoon of salt and ⅓ teaspoon of baking soda over the onions, mixing thoroughly to enhance caramelization.
- Remove the skillet from heat immediately to prevent burning, transferring your perfectly caramelized onions to a serving dish.
Notes
- Opt for sweet onion varieties like Vidalia for a more mellow, caramel-like result that deepens the overall flavor profile.
- Watch the heat carefully since cast iron or stainless steel can create hot spots that might burn your onions if not stirred consistently.
- Save leftover caramelized onions in an airtight container in the refrigerator for up to five days, perfect for adding instant depth to sandwiches, pizzas, or salads.
- For a vegan version, replace butter with olive oil or coconut oil, which will still help create that rich golden-brown color and complex taste.
- Prep Time: 5 minutes
- Cook Time: 15 minutes
- Category: Sautéed
- Method: Sautéing
- Cuisine: American
Nutrition
- Serving Size: 3 to 4
- Calories: 120 kcal
- Sugar: 5 g
- Sodium: 420 mg
- Fat: 14 g
- Saturated Fat: 1.3 g
- Unsaturated Fat: 12.7 g
- Trans Fat: 0 g
- Carbohydrates: 9 g
- Fiber: 1.5 g
- Protein: 1.2 g
- Cholesterol: 0 mg
Mason Carter
Founder
Expertise
Family Meal Routines, Simple One-pot Meals, Budget-friendly Cooking, Quick Dinner Planning, Batch Cooking Systems
Education
- Certificate: Culinary Arts
- Focus: Training in core cooking techniques, kitchen operations, and real food preparation through hands-on experience in professional-style kitchens.
Penn Foster Career School (Online)Mason is the founder of Families With Purpose and the heart behind its simple, family-focused recipes. Based in Greenville, South Carolina, he creates meals that fit into busy routines and bring people back to the table. He focuses on easy dinners, one-pot meals, budget-friendly cooking, and practical weekly meal planning. Mason has built a recipe collection shaped by real family life, with clear methods and repeatable meals that work on everyday schedules.