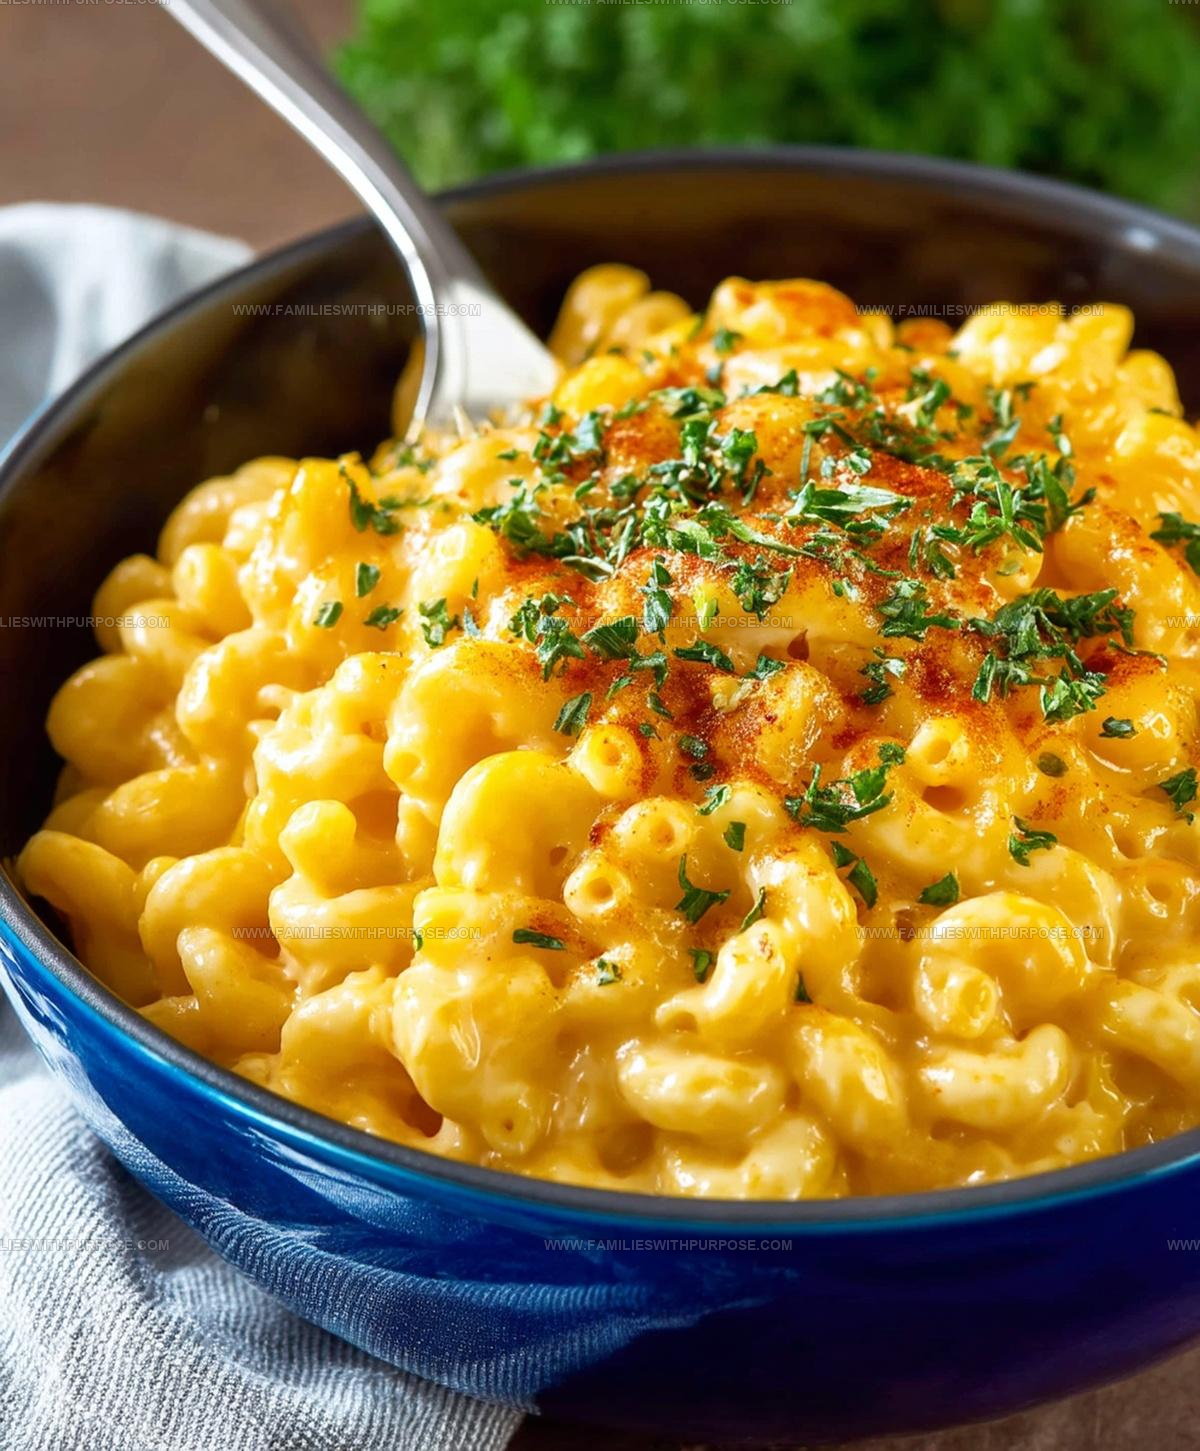
Classic Stovetop Macaroni and Cheese Recipe for Creamy Comfort
Stovetop macaroni and cheese gives all the comfort of homemade pasta in a fraction of the time that baked versions require.
Nothing quite matches that creamy, satisfying feeling when you need something warm and filling on a busy weeknight.
What makes it so appealing is how simple it is to pull together without sacrificing any of that rich, gooey goodness everyone craves.
Perfect for casual dinners or last-minute meals, it delivers maximum comfort with minimal fuss.
Whether serving a crowd or just looking for leftovers, it scales beautifully to fit any occasion.
Everyone from picky eaters to adventurous food fans seems to love it equally.
Scroll down to see exactly how to make it happen in one pot.
Practical Reasons to Cook Stovetop Mac and Cheese
What Goes Into Stovetop Macaroni and Cheese
Pasta Base:Dairy Essentials:Seasoning and Optional Topping:Which Tools Melt Stovetop Mac and Cheese
Stovetop Cooking Guide for Macaroni and Cheese

Boil the Pasta
Fill a large pot with salted water and bring to a rolling boil at 212°F. Drop in 1 pound of elbow macaroni and cook for 6-7 minutes, stirring occasionally. The goal is to keep the pasta slightly firmer than the package suggests.
Drain and Rest Pasta
Pour the macaroni into a colander, letting it drain completely. Set aside without rinsing.
Create Butter Base
Melt 4 tablespoons of unsalted butter in the same pot over medium heat at 350°F.
Build the Roux
Sprinkle 1/4 cup all-purpose flour into the melted butter. Whisk constantly for 1-2 minutes until the mixture turns light golden and becomes smooth.
Pour in Milk
Gradually stream 3 cups of whole milk into the pot, whisking continuously to prevent any lumps from forming.
Thicken the Sauce
Cook the milk mixture for 5-7 minutes, whisking occasionally. The sauce should thicken enough to coat the back of a spoon.
Season the Sauce
Remove the pot from heat. Stir in these seasonings:
Melt the Cheese
Add these cheeses to the sauce:
Stir until the cheese melts completely and creates a smooth sauce.
Combine Pasta and Cheese
Fold the drained macaroni into the cheese sauce, ensuring every noodle gets coated.
Optional Crispy Topping
If you’re feeling fancy, melt 2 tablespoons of butter in a small skillet at 350°F. Toss in 1/4 cup breadcrumbs and toast until golden brown.
Final Touch
Sprinkle the toasted breadcrumbs over the mac and cheese. For extra crispiness, broil at 500°F for 1-2 minutes, watching carefully to prevent burning.
Serve and Enjoy
Let the dish cool for a few minutes before serving to let the sauce set and prevent burning your tongue.
Easy Tips for Stovetop Macaroni and Cheese
Creamy Stovetop Macaroni and Cheese Variations to Try
Classic Serving Suggestions for Stovetop Mac and Cheese
How to Store Stovetop Macaroni and Cheese Creamy
Stovetop Macaroni and Cheese Questions Answered
Can I use different cheeses?
Absolutely! Experiment with your favorite cheeses like sharp cheddar, gouda, or fontina. Just ensure they melt well and complement each other.
How can I make this dish more nutritious?
Sneak in some pureed cauliflower or butternut squash into the cheese sauce. You’ll add nutrients without changing the creamy texture.
What if my sauce is lumpy?
Whisk vigorously when adding milk, and use a fine-mesh strainer if needed. Smooth sauce depends on constant whisking and gradual liquid addition.
Can I make this gluten-free?
Replace regular flour with cornstarch or gluten-free flour blend. The technique remains the same, and your sauce will still be deliciously creamy.
How do I prevent the cheese from becoming grainy?
Remove the pot from heat before adding cheese, and stir gently until melted. Overheating can cause separation and a gritty texture.
Is this recipe good for meal prep?
Prepare the mac and cheese, cool completely, and store in refrigerator for 3-4 days. Reheat gently with a splash of milk to restore creaminess.

Ultra-Creamy Stovetop Macaroni Cheese Recipe
- Total Time: 20-25 minutes
- Yield: 8 1x
Description
Quick mac and cheese brings pure comfort straight from your kitchen. Creamy, cheesy goodness melts together faster than grabbing takeout, making dinner deliciously simple.
Ingredients
Main Ingredients:
- 1 pound elbow macaroni
- 1 pound sharp cheddar cheese
- 8 ounces Gruyere cheese
- 4 ounces Monterey Jack cheese
Supporting Base Ingredients:
- 3 cups whole milk
- 6 tablespoons unsalted butter
- ¼ cup all-purpose flour
Seasoning Ingredients:
- 1 teaspoon salt
- ½ teaspoon black pepper
- ¼ teaspoon ground nutmeg
- ½ teaspoon garlic powder
- ¼ teaspoon onion powder
Optional Topping Ingredients:
- ¼ cup breadcrumbs
- 1 tablespoon melted butter
Instructions
- Salt a large pot of water and bring to a boil at 212°F. Add 1 pound elbow macaroni and cook for 6-7 minutes, stirring occasionally to prevent sticking.
- Drain pasta in a colander without rinsing. Set aside while preparing your creamy cheese sauce.
- Melt 4 tablespoons butter in the same pot over medium heat until it becomes foamy and golden.
- Sprinkle ¼ cup flour into the melted butter, whisking continuously for 1-2 minutes to create a smooth roux.
- Gradually pour 3 cups whole milk into the roux, whisking constantly to prevent lumps from forming.
- Simmer the mixture at medium-low heat for 5-7 minutes, stirring occasionally until the sauce thickens and coats the back of your spoon.
- Remove the pot from heat and stir in 1 teaspoon salt, ½ teaspoon black pepper, ¼ teaspoon nutmeg, ½ teaspoon garlic powder, and ¼ teaspoon onion powder.
- Add 4 cups shredded cheddar, 2 cups Gruyere, and 1 cup Monterey Jack cheese, stirring until completely melted and smooth.
- Fold the drained macaroni into the cheese sauce, ensuring every noodle gets perfectly coated.
- If your sauce seems too thick, splash in a bit more milk. If too thin, return to low heat and stir until it reaches your desired consistency.
- Optional: Melt 2 tablespoons butter in a skillet and toast ¼ cup breadcrumbs until golden and crisp.
- Sprinkle toasted breadcrumbs over the mac and cheese for an extra crunchy texture.
- For a golden finish, place the mac and cheese under the broiler at 500°F for 1-2 minutes, watching carefully to prevent burning.
- Let the dish rest for 3-4 minutes before serving to allow the sauce to set slightly.
Notes
- Cheese selection matters tremendously, so grate your own cheese blocks for the smoothest, most flavorful sauce and avoid pre-shredded cheese with anti-caking agents.
- For a creamier texture, let the white sauce (roux) develop slowly and whisk consistently to prevent scorching or lumps.
- Experiment with cheese combinations like sharp cheddar, smoked gouda, or fontina to create unique flavor profiles that match your preferences.
- If preparing for gluten-sensitive guests, substitute all-purpose flour with cornstarch or gluten-free flour blend, and use gluten-free pasta for a completely adaptable version.
- Prep Time: 5 minutes
- Cook Time: 15-20 minutes
- Category: Boiled
- Method: Boiling
- Cuisine: American
Nutrition
- Serving Size: 8
- Calories: 625 kcal
- Sugar: 4 g
- Sodium: 600 mg
- Fat: 38 g
- Saturated Fat: 23 g
- Unsaturated Fat: 13 g
- Trans Fat: 0.5 g
- Carbohydrates: 44 g
- Fiber: 2 g
- Protein: 31 g
- Cholesterol: 110 mg
Sophie Lane
Recipe Developer
Expertise
Family-friendly Meals, Simple Healthy Cooking, Ingredient Substitutions, Beginner-friendly Recipes, Flexible Meal Prep
Education
- Program: Professional Cook Certificate
- Focus: Online culinary training covering knife skills, cooking techniques, and plant-based and modern cooking approaches.
Schoolcraft CollegeSophie brings a calm and flexible approach to Families With Purpose. Based in Fort Collins, Colorado, she creates recipes that feel simple, clear, and easy to make at home. She focuses on family-friendly meals, healthy everyday cooking, ingredient swaps, and beginner-friendly ideas. Sophie helps make each recipe approachable and easy to follow, especially for busy families who need meals that can bend with the day.